Understanding the selector is essential for stable operation of UiPath robots.
However, the selector is a difficult concept to understand because it is UiPath’s own way of specifying UI elements.
This article explains what a selector is, how to modify it, and how to specify it using variables, relative specification, anchors, and find elements.
\Save during the sale period!/
Take a look at the UiPath course on the online learning service Udemy
*Free video available
Related Articles Learn the Creation Techniques f UiPath robotics creation with Udemy’s online courses that take it up a notch
This site was created by translating a blog created in Japanese into English using the DeepL translation.
Please forgive me if some of the English text is a little strange
What is a selector?
A selector is like a textual address for UiPath to recognize UI elements such as buttons and strings in your application.
By uniquely specifying the selector and specifying the UI element to be manipulated, operations such as clicking and text input can be stabilized and made to work.

How to check the selector
There are three ways to check the selector: the property selector, the selector editor, and the UI Explorer.
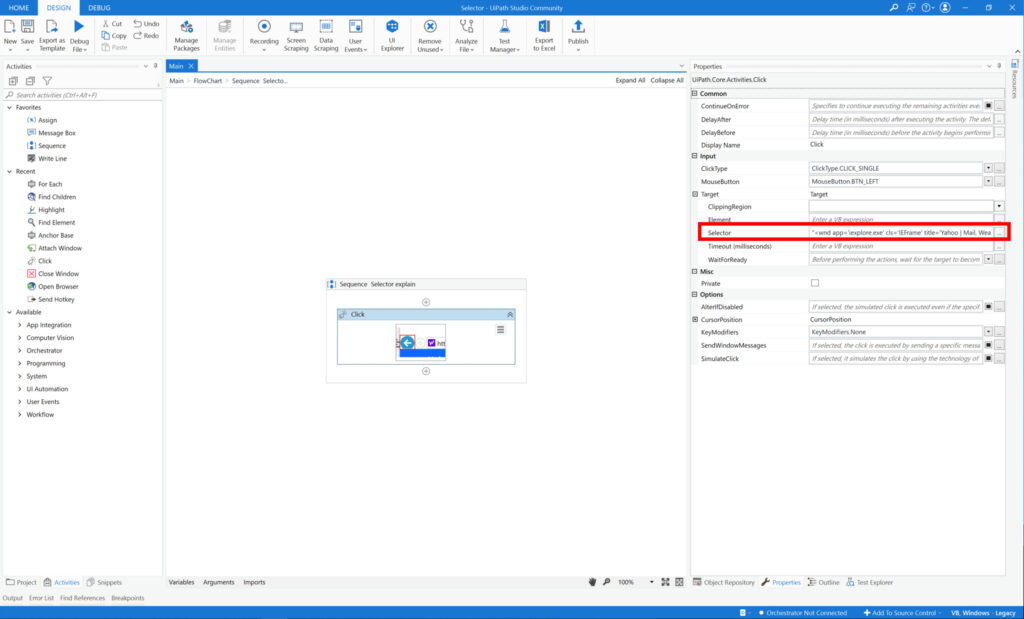
Check with the property selector.
You can see the selector in the properties of the activity where you need to specify the UI elements such as clicking or typing.

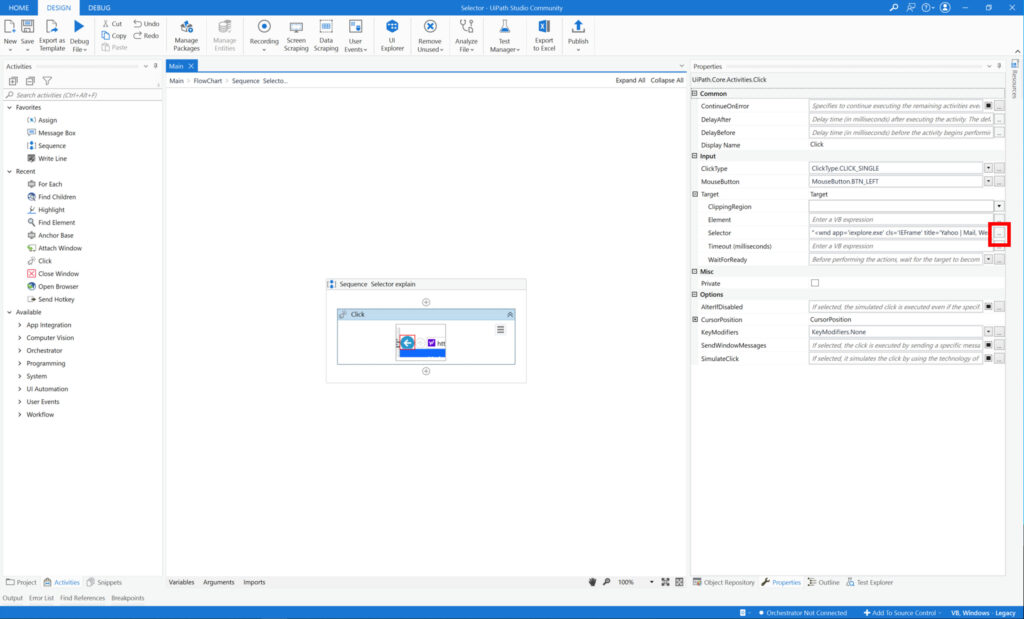
Check in the Selector Editor.
If you want to check the selector structurally, use the Selector Editor.
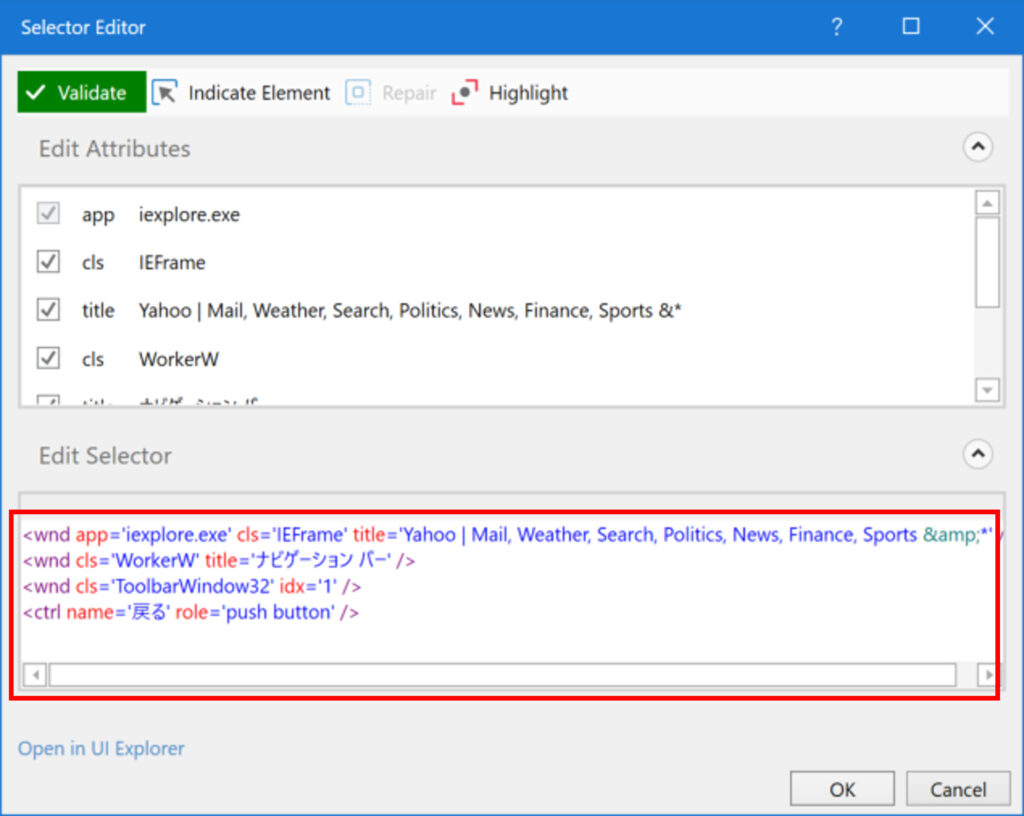
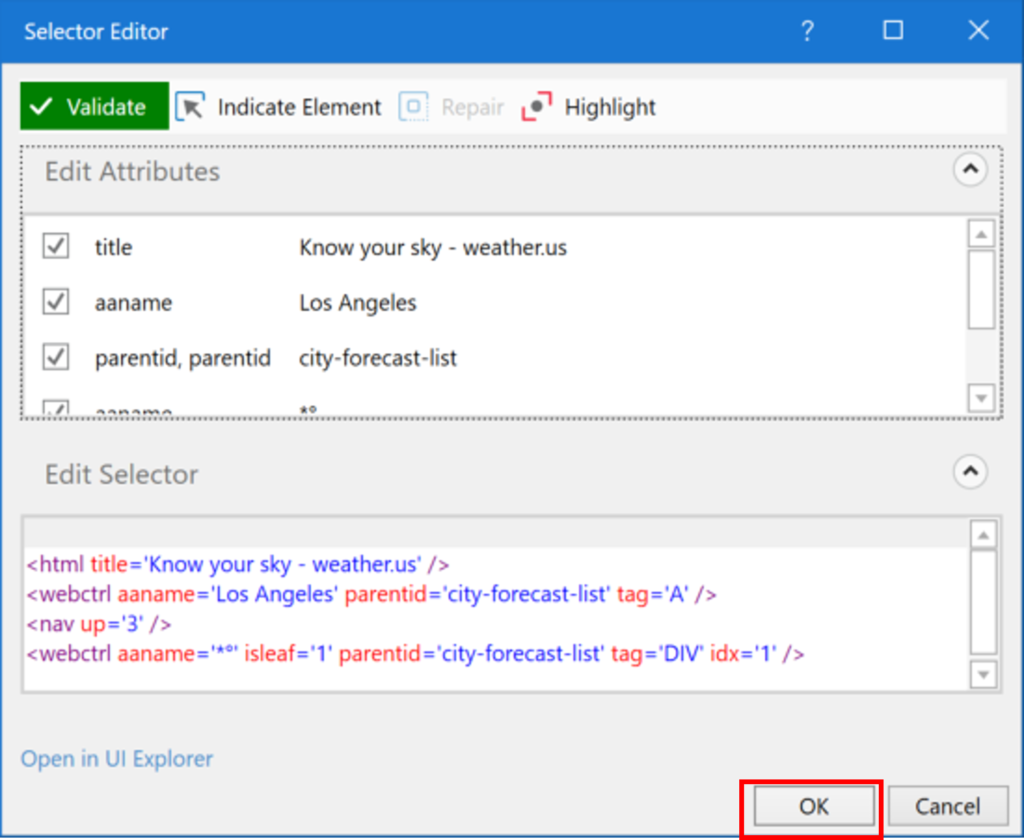
(1) Click […] next to the Activity Properties selector.
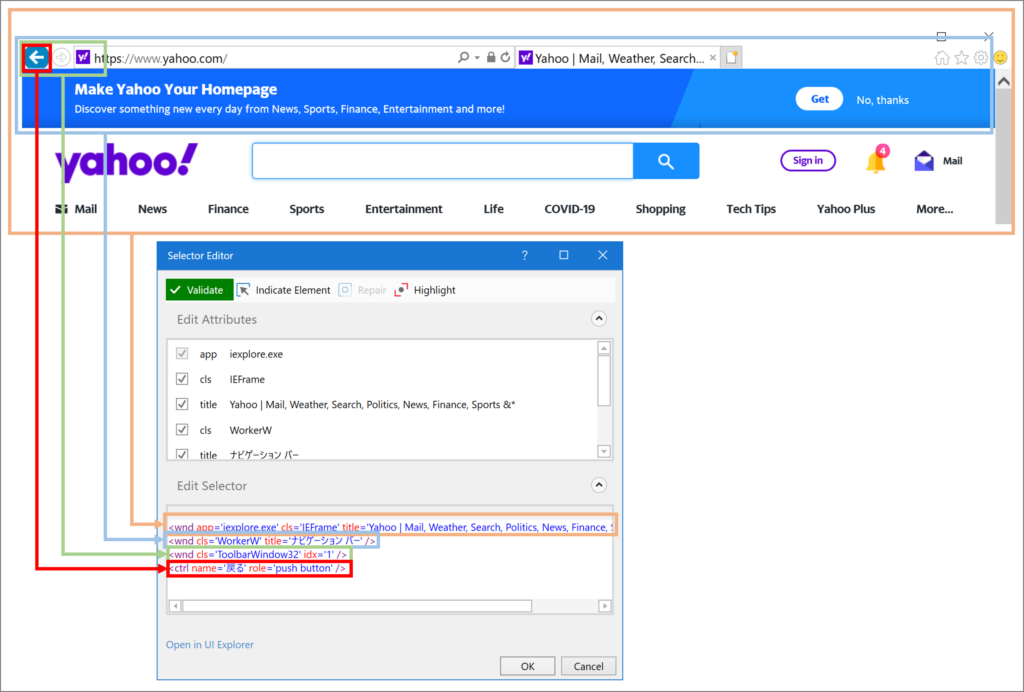
(2) The Selector Editor will open, and check the red box in the figure below.
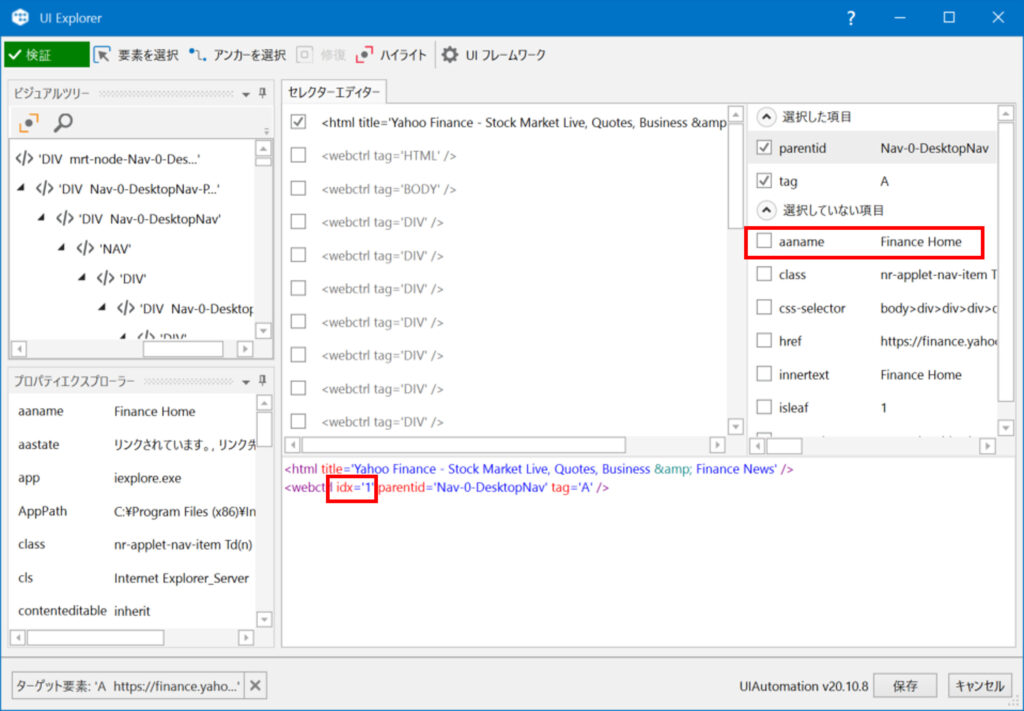
Check with UI Explorer.
If you want to see all the selectors, use the UI Explorer.
There are two ways to open the UI Explorer: from the Selector Editor, or from the Studio ribbon.
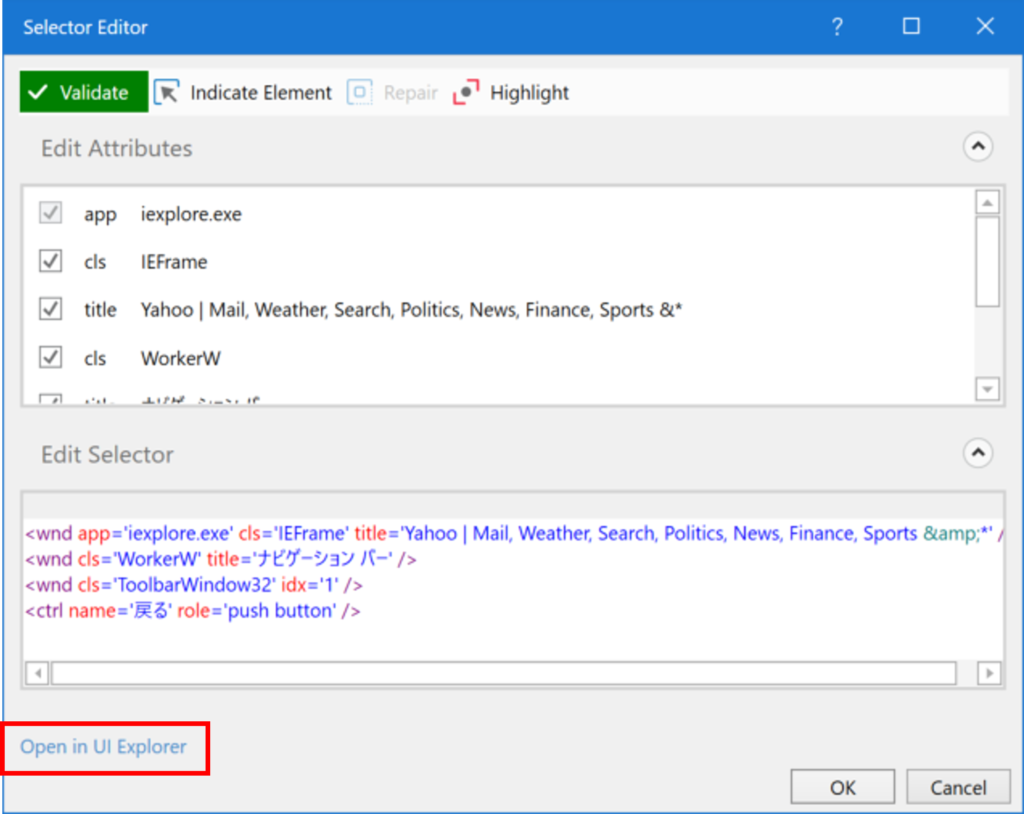
■How to open from the Selector Editor
(1) Click [Open in UI Explorer] in the Selector Editor.
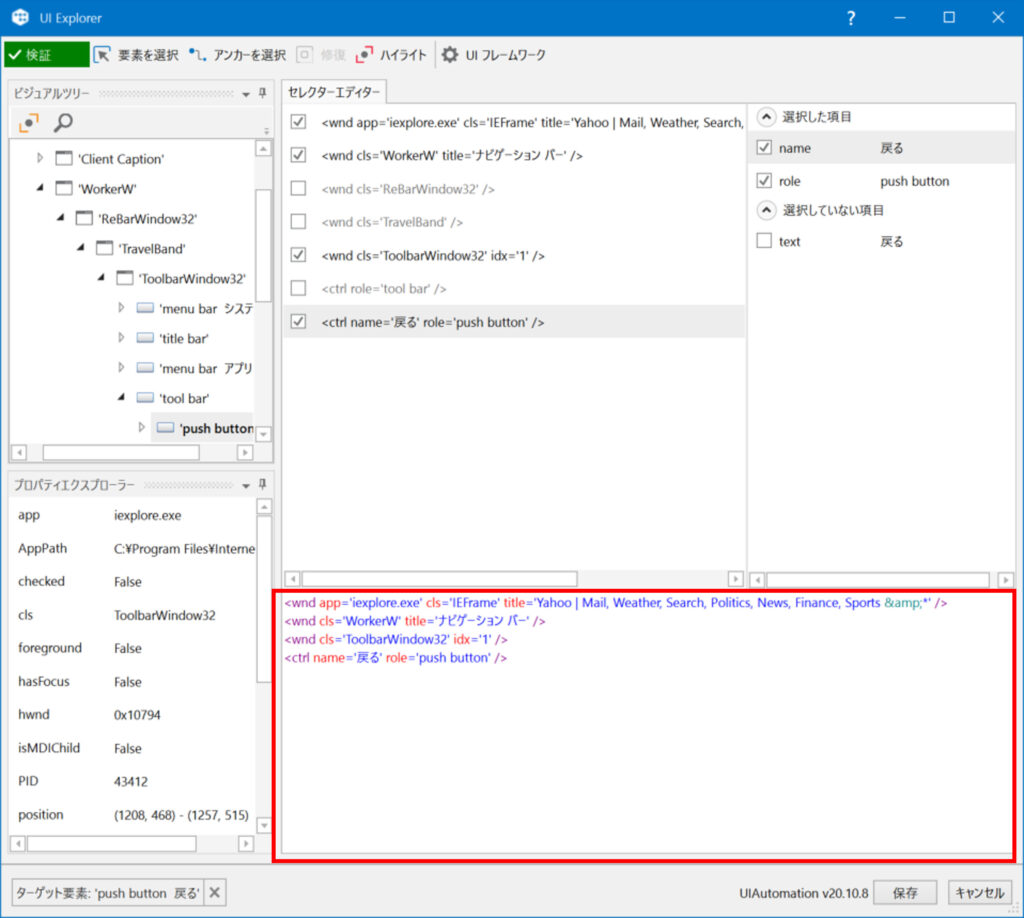
(2) UI Explorer will open, and check the selector in the red frame on the bottom right.
■How to open from the Studio ribbon
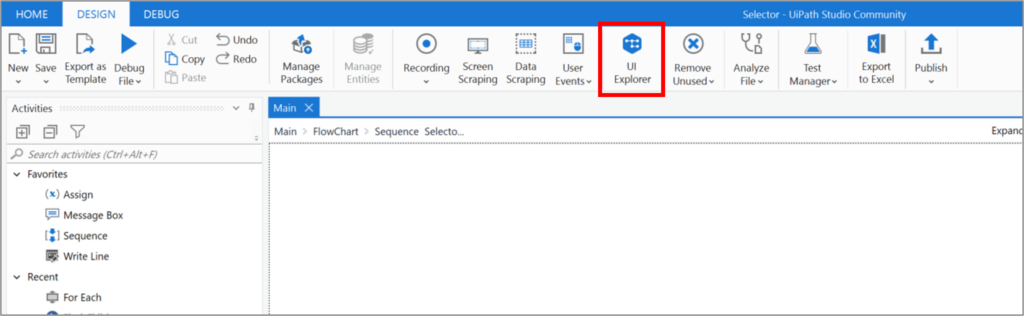
(1) Click [UI Explorer] in the Studio ribbon.
(2) Click [Select Element].
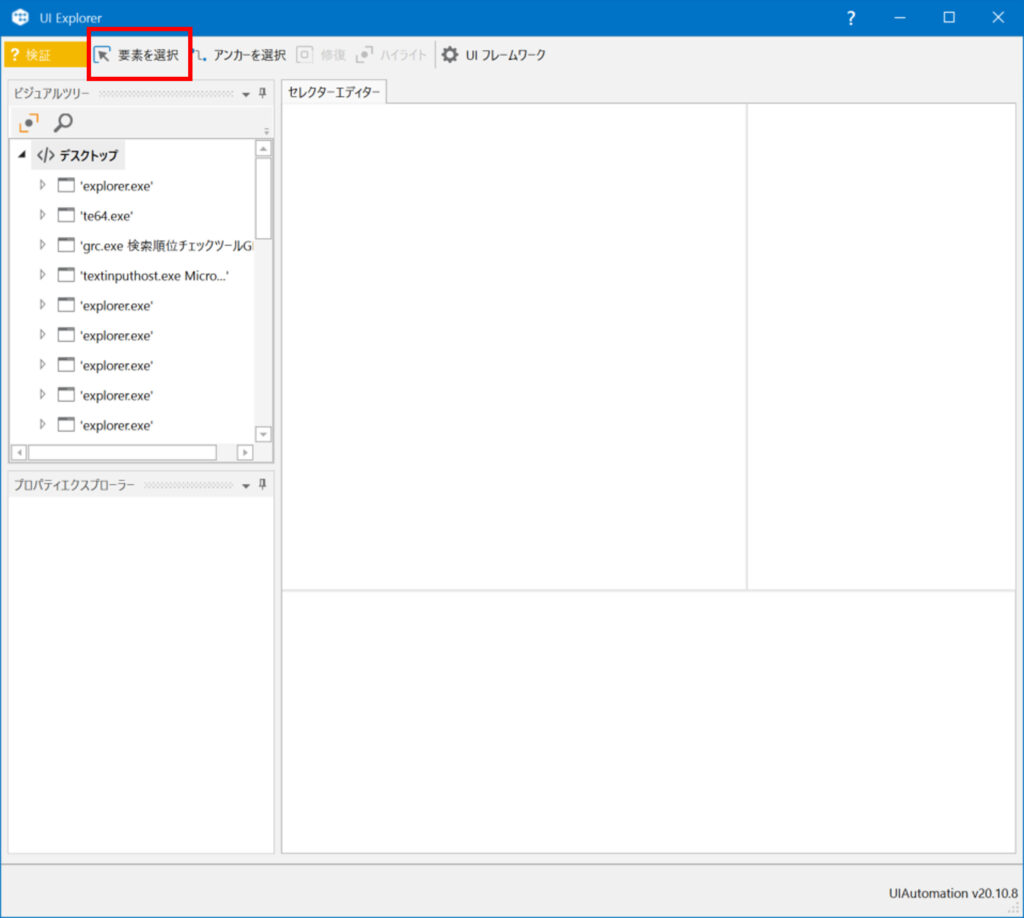
(3) Click on the element for which you want to get the selector.

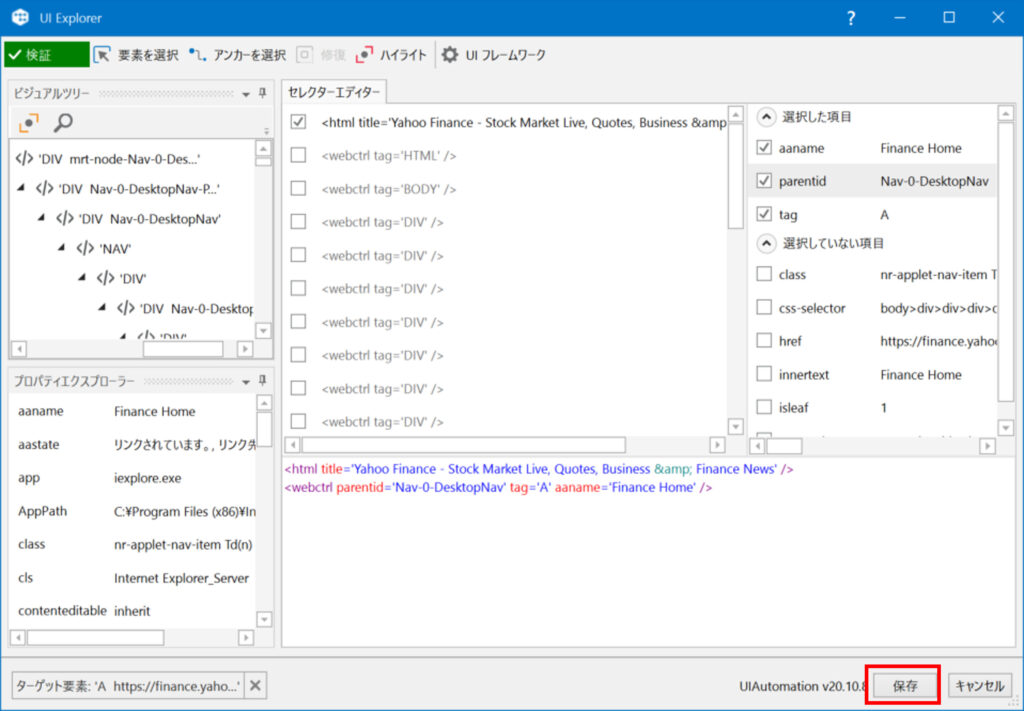
(4) Check the selector in the red box at the bottom right of the UI Explorer.

Structure of the selector
Selectors are structured in a hierarchy.
The selector has the following hierarchical structure
- The top window of the application
- Parent element 1
- Parent element 2
- …
- UI elements
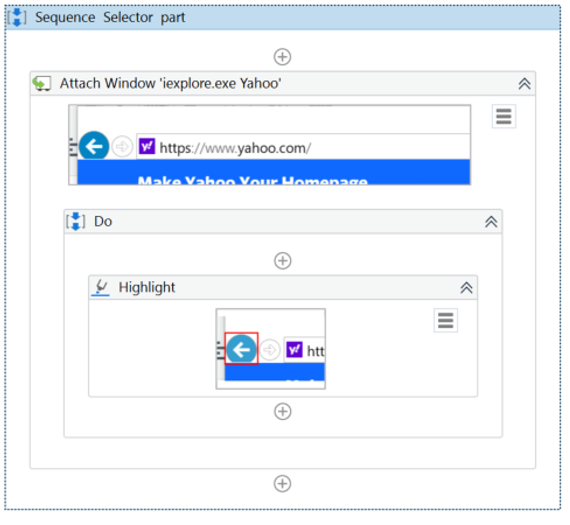
IE’s back button is shown in the figure below
- IE (the top window of the application)
- Navigation bar (element 1 of the parent)
- The first one in the toolbar (parent element 2)
- Back button (UI element)
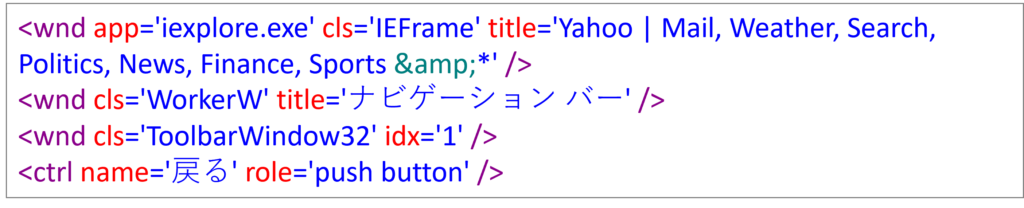
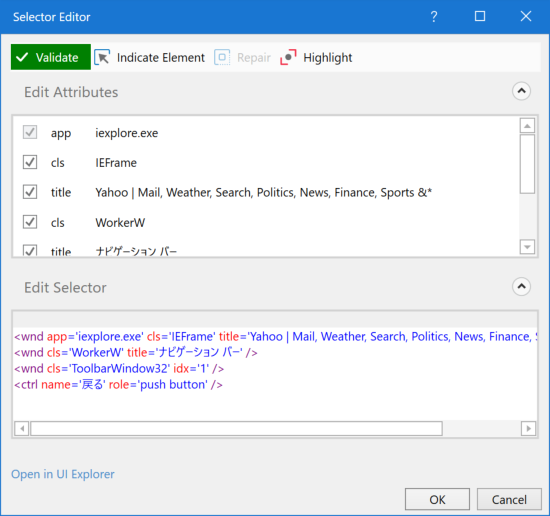
The back button is represented by the following selectors
Selectors are represented by attributes and values.
Selectors are displayed with attributes in red and values in blue.
Take the first line of the figure below as an example.
- The attribute is [app]、[cls]、[title]
- The value is [iexplore.exe]、[IEFrame]、[‘Yahoo | Mail, Weather, Search, Politics, News, Finance, Sports &*’ ]
There are two ways to select: full selector and partial selector.
There are two ways to specify the selector.
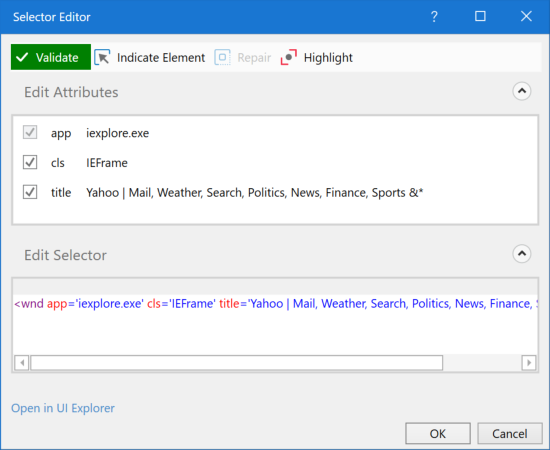
- Full selector
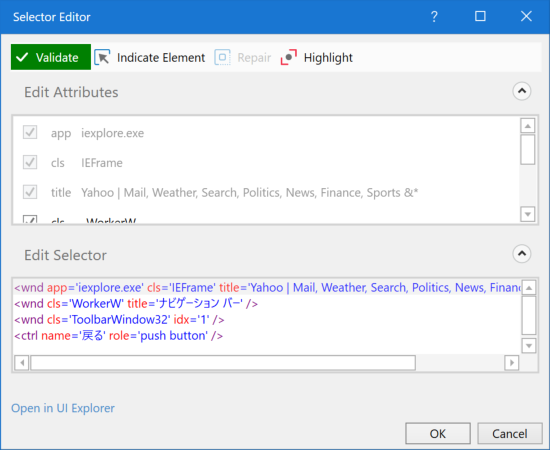
This is a selector that has all the elements necessary to identify a UI element, including the top-level window (application). - Partial selector
This is a selector that does not include the top level window (application), but is specified within a container such as a window attach.
Sample of a Full selector
・Sample Process
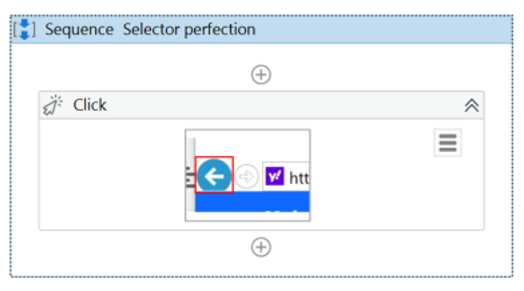
・Click selector
Sample partial selector
・Sample Process
・Attach Window Selector
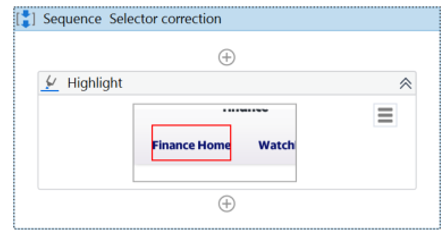
・Highlight Selector
Fix selector.
Use the index ( idx ) attribute as little as possible.
The index ( idx ) attribute of the selector is automatically generated when the selected element has no unique information (multiple elements have the same selector).
Therefore, since idx is susceptible to changes in UI elements, it is better to avoid using it as much as possible to create a stable working robot.
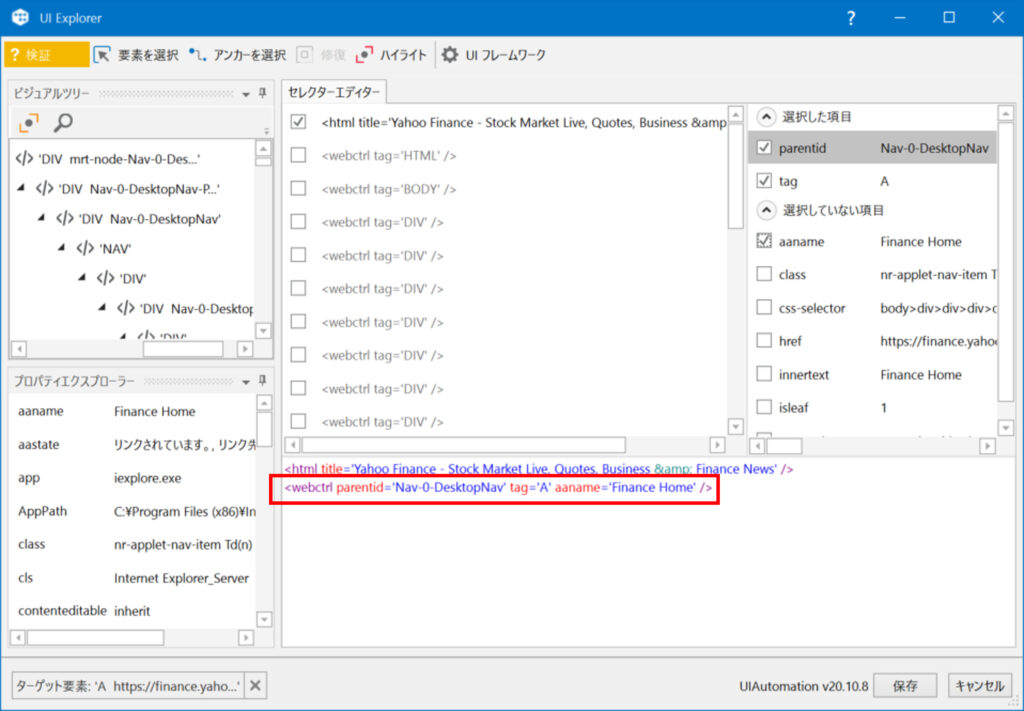
Here are the steps to modify the selector of idx to another selector.
Sample Process
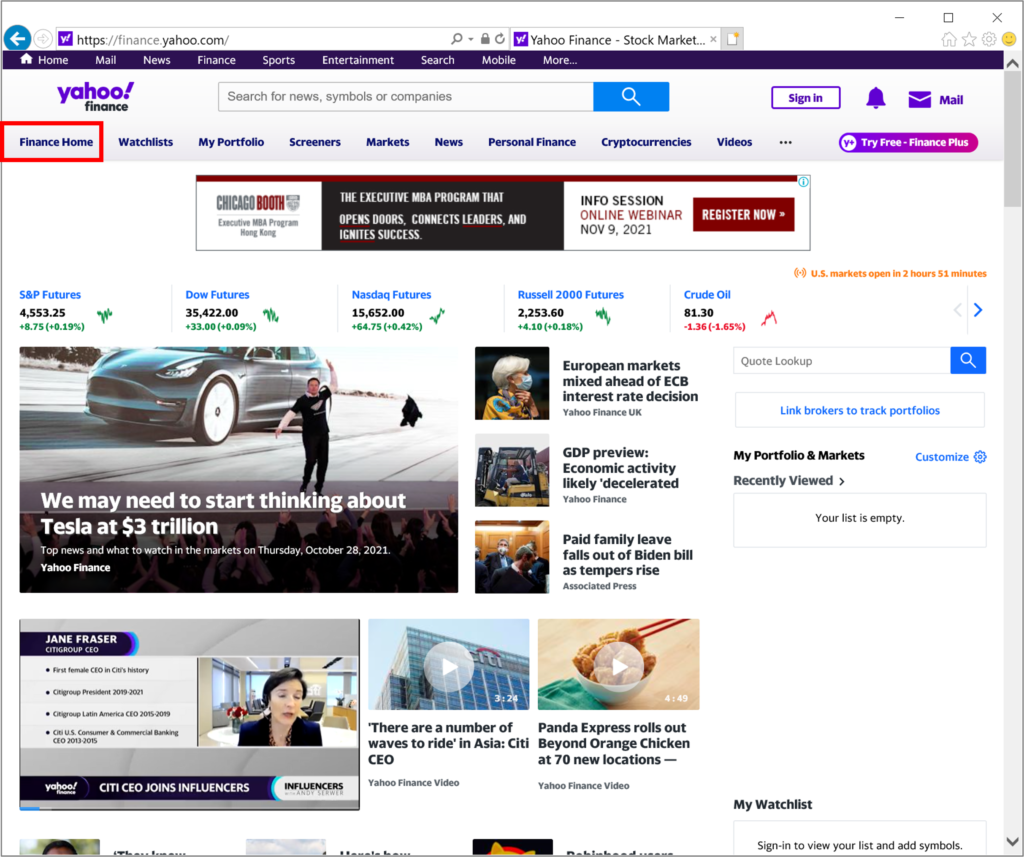
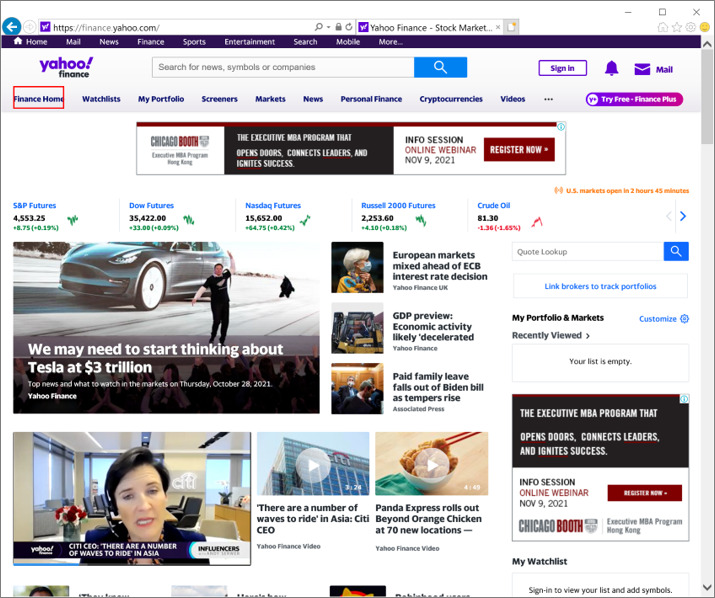
Highlight “Finance Home” in Yahoo Finance.
・Target screen
・Initial selector for highlighting
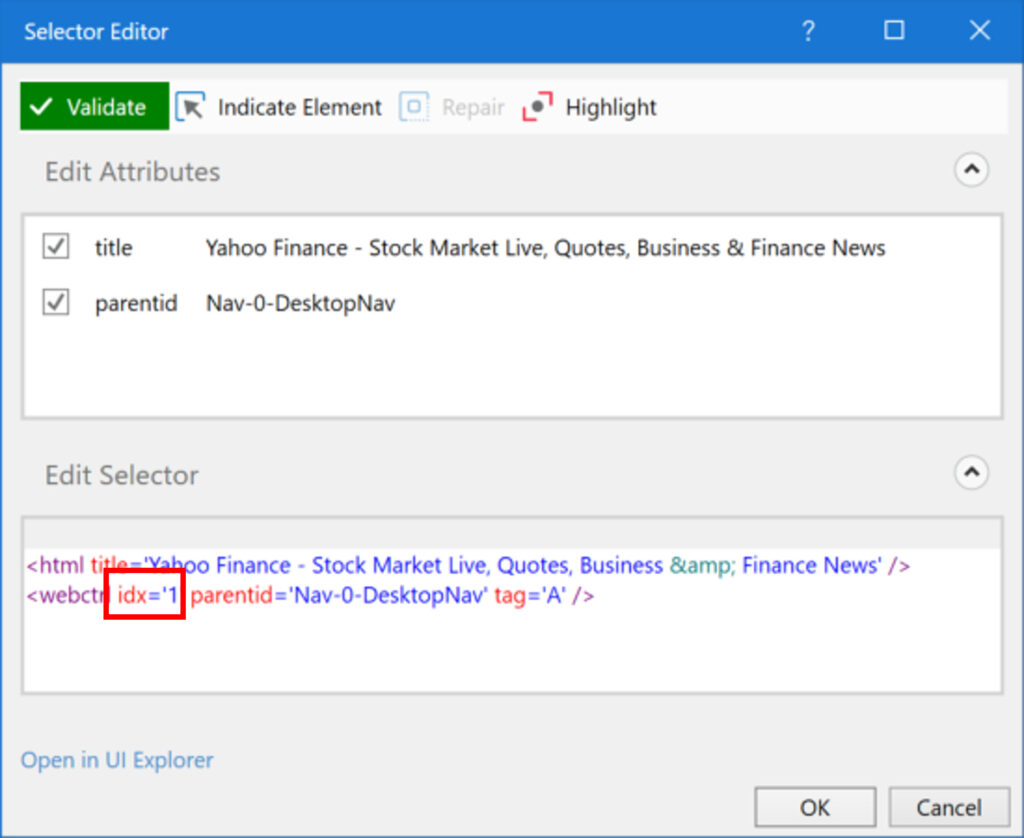
・UI Explorer before modification
・Fixed UI Explorer
・Modified UI Explorer2
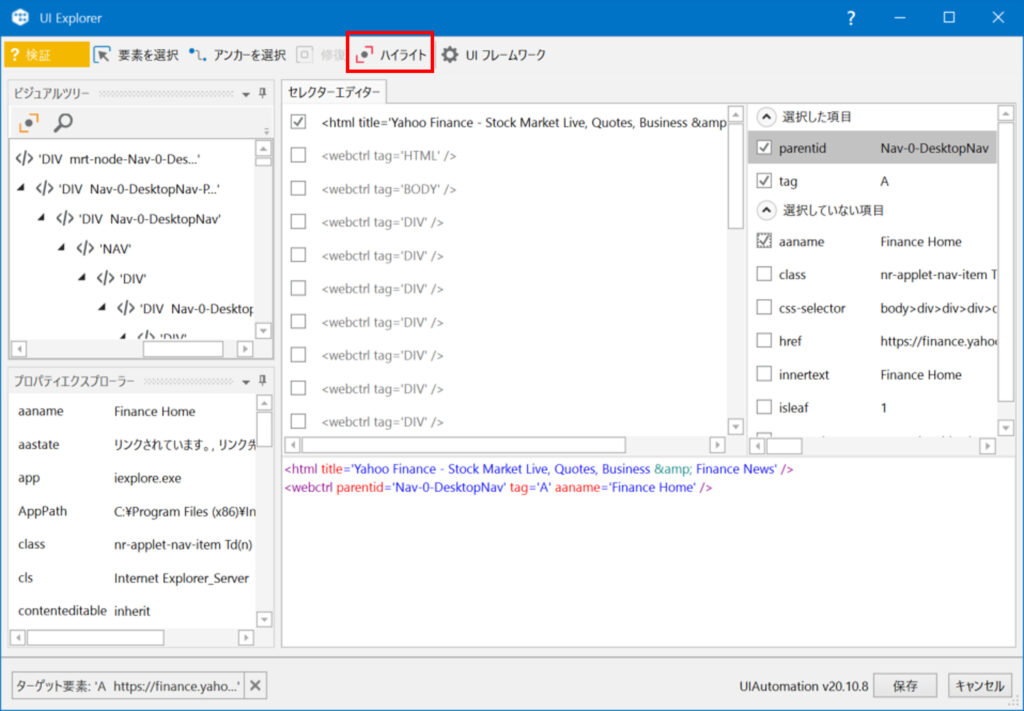
・Browser when highlight-clicking
・The modified UI Explorer3
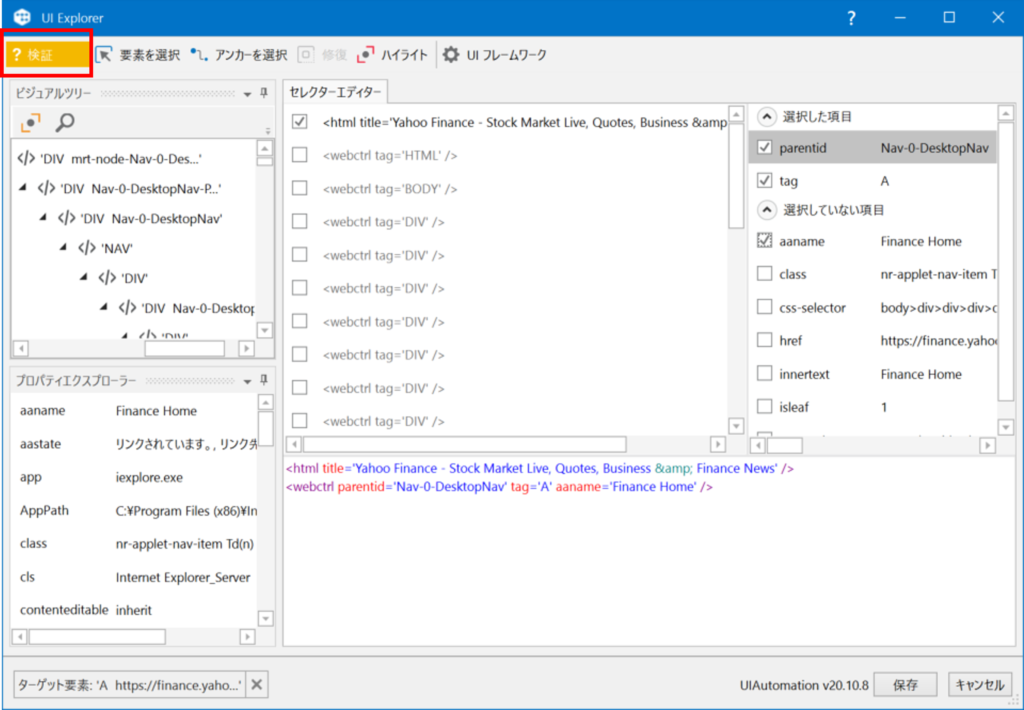
・Modified UI Explorer4
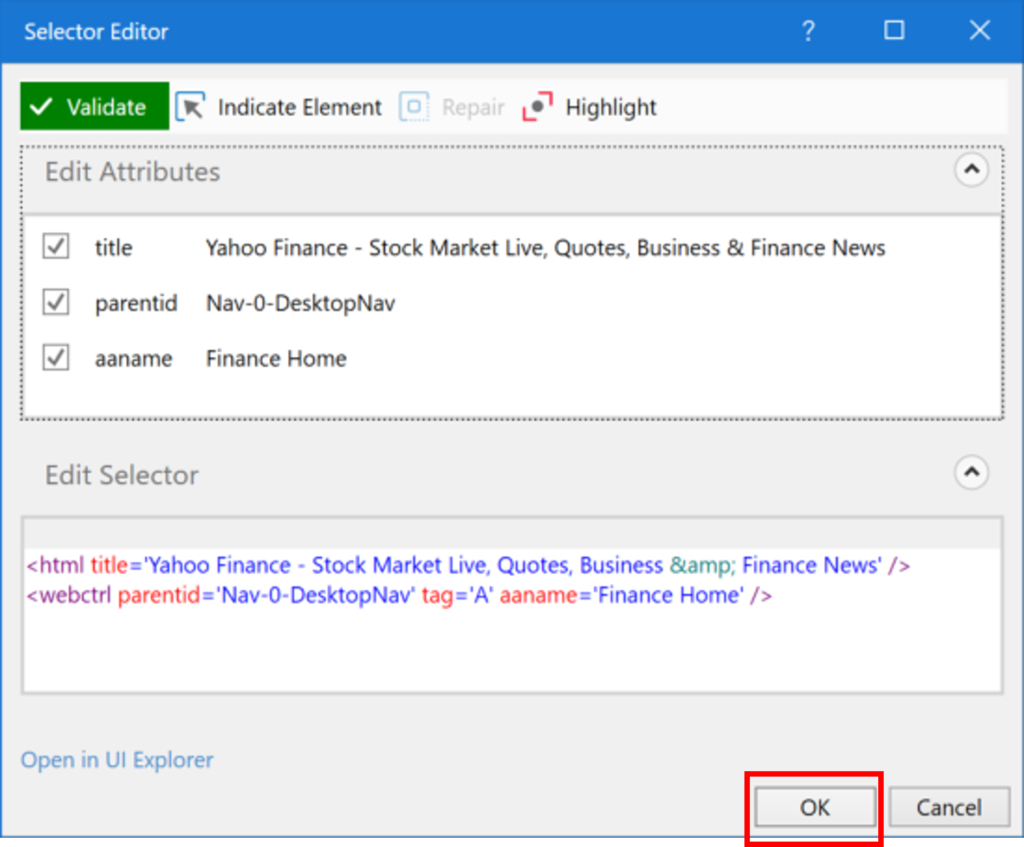
・Selector Editor
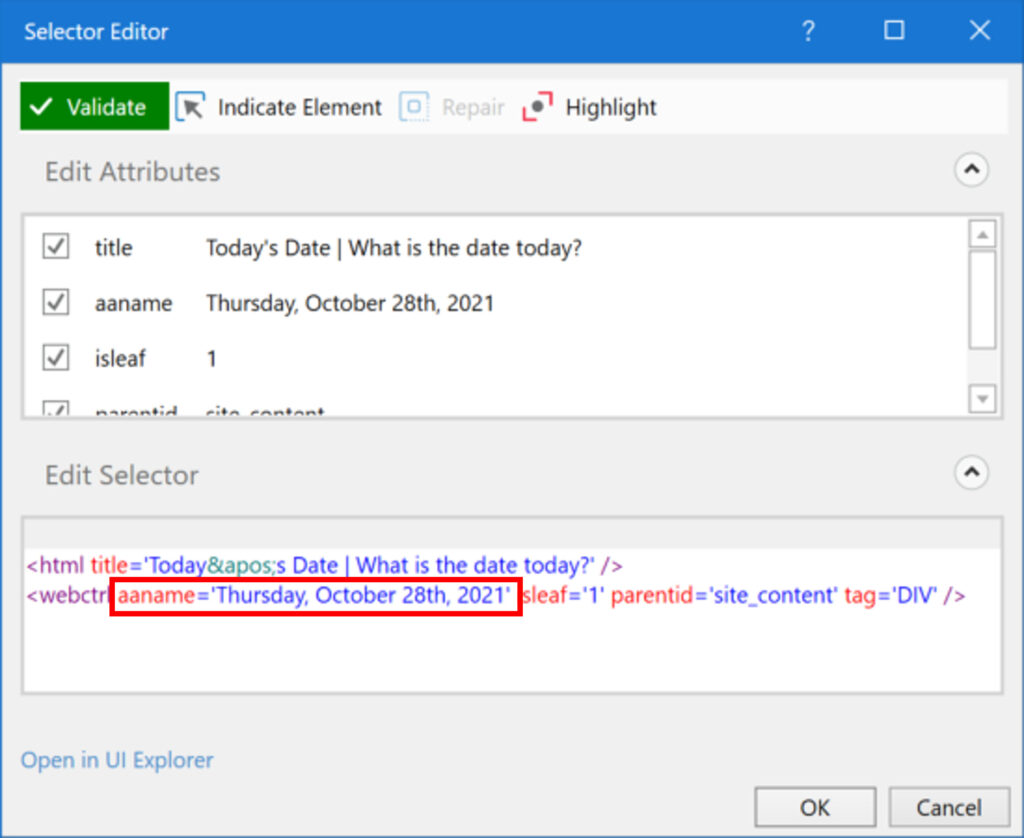
Use wildcards
If the value of the selector is variable, such as a file name or a date, use wildcards.
There are two types of wildcards
- *
Represents multiple characters. - ?
Represents a single character.
Sample Process
todaysdateサイトの現在日付をハイライトする。
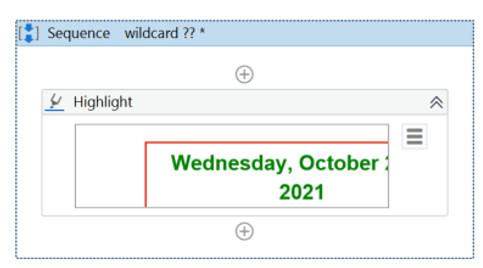
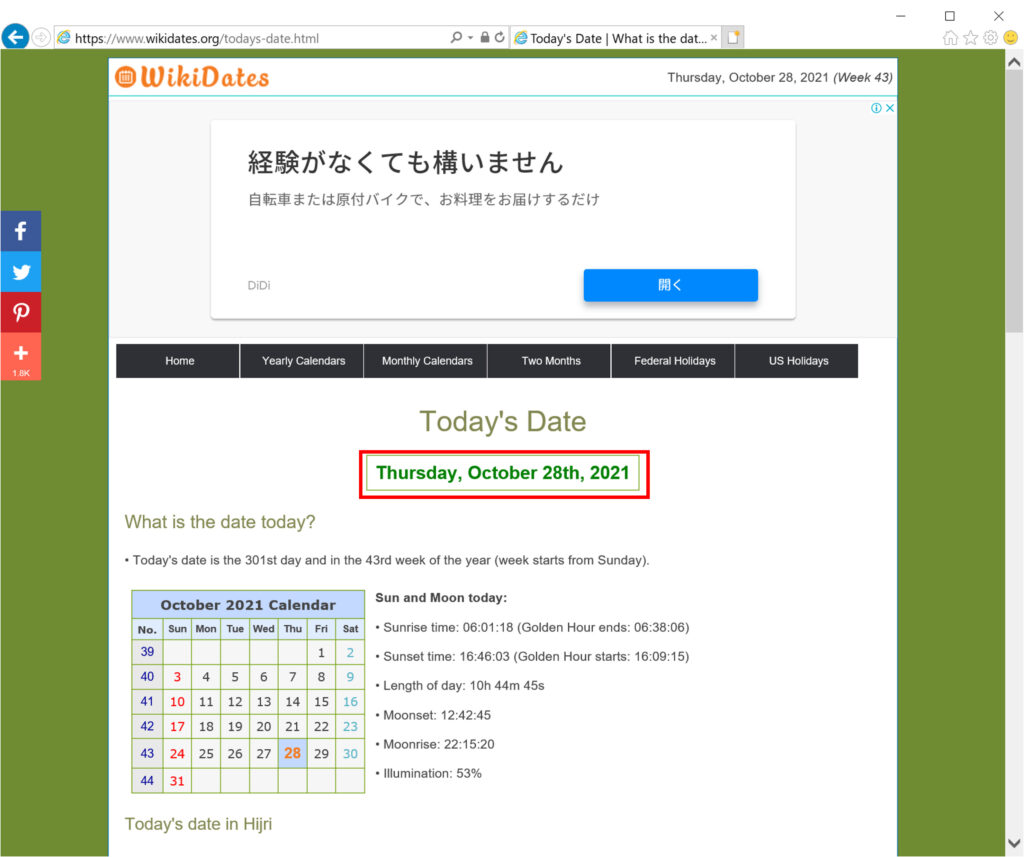
・Target UI element
・Selector before highlight modification
・Selector with modified highlighting 1
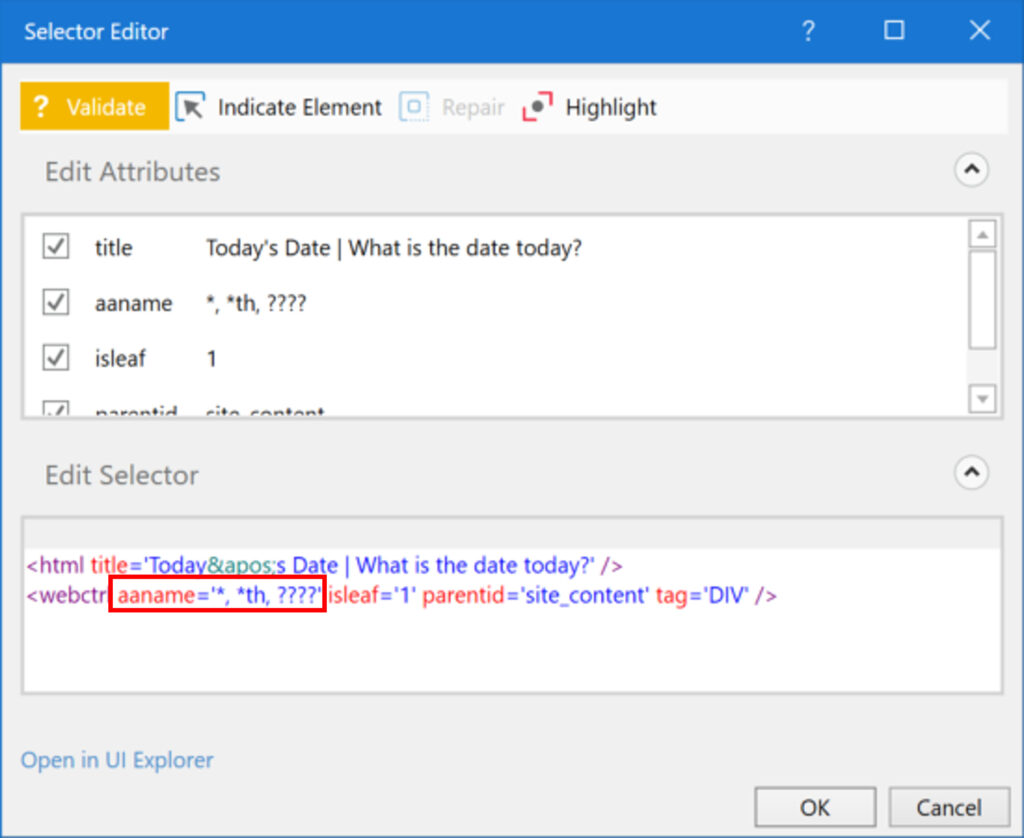
・Selector with modified highlighting 2
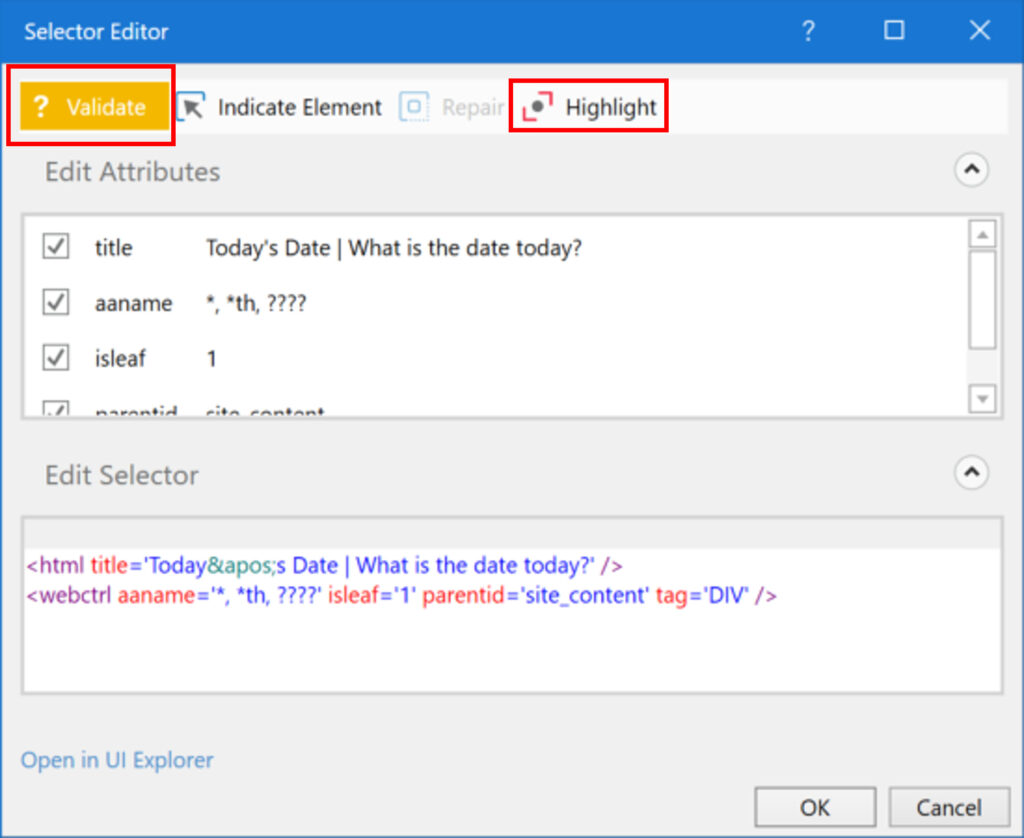
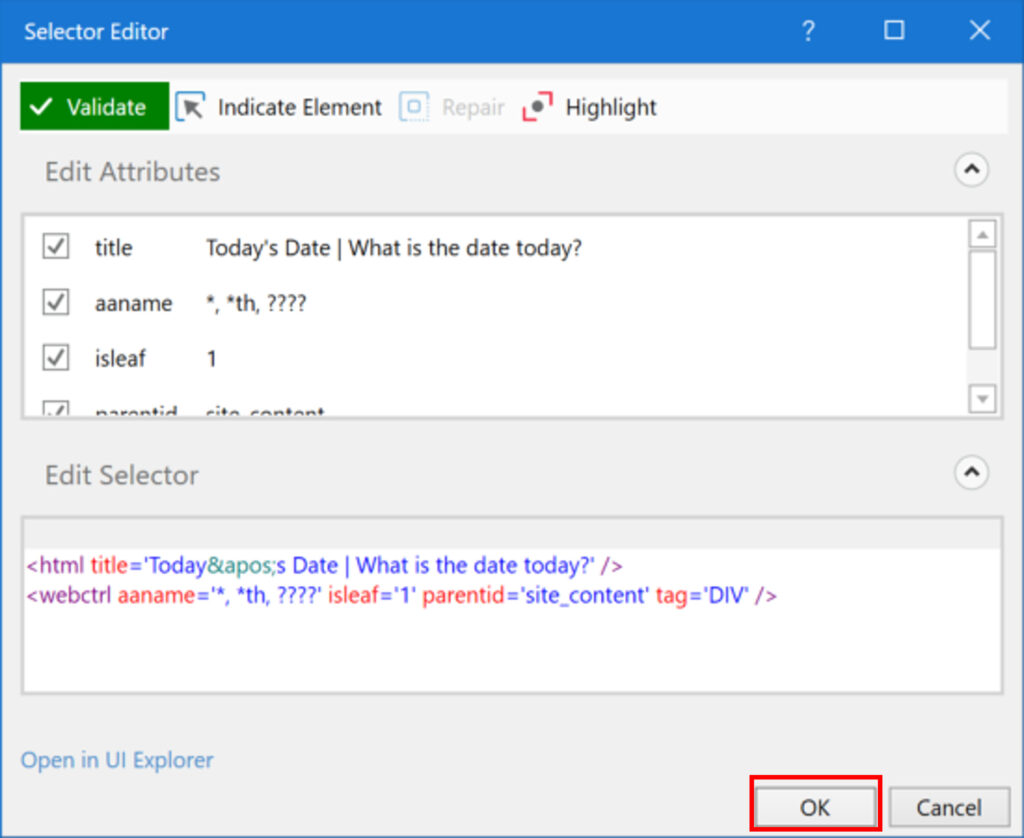
・Selector with modified highlighting 3
Use variables
If the value in the selector changes regularly, replace the fixed value in the selector with a variable.
The fix is to edit the selector item of the target activity’s properties as text.
Sample Process
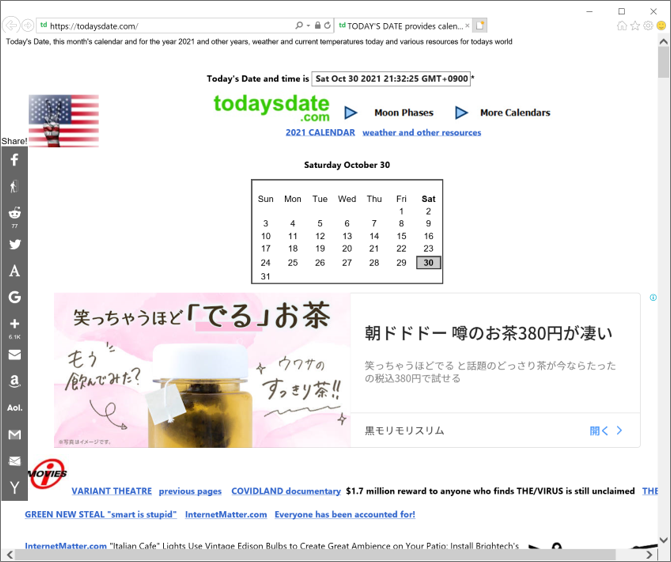
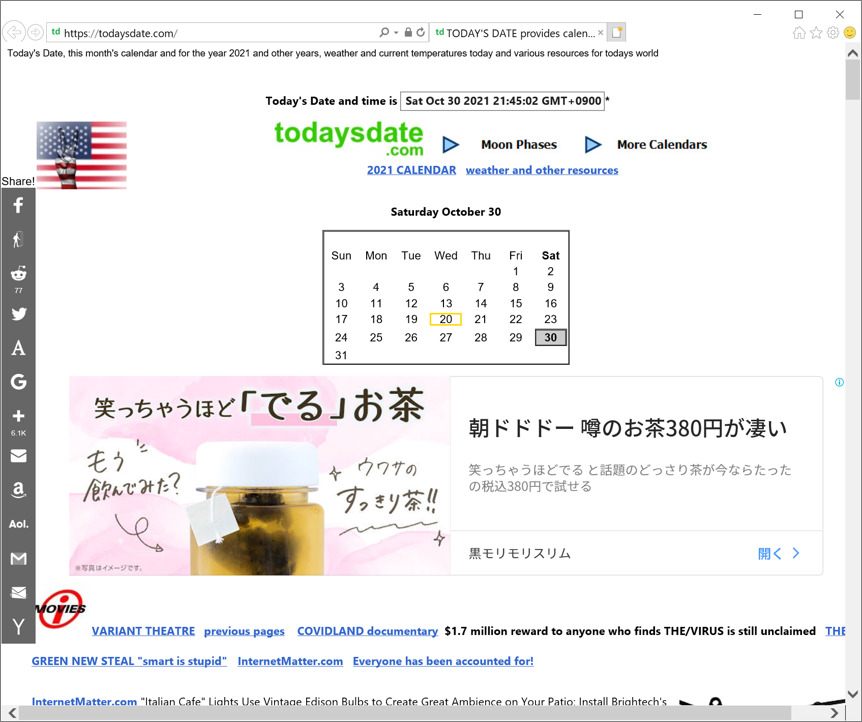
Highlight the location of the specified calendar in todaysdate.
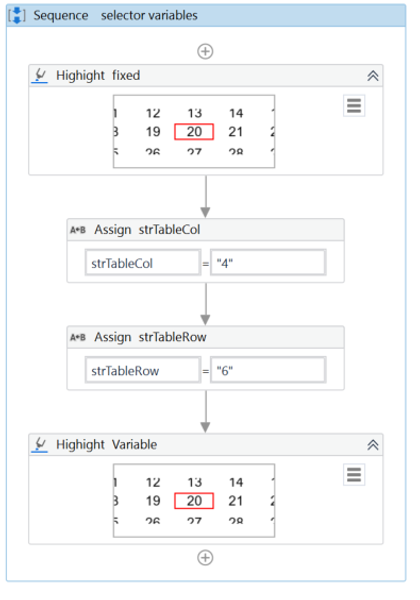
・Screenshot of the target site
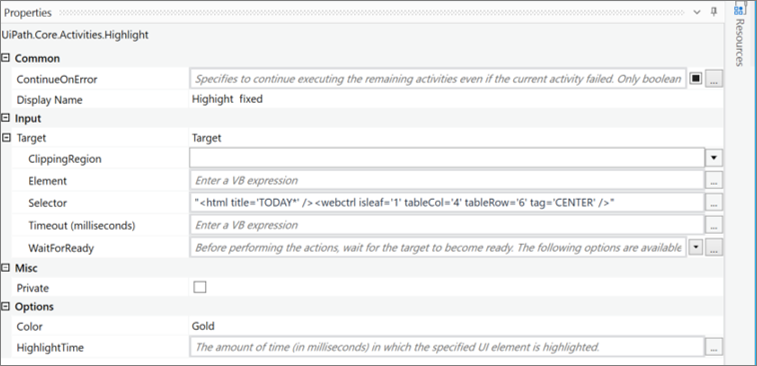
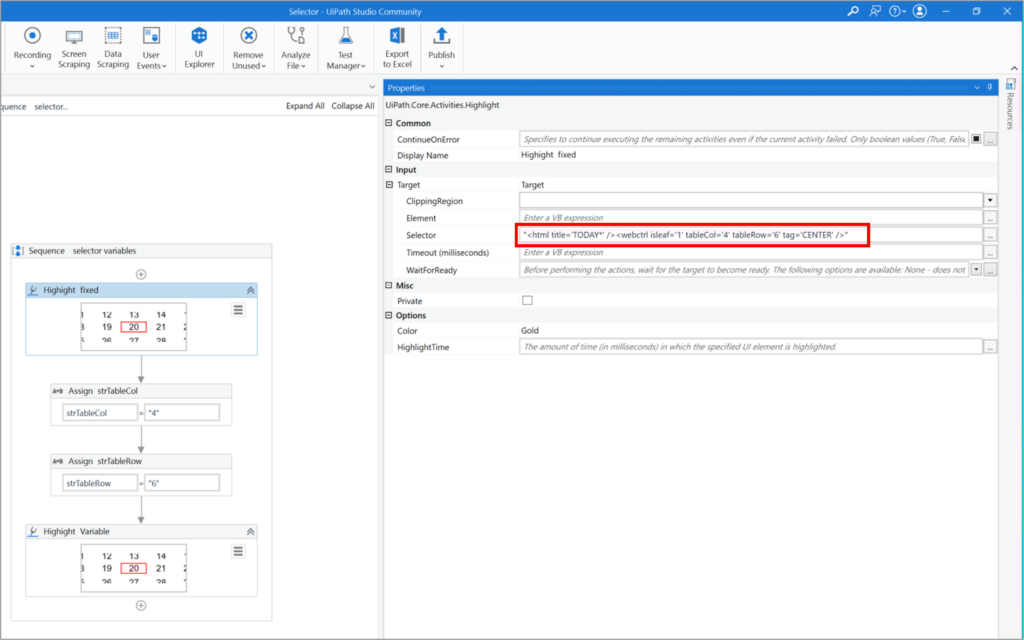
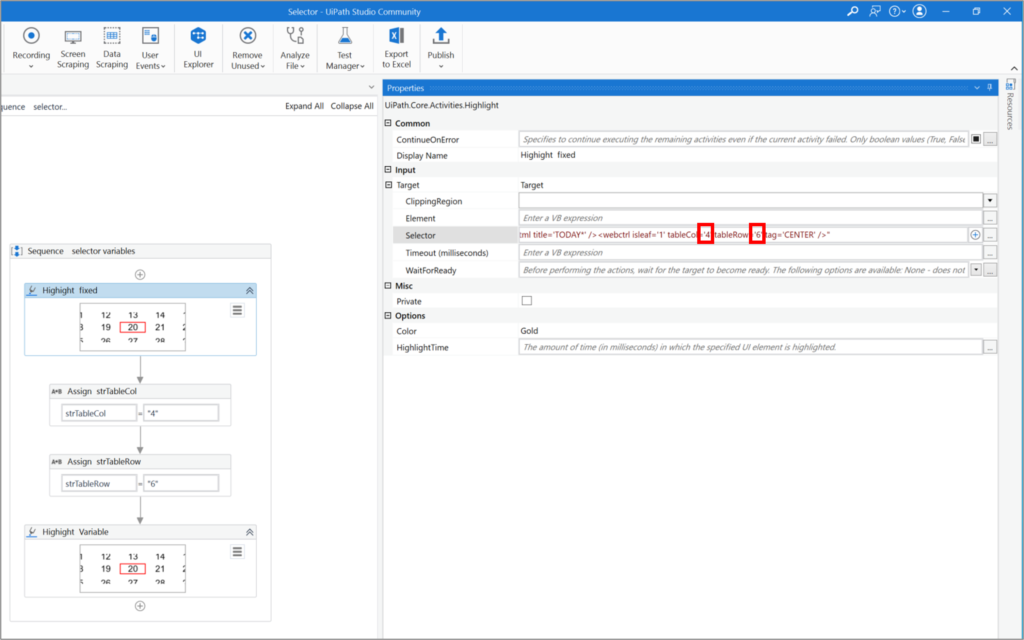
・Highight fixed Properties
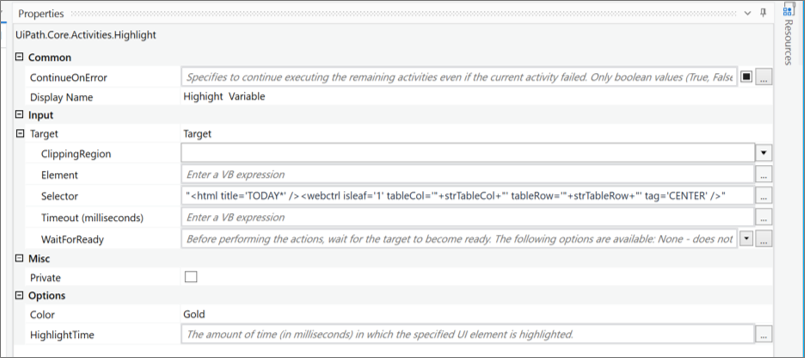
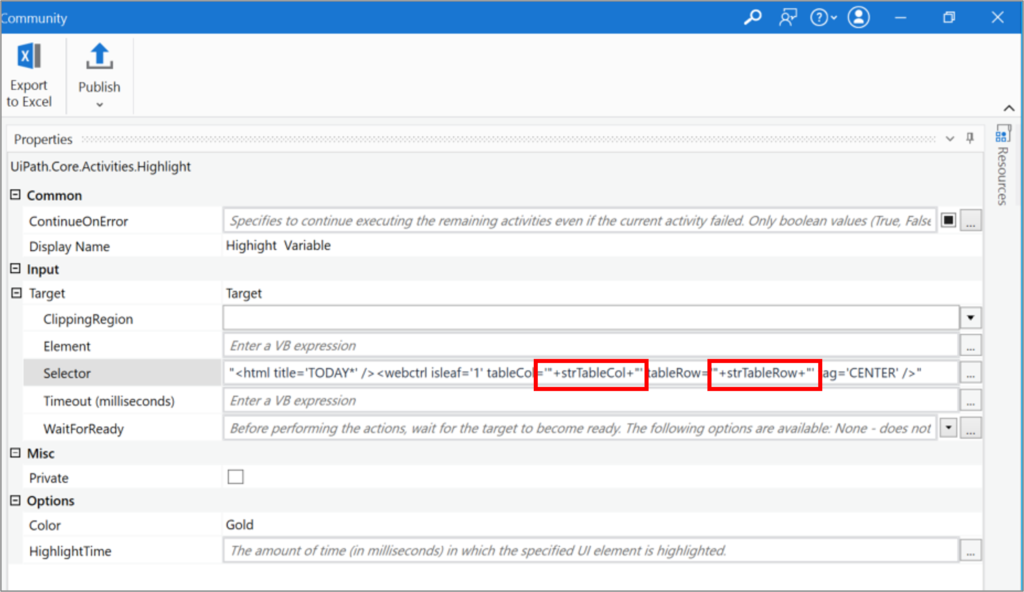
・Highight Variable Properties
・Execution result
How to modify the selector
(1) Click on the text field of the selector for the activity to be modified.
(2) Edit the selector.
・Before correction
・After correction
・Selector text
・Before correction
"<html title='TODAY*' /><webctrl isleaf='1' tableCol='4' tableRow='6' tag='CENTER' />"

・After correction
"<html title='TODAY*' /><webctrl isleaf='1' tableCol='"+strTableCol+"' tableRow='"+strTableRow+"' tag='CENTER' />"
Relative specification of selectors
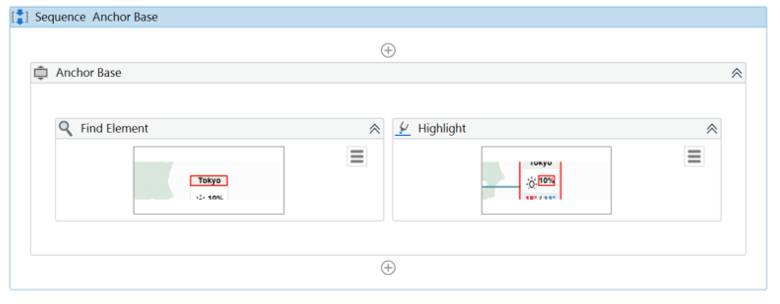
Using the Anchor Base
Use “Anchor Base” when the content cannot be specified in the stable selector.
Specify the content indirectly by using “Find Element” within the “Anchor Base” to specify the stable content near the content.
The “Anchor Base” is located in UIAutomation > Element > Find.
“Find Element” is located in UIAutomation > Element > Find.
Sample Process
Highlight the man-hour probability for Tokyo in the weather forecast on the japan.travel website.
・Target Sites

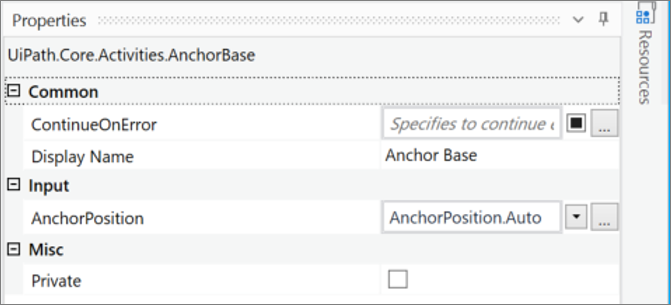
・Anchor Base Properties
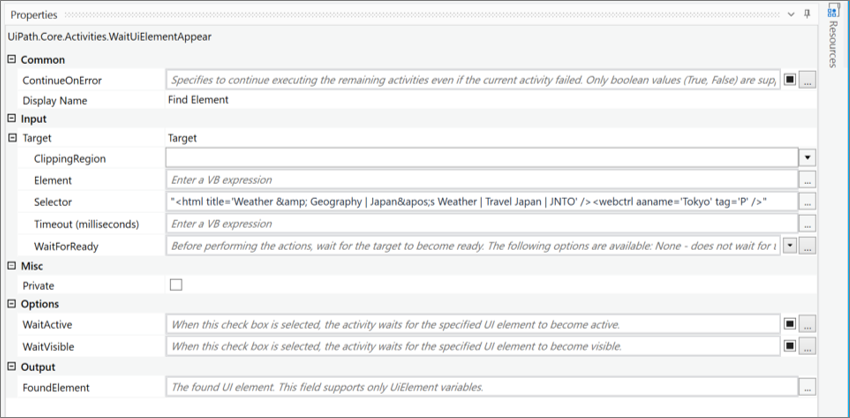
・Find Element Properties
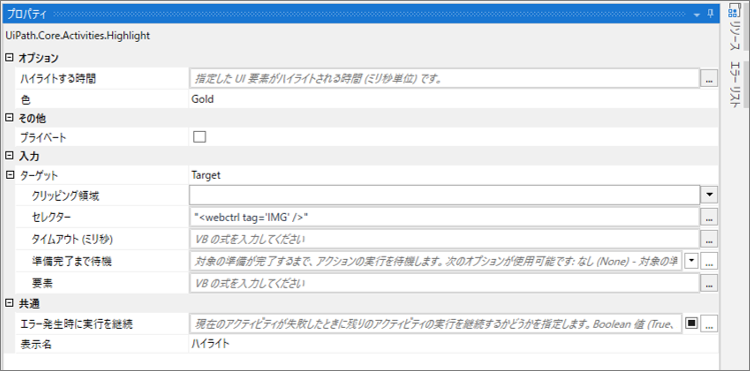
・Highlight Properties
・Execution result

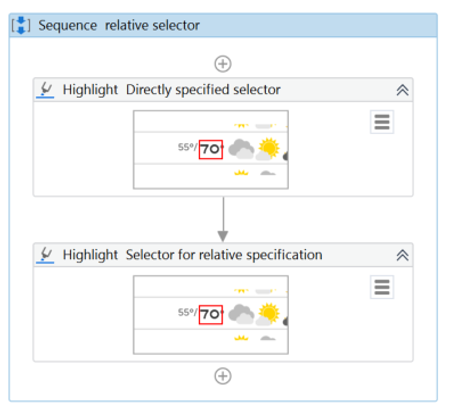
Use the relative selector
If the content cannot be specified with a stable selector, there are other ways to use relative selectors besides anchor-based.
Specify a stable selector near the content to indirectly specify the content.
Relative selectors are created using the UI Explorer.
Sample Process
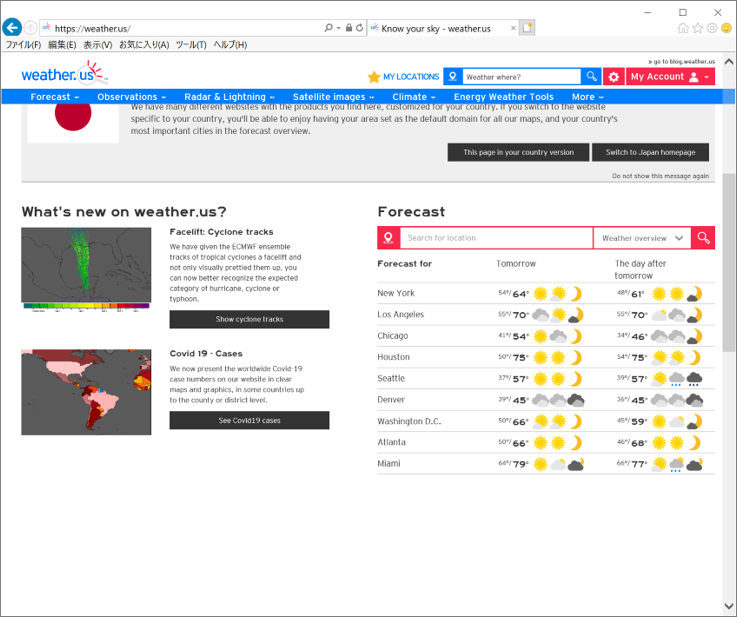
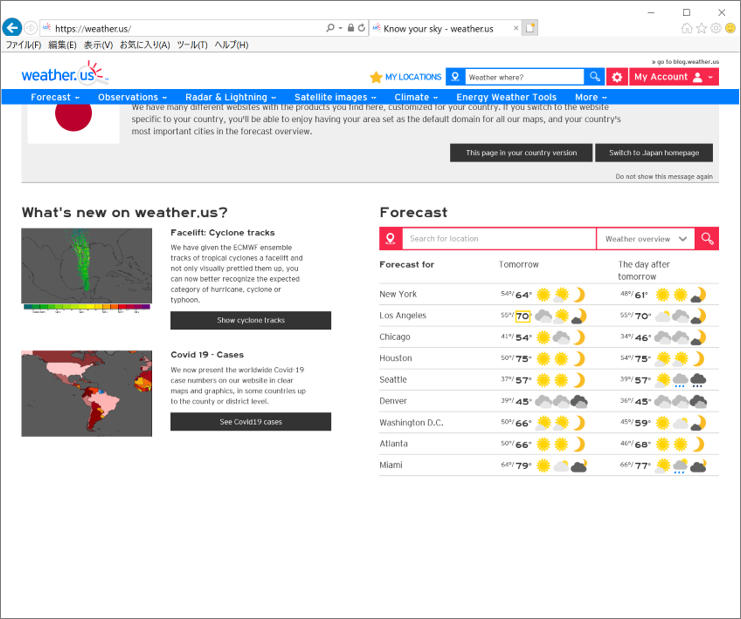
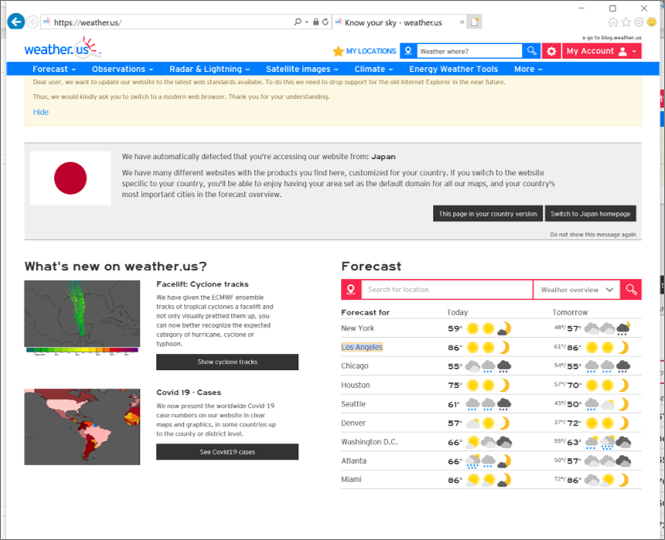
Highlight the maximum temperature for Los Angels in the weather.us weather forecast.
・Target Sites
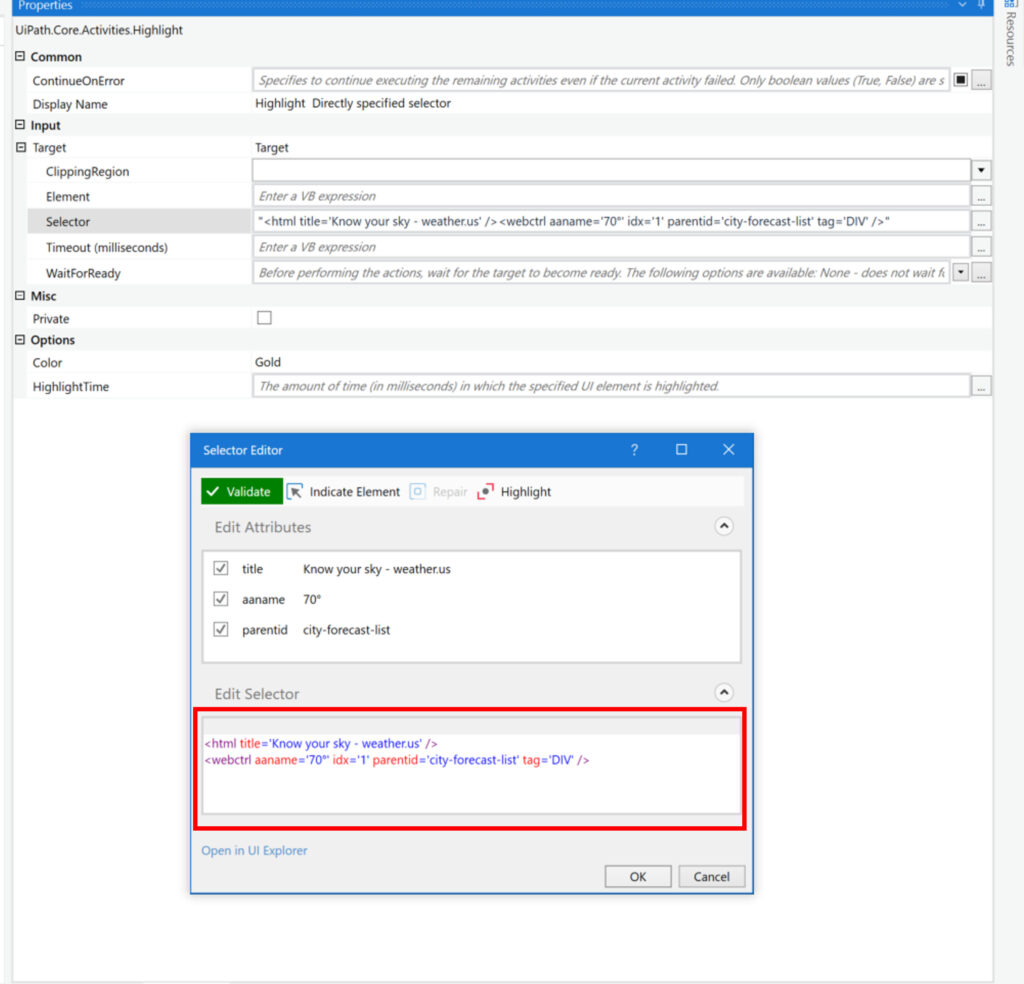
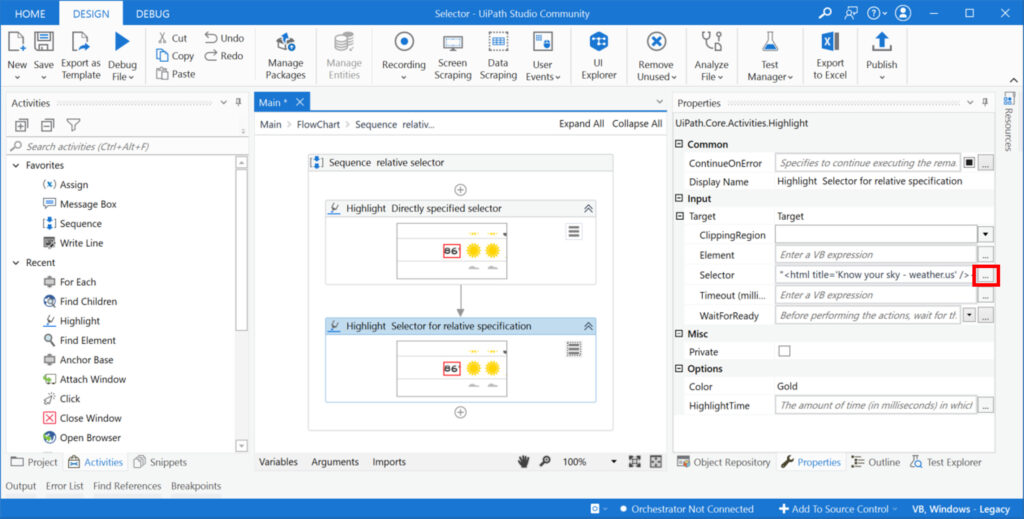
・Highlight Directly specified selector Properties
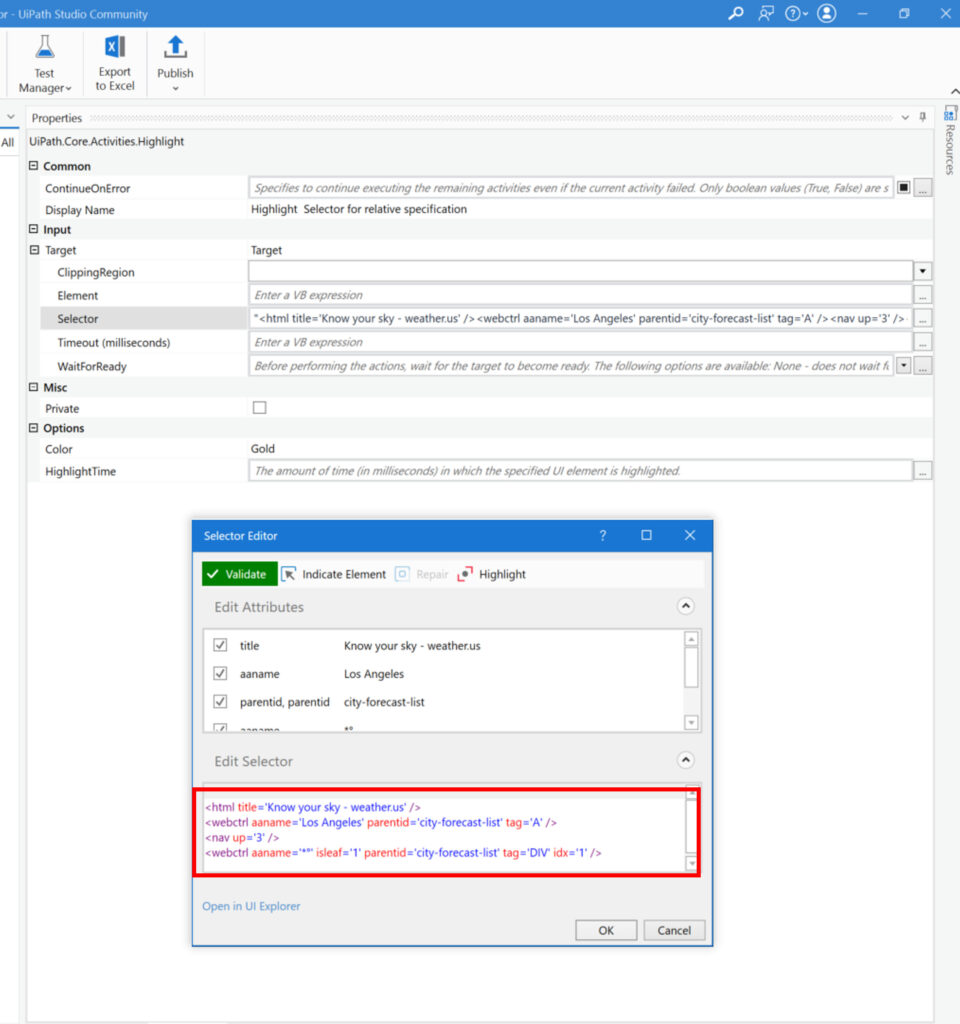
・Highlight Selector for relative specification Properties
・Execution result
How to modify the selector
(1) Click […] on the selector.
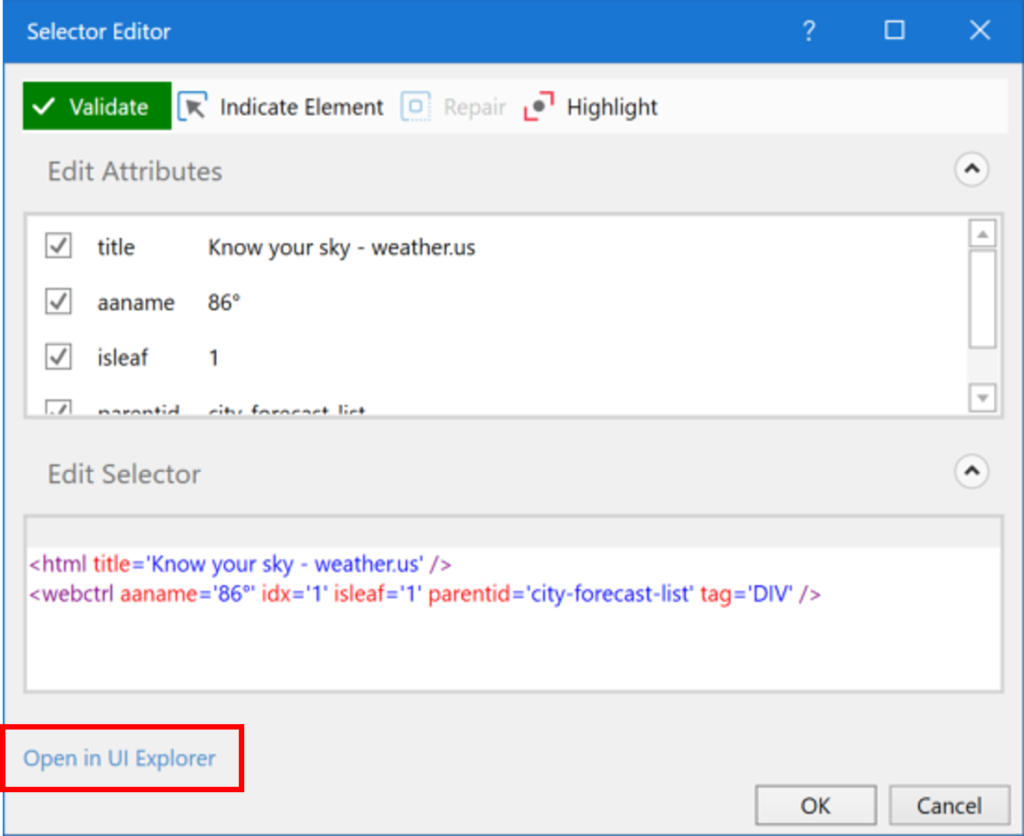
(2) Click [UI Explorer]
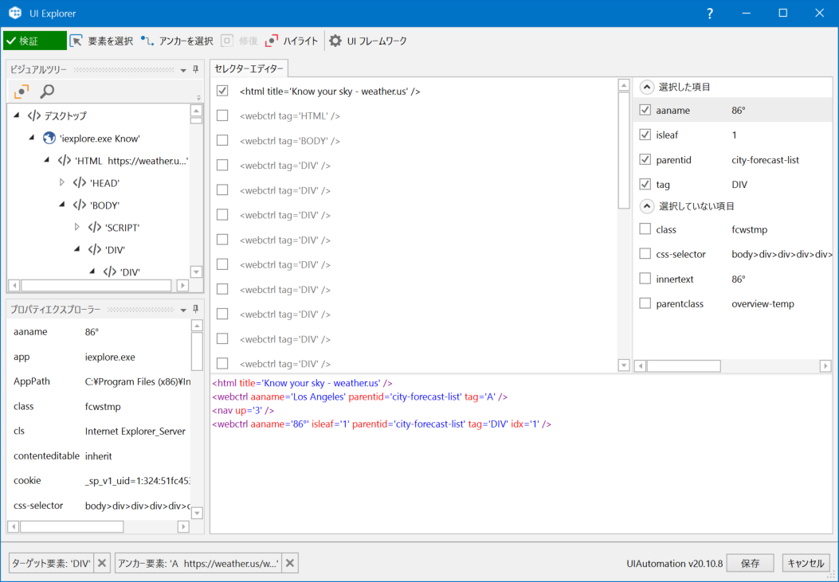
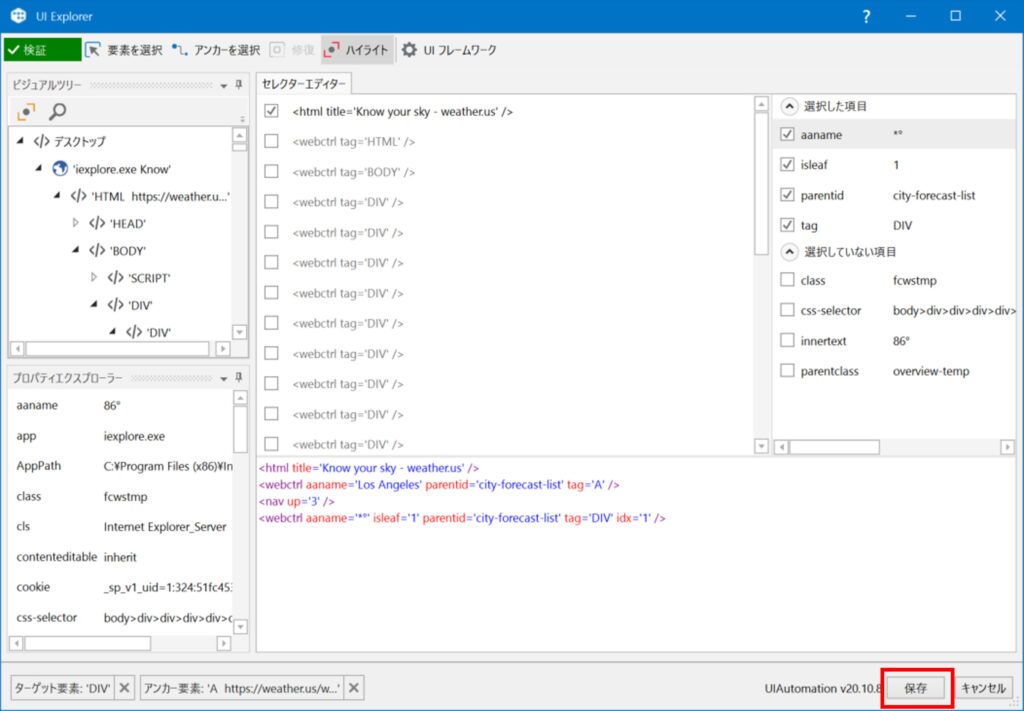
(3) Click [Select Anchor].
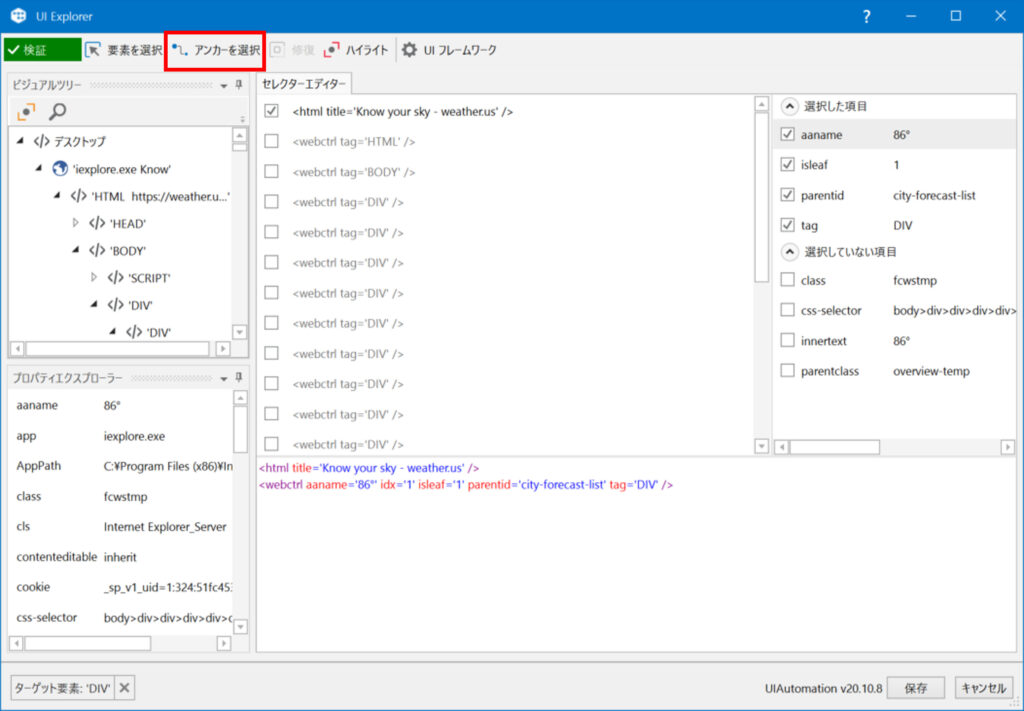
(5) Specify [Los Angeles].
(5) Make sure that the selector with the anchor designation has been created.
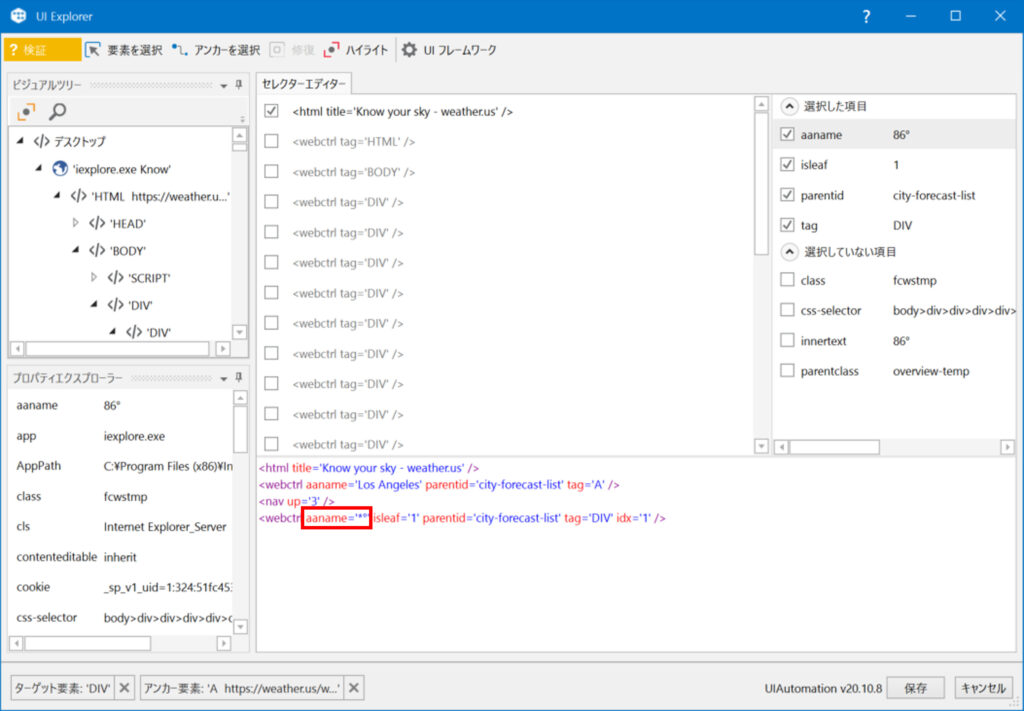
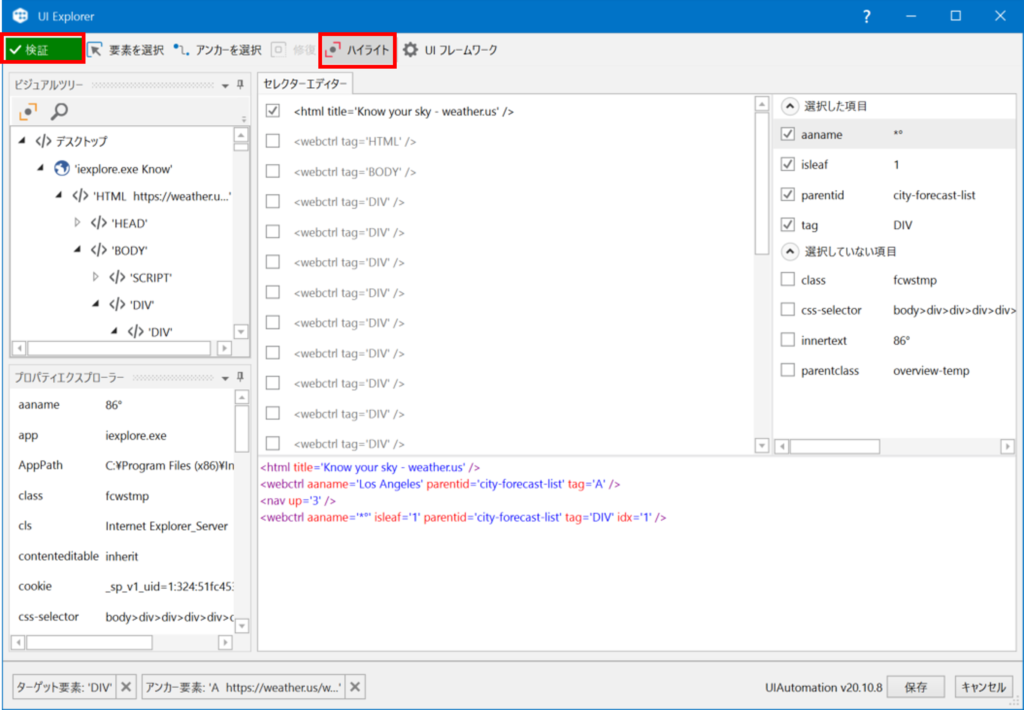
(6) Modify the temperature of aaname to a wildcard *.
(7) Click on “Highlight” and “Verify.
(8) Click “Save”.
(9) Click OK
This completes the modification of the selector.
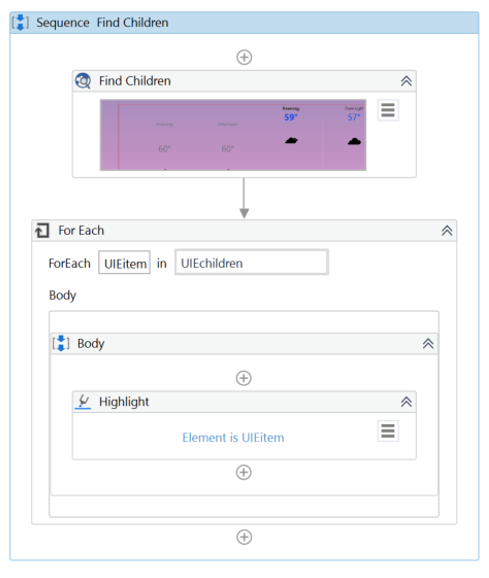
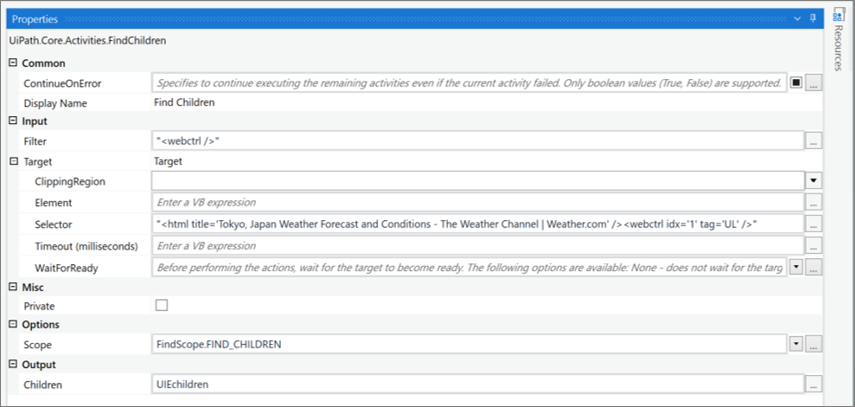
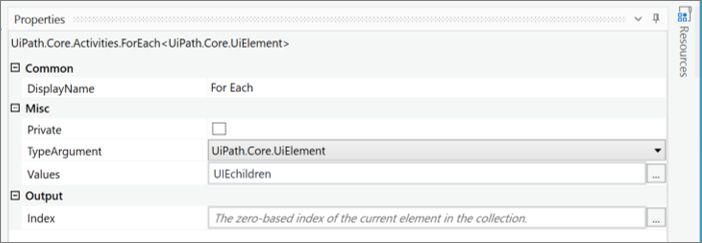
Using Find Children
Use “Find Children” to specify the content in the specified selector to the selector of the child elements.
Find Children to get the child elements, and For Each to perform the activity on the selector of the child elements.
“Find Children” is located in UI Automation > Element > Find
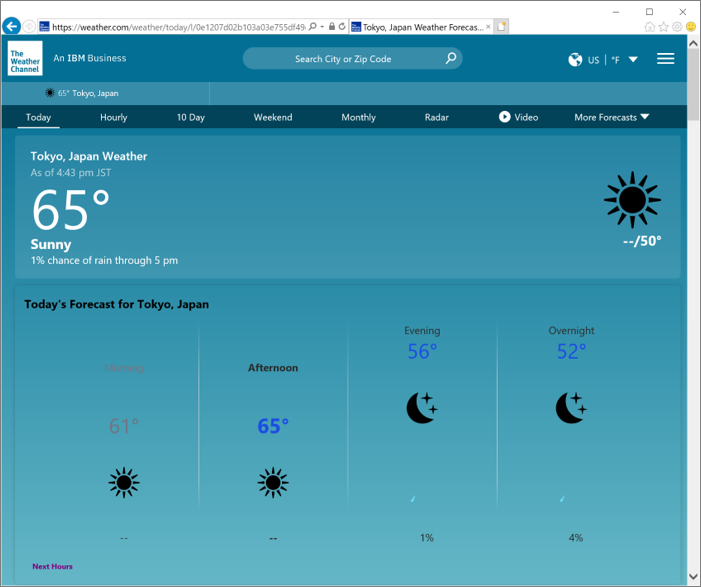
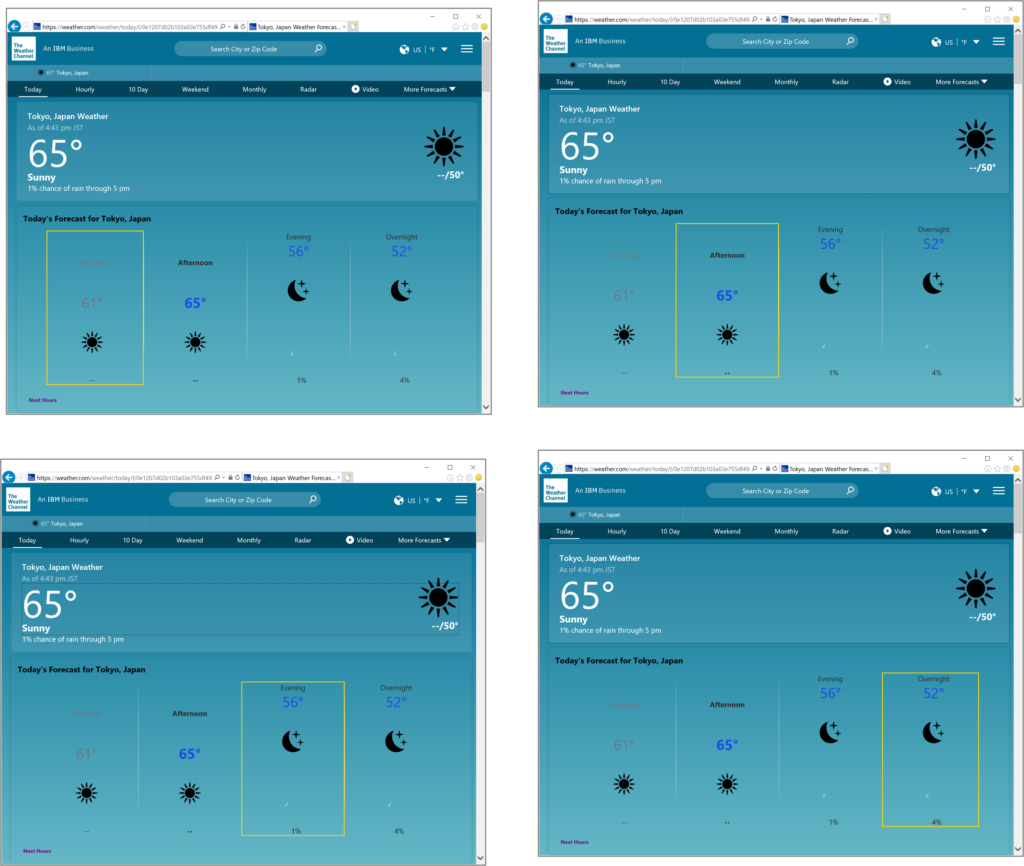
Sample Process
Prepare and highlight the 4-day weather forecast on weather.com.
・Target Sites
・Find Children Properties
・For Each Properties
・Variables

・Execution result
Summary
- A selector is like a textual address for UiPath to recognize UI elements such as buttons and strings in your application.
- You can modify the selector from the property selector, selector editor, or UI Explorer.
- Selectors can also be specified by wildcards or variables.
- There are three ways to specify a relative selector: Anchor Base, Relative Selector, and Find Children.
\Save during the sale period!/
Take a look at the UiPath course on the online learning service Udemy
*Free video available
Related Articles Learn the Creation Techniques f UiPath robotics creation with Udemy’s online courses that take it up a notch
same category UiPath
Japanese IT engineer with a wide range of experience in system development, cloud building, and service planning. In this blog, I will share my know-how on UiPath and certification. profile detail / twitter:@fpen17