With the development of UiPath Studio, we assume that there will be an increasing need to automate operations on the Microsoft Office365 web.
In this article, we will discuss how to install, configure, and use Microsoft Office365 Activities.
\Save during the sale period!/
Take a look at the UiPath course on the online learning service Udemy
*Free video available
Related Articles Learn the Creation Techniques f UiPath robotics creation with Udemy’s online courses that take it up a notch
This site was created by translating a blog created in Japanese into English using the DeepL translation.
Please forgive me if some of the English text is a little strange
How to operate Office365
There are two ways to automate Office365 web-based operations: using activities for Office365 or using clicks and keyboards.
In addition, there are some activities for Office365 that require AzureAD preconfiguration and some that do not.
The following is a summary in tabular form.
| No | Authentication Method | How to operate Office365 | Installing the Activity Package | Configure AzureAD | The number of things that can be operated | Stability during process execution |
| 1 | Microsoft Office 365 Scope Activities | Integrations >Microsoft >Office365 Use subordinate activities | necessary | necessary | medium level |
stability |
| 2 | Use OneDrive & SharePoint Activities | Integrations >Microsoft >Office365 >Files Use subordinate activities | necessary | necessary | Small degree |
stability |
| 3 | Authentication in web browser by click or keyboard activity | Open Office365 in a web browser, log in, and use click and keyboard activity | unnecessary | necessary | Large degree |
instability |
The method using the No.1 “Microsoft Office 365 Scope” activity is recommended because of its stability when running processes and the ability to use all activities under the Integrations> Microsoft> Office365 distribution.
However, “App Registration” must be configured for AzureAD.
The “Use OneDrive and SharePoint” activity in No.2 is only available for activities under the Integrations > Microsoft > Office365 > Files and can only manipulate files on Office365.。
Since AzureAD configuration is not required, it is recommended when only files on OneDrive or SharePoint on Office365 are to be manipulated.
No3, “Authentication in web browser by click or keyboard activity” uses click or keyboard activity to operate, which is almost all that can be operated, but it lacks stability in process execution, so it should be used as little as possible.

Installation of Office365 Activity Package
To use the “Microsoft Office 365 Scope” or “Use OneDrive and SharePoint” activities, you must install the “MicrosoftOffice365.Activities” activity package.
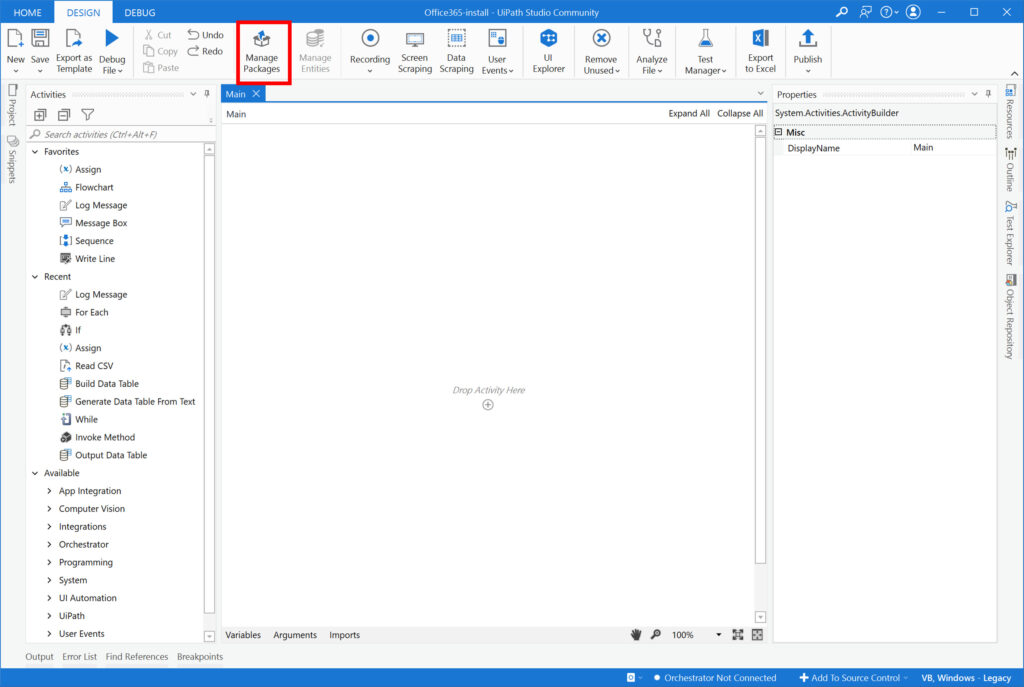
Activity packages are installed from “Manage Packages” in UiPathStudio.
MicrosoftOffice365.Activities package installation instructions
(1) With the target process open in Studio, click [Manage Packages].
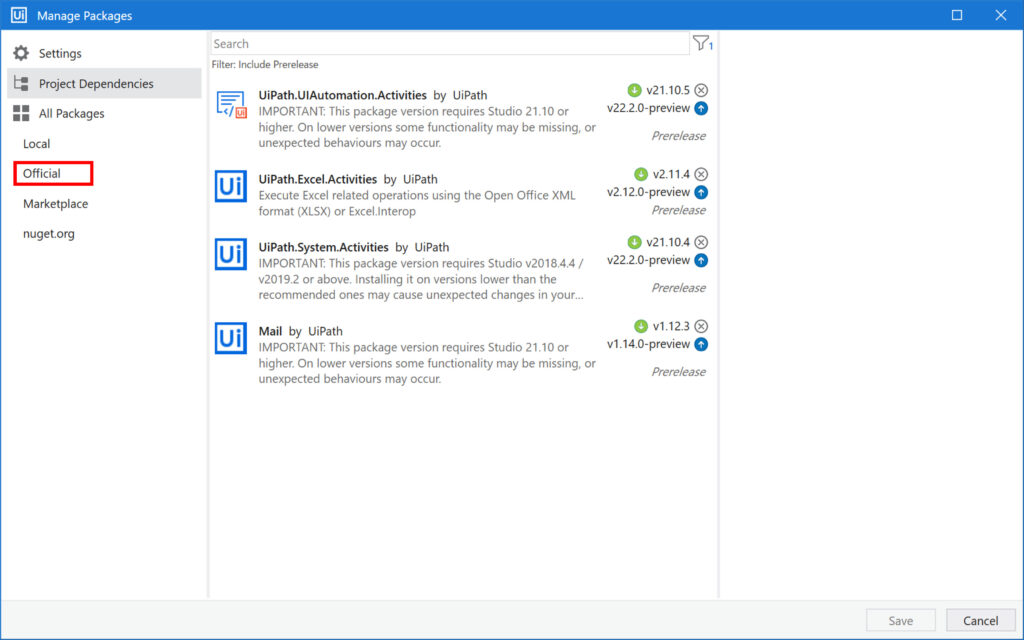
(2) Click [Official] on the screen that pops up.
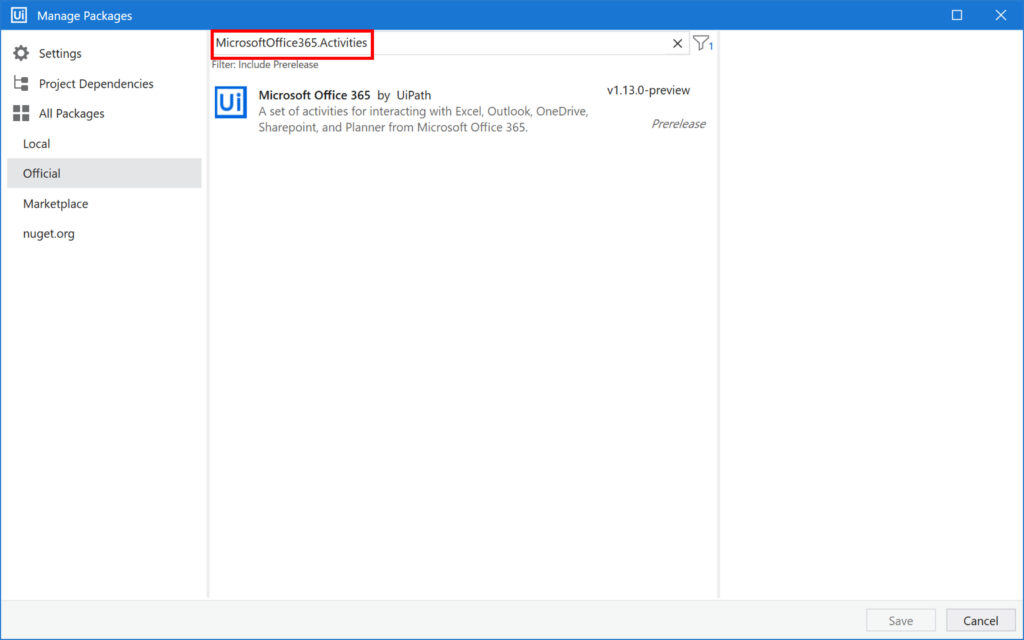
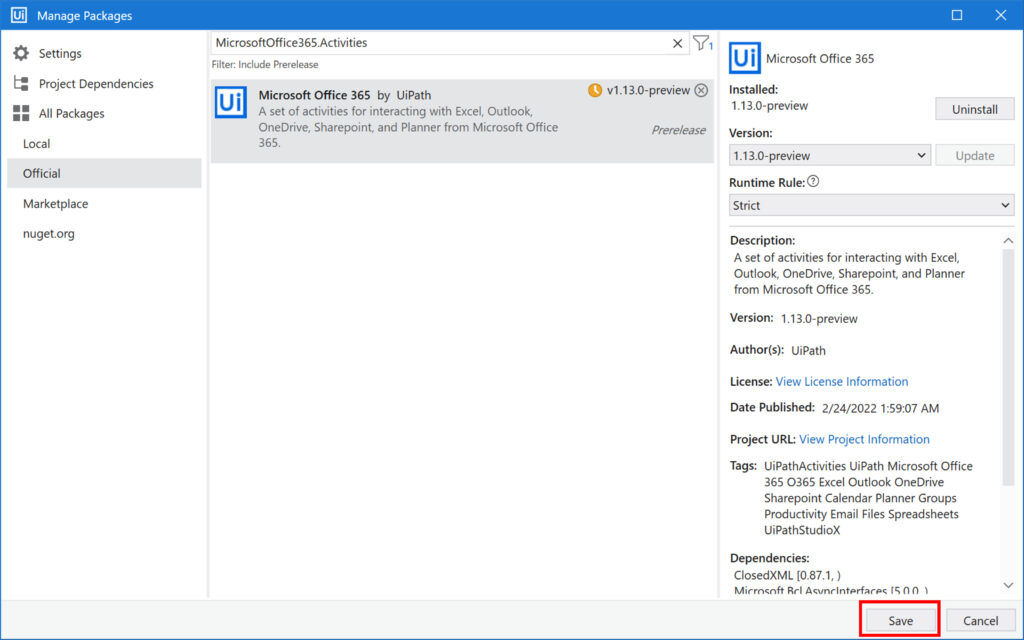
(3) Type “MicrosoftOffice365.Activities” in the search window and click [MicrosoftOffice365.Activities]
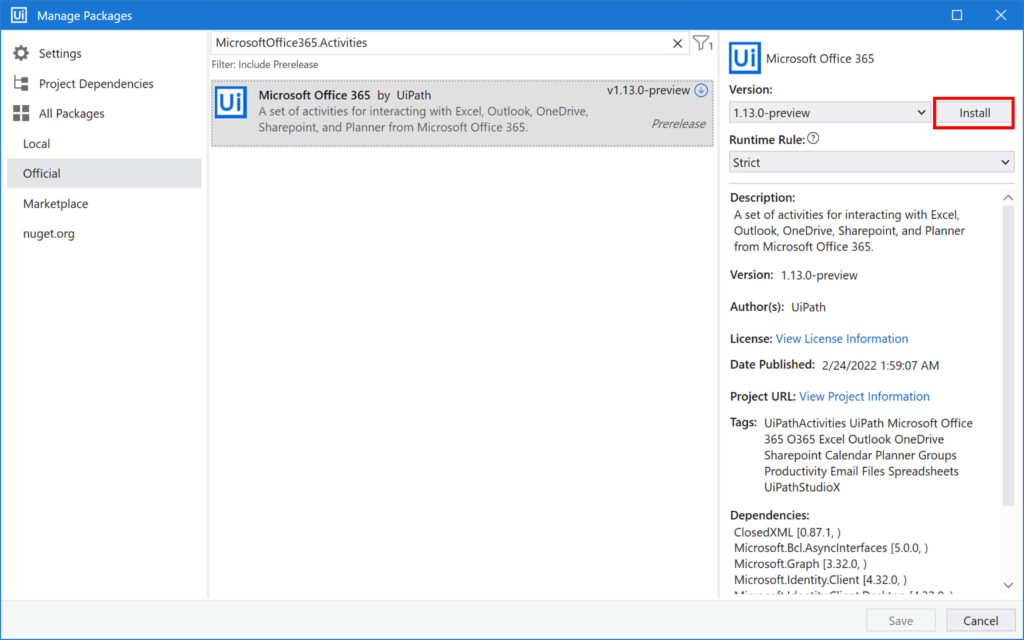
(4) Click [Install
(5) Click [Save]
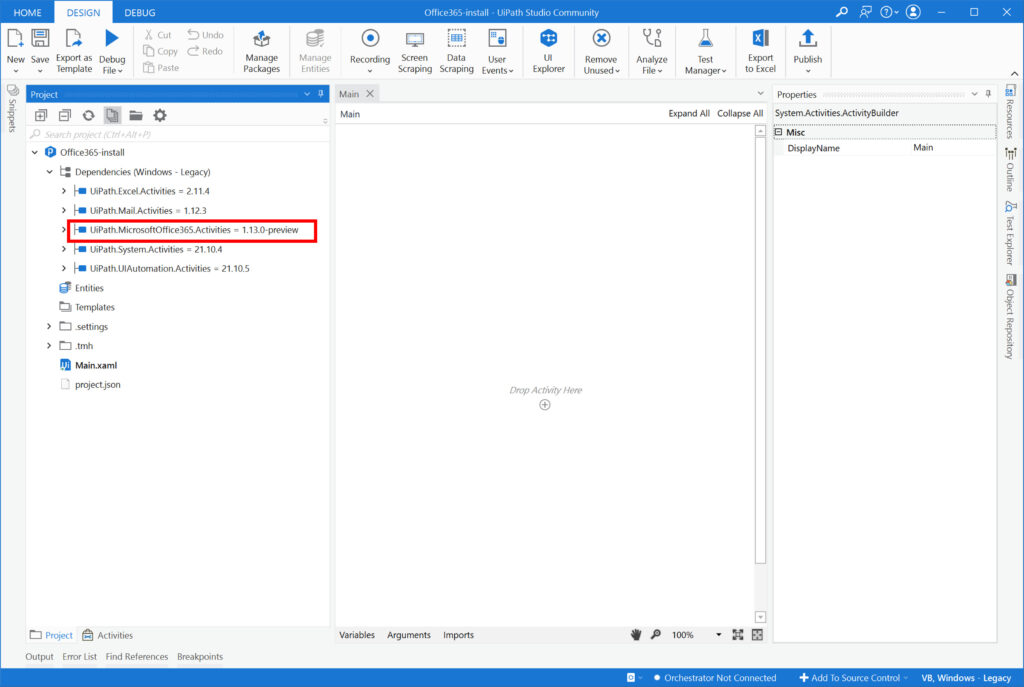
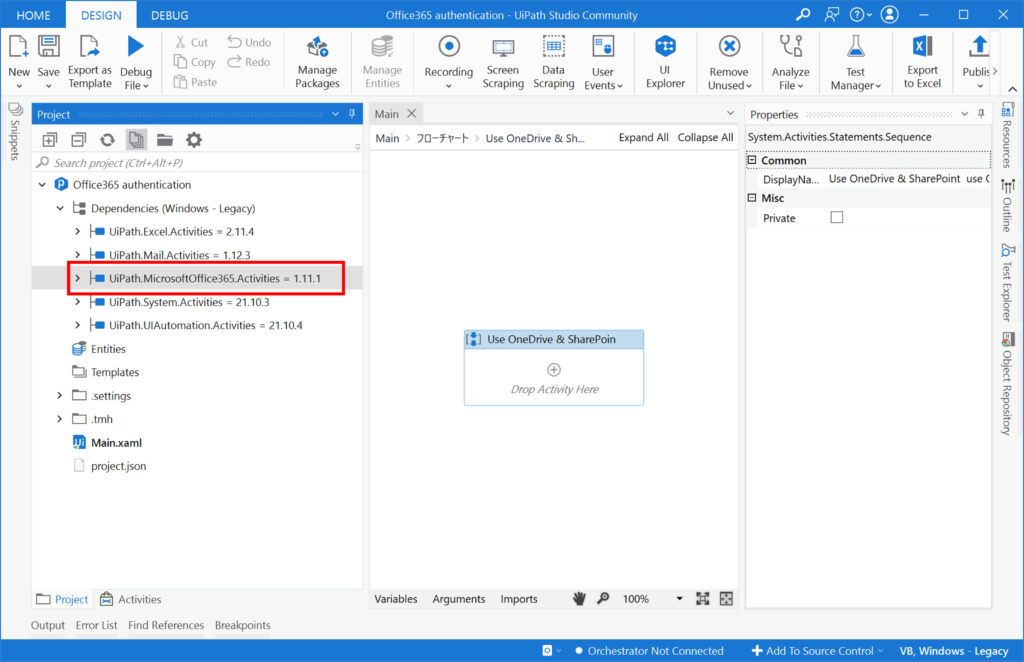
(6) Click on [Projects] in the lower left corner and make sure MicrosoftOffice365.Activities is listed
Office365 Activity List
Office365 activities are located under “Integrations> Microsoft> Office365”.
Place the activity under “Integrations> Microsoft> Office365” within the “Microsoft Office 365 Scope” or “Use OneDrive & SharePoint” activity.
The table below shows the activities under “Integrations> Microsoft> Office365”.
| Activity Location | Activity Name | What you can do in Activities |
| Integrations> Microsoft> Office365 | Microsoft Office 365 Scope | Uses the Microsoft identity platform to establish an authenticated connection between UiPath and your Microsoft Office 365 application. |
| Integrations> Microsoft> Office365> Excel |
VLookup Range | Uses the Microsoft Graph Use workbook functions API to find a value in a range using the VLOOKUP function. |
| Copy Sheet | Uses the Microsoft Graph Get range, Add worksheet, and Update range APIs to copy an existing worksheet (CopySheet) in a specified workbook (CopyWorkbook) and then paste it as a new worksheet (PasteSheet) into the same or a different workbook (PasteWorkbook). | |
| Get Sheets | Uses the Microsoft Graph Get worksheet API to retrieve and return an array of worksheets (Sheets) from a specified workbook (Workbook). | |
| Add Sheet | The Add Sheet activity uses the Microsoft Graph Add worksheet API to add a new worksheet (Sheet) to a specified workbook (Workbook). | |
| Rename Sheet | Uses the Microsoft Graph Update worksheet API to change the name of a specified workbook (Workbook) worksheet from its current name (OriginalSheetName) to a new name (NewSheetName). | |
| Write Cell | Uses the Microsoft Graph Update range API to write a value (Cell Value) to a specified cell (CellAddress) in a workbook (Workbook) worksheet (SheetName). | |
| Get Cell Color | Uses the Microsoft Graph Get range format API to retrieve the color properties of specified cells (CellAddress) in a workbook (Workbook) worksheet (SheetName). | |
| Read Cell | Uses the Microsoft Graph Get range API to retrieve the value of a specified cell (CellAddress) in a workbook (Workbook) worksheet (SheetName). | |
| Create Workbook | Uses the Microsoft Graph Upload item API to create a new workbook (Name) and upload it to a specified location (Parent). | |
| Read Column | Uses the Microsoft Graph Get range API to retrieve cell values from a specified column (StartingCell) in a workbook (Workbook) worksheet (SheetName). | |
| Write Range | Uses the Microsoft Graph Update range API to write a range of cell data (DataTable) starting from a specific cell (Starting Cell) in a specified workbook (Workbook) worksheet (SheetName). | |
| Set Range Color | Uses the Microsoft Graph Update range format API to set the background color of a specified range. | |
| Clear Range | Uses the Microsoft Graph Clear range API to clear values, format, fill, border, etc. of a range from the specified sheet. | |
| Copy Range | Uses the Microsoft Graph Get range, Add worksheet, and Update range APIs to copy a range and pastes it to another location. | |
| Delete Range | Uses the Microsoft Graph Clear range (when Shift is None) or Delete range (when Shift is Up or Left) API to delete a range of cell data (Range) from a specified workbook (Workbook) worksheet (SheetName). | |
| Append Range | Uses the Microsoft Graph Update range API to write a range of cell data (DataTable) to a specified workbook (Workbook) worksheet (SheetName). | |
| Read Range | Uses the Microsoft Graph Get range API to retrieve values from a specified range of cells (Range) in a workbook (Workbook) worksheet (SheetName). | |
| Read Row | Uses the Microsoft Graph Get range API to retrieve the values of cells from a specified row (StartingCell) in a workbook (Workbook) worksheet (SheetName). | |
| Integrations> Microsoft> Office365> Excel> Tables |
Get Table Range | Uses the Microsoft Graph Get range API to retrieve the range associated with the specified table. |
| Create Table | Uses the Microsoft Graph Add table API to create a table from the specified range. | |
| Delete Column | Uses the Microsoft Graph Delete table column API to delete a column from a table. | |
| Insert Column | Uses the Microsoft Graph Create Column API to insert a new column in a table. The previous column at the indicated position is shifted to the right. | |
| Delete Rows | Uses the Microsoft Graph Delete table row API to delete the specified rows from a table. | |
| Insert Rows | Uses the Microsoft Graph Create row API to insert rows at the specified position in a table. Any rows below the inserted rows are shifted downwards. | |
| Integrations> Microsoft> Office365> Outlook |
Reply to Mail | Uses the Microsoft Graph Create Reply and Reply APIs to reply to an email message. |
| Set Mail Categories | Uses the Microsoft Graph Update message API to associate categories with a message. | |
| Delete Mail | Uses the Microsoft Graph Delete message API to delete an email message. | |
| Get Mail | Uses the Microsoft Graph Get message and List messages APIs to retrieve the matching messages from a specified mailbox (Mailbox). | |
| Move Mail | Uses the Microsoft Graph Move event message API to move a message (Message) to a different mail folder (DestinationFolder). | |
| Forward Mail | Uses the Microsoft Graph Create forward and Forward event message API to forward a message (Message), with additional content (Body), to one or more recipients (To). | |
| Send Mail | Uses the Microsoft Graph Create message and Send mail APIs to send a message (Body and Subject) to one or more recipients (To, CC, and BCC). | |
| Integrations> Microsoft> Office365> Planner> Tasks |
List Tasks | Uses the Microsoft Graph List tasks API to list all tasks in a plan. |
| Create Task | Uses the Microsoft Graph Create task API to create a new task. | |
| Delete Task | Uses the Microsoft Graph Delete task API to delete an existing task. | |
| Get Task | Uses the Microsoft Graph Get task API to retrieve an existing task. | |
| Update Task | Uses the Microsoft Graph Update task API to modify an existing task. | |
| Integrations> Microsoft> Office365> Planner> Buckets |
List Bucket Tasks | Uses the Microsoft Graph List bucket tasks API to list all tasks in a given bucket. |
| List Buckets | Uses the Microsoft Graph List plan buckets API to list all buckets in a plan. | |
| Create Bucket | Uses the Microsoft Graph Create bucket API to create a new bucket within a plan. | |
| Delete Bucket | Uses the Microsoft Graph Delete bucket API to delete an existing bucket. | |
| Integrations> Microsoft> Office365> Planner> Plans |
List Plans | Uses the Microsoft Graph List plans API to list all plans for a given user group. |
| Create Plan | Uses the Microsoft Graph Create plan API to create a new plan. | |
| Get Plan | Uses the Microsoft Graph Get plan API to retrieve a plan by its ID. | |
| Integrations> Microsoft> Office365> SharePoint Lists |
Delete List Item | Uses the Microsoft Graph Delete item API to delete the specified list item. |
| Update List Item | Uses the Microsoft Graph Update item API to update the specified list item. | |
| Add List Items | Uses the Microsoft Graph Create item API to add one or multiple list items to the specified SharePoint list. | |
| Get List Info | Uses the Microsoft Graph Get list API to get information about the specified SharePoint List. | |
| For Each List Item | Uses the Microsoft Graph Get items API to perform an activity or a series of activities on each list item in the specified SharePoint list. | |
| For Each List | Uses the Microsoft Graph Get lists and Get list APIs to perform an activity or a series of activities on each list in the specified SharePoint site. | |
| Integrations> Microsoft> Office365> Groups |
Create Group | Uses the Microsoft Graph Create group API to create a new user group. |
| Delete Group | Uses the Microsoft Graph Delete group API to delete a user group. | |
| Get Group | Uses the Microsoft Graph Get group API to look up a user group. | |
| List Groups | Uses the Microsoft Graph List groups API to list all user groups. | |
| Integrations> Microsoft> Office365> Files |
Use OneDrive & SharePoint | Selects an account to use for OneDrive and SharePoint automation. After you add this activity, add the activities that work with files from OneDrive and SharePoint in Use OneDrive & SharePoint. |
| Copy File/Folder | Uses the Microsoft Graph Copy item API to create a copy of a file or folder and add it to the same or a new parent folder (Destination folder). | |
| Share File/Folder | Uses the Microsoft Graph Create sharing link and Add permissions APIs to share a file or folder drive item with the specified recipients. | |
| Delete File/Folder | Uses the Microsoft Graph Delete item API to delete a specified file or folder in your OneDrive or SharePoint site (DriveItem). | |
| Get File/Folder | Uses the Microsoft Graph Get item API to get the metadata of a specified item with a known ID (ItemID). | |
| Move File/Folder | Uses the Microsoft Graph Move item API to move a specified file or folder to a new parent folder (Destination folder) with the option to change its name. | |
| Find Files And Folders | Uses the Microsoft Graph Search items and Shared files APIs to find the files, metadata, and/or contents that match the values of your search parameters (Query). | |
| Export File as PDF | Uses the Microsoft Graph Convert content API to convert a OneDrive or SharePoint file to a PDF and save it to a local location. | |
| Upload File | Uses the Microsoft Graph Resumable upload API to upload a local file to your OneDrive or SharePoint account. | |
| Download File | Uses the Microsoft Graph Download file API to download a specified file from your OneDrive or SharePoint site to a local location. | |
| Create Folder | Uses the Microsoft Graph Create folder API to create a new folder (FolderName) in a specified parent directory (Destination folder). | |
| For Each File/Folder | Uses the Microsoft Graph Microsoft Search API to perform an activity or a series of activities on each file/folder that matches the filter criteria. | |
| Integrations> Microsoft> Office365> Calendar |
Create Event | Uses the Microsoft Graph Create event API to create a new event in a specified calendar (Calendar). |
| Delete Event | Uses the Microsoft Graph DeleteEvent API to delete a specified event (Event). | |
| Modify Event | Uses the Microsoft Graph Update event API to change an existing event (Event). | |
| Search Events | Uses the Microsoft Graph List events API to retrieve the matching events from the specified calendar (Calendar). | |
| Get Calendars | Uses the Microsoft Graph Get calendar API to get the properties and relationships of a calendar. | |
| Find Meeting Times | Uses the Microsoft Graph Find meeting times API to suggest meeting times and locations based on organizer and attendee availability (Attendees) and your specified range of time that you want the meeting to occur (IntervalStart, IntervalEnd, and MeetingDuration). | |
| Add Attendee | Uses the Microsoft Graph Update event API to add attendees (Email Address and Name) to a specified event (Event). | |
| RSVP | Uses the Microsoft Graph Accept event, Decline event, and Tentatively accept APIs to respond (Response) to a specified event (Event). | |
| Add Location | Uses the Microsoft Graph Update event API to add a location (RoomEmailAddress and DisplayName) to a specified event (Event). | |
| Add Attachment | Uses the Microsoft Graph Add attachment API to add an attachment (FilePath) to a specified event (Event). |
Authentication by Microsoft Office 365 Scope
Overview of Operation Mechanism and Setup Procedure
See this link for how [Microsoft Office 365 Scope] works.
The setup procedure is outlined below.
- Register your application in AzureAD
- Add API permissions to the application created in 1
- In UiPathStudio, place a [Microsoft Office 365 scope] in the project (process)
- Enter [Authentication] and the value according to the authentication method into the properties of [Microsoft Office 365 Scope]
- Add an activity under Integration>Microsoft>Office365 in the [Microsoft Office 365 scope]
Type of certification method
There are five authentication methods for “Microsoft Office 365 Scope” as shown in the table below.
| No | Type of certification | Attended | Unattended | remarks |
| 1 | InteractiveToken | 〇 | ||
| 2 | IntegratedWindowsAuthentication | 〇 | ||
| 3 | UsernameAndPassword | 〇 | deprecated | |
| 4 | ApplicationIdAndSecret | 〇 | ||
| 5 | ApplicationIdAndCertificate | 〇 |

InteractiveToken
Application registration with AzureAD
Register the application in AzureAD as described in the UiPath documentation Registering Applications in Microsoft Office 365 Setup.
Application Registration Procedure
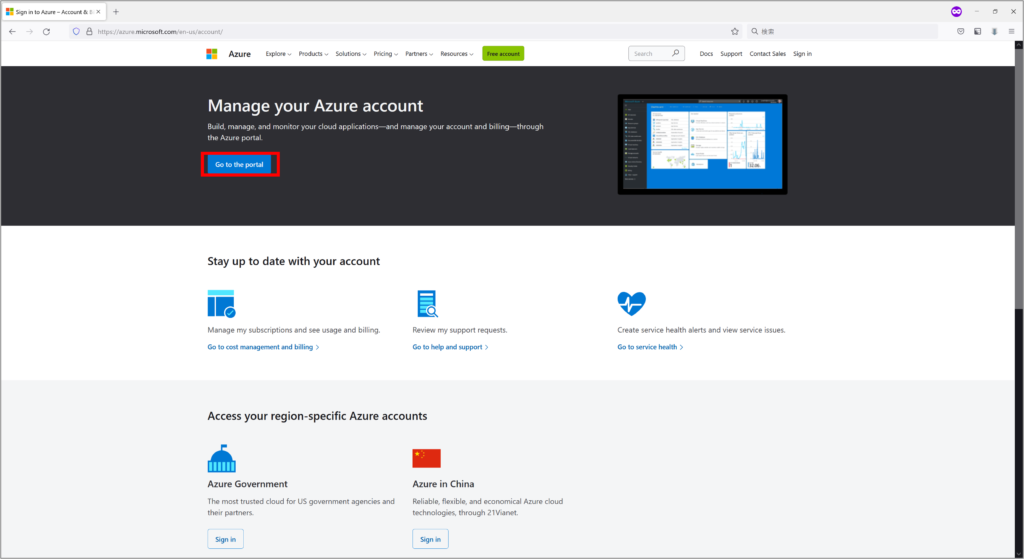
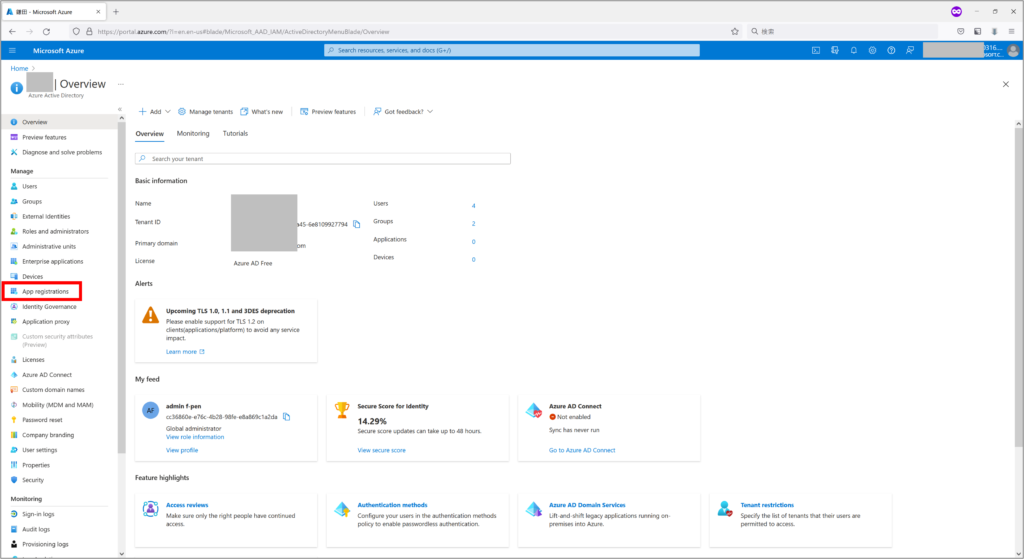
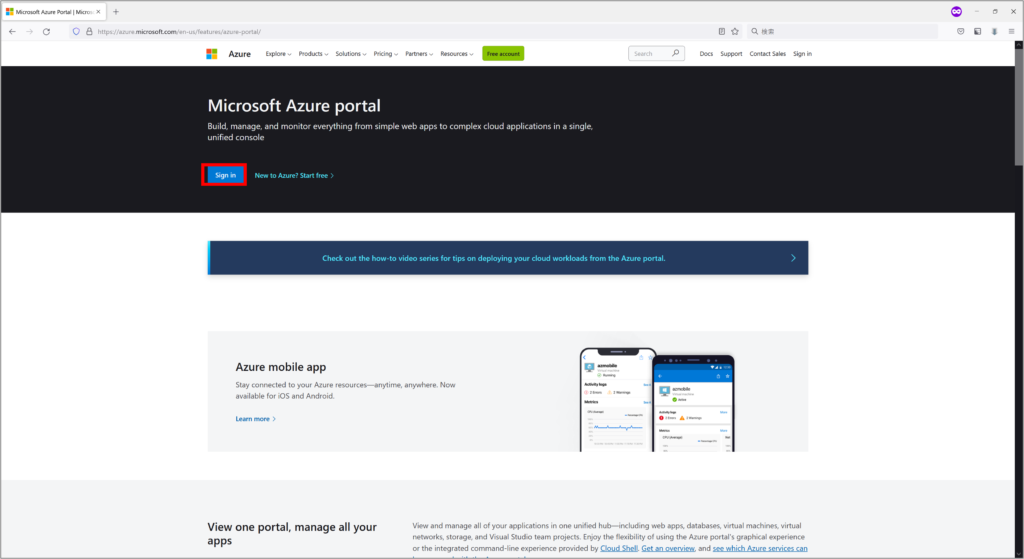
(1)Open the Azure Portal in a web browser and sign in
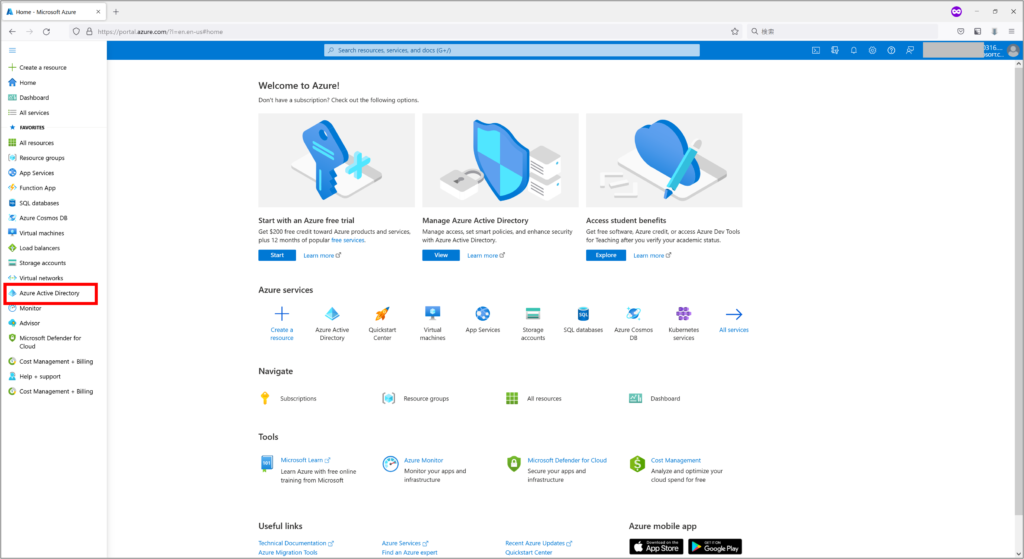
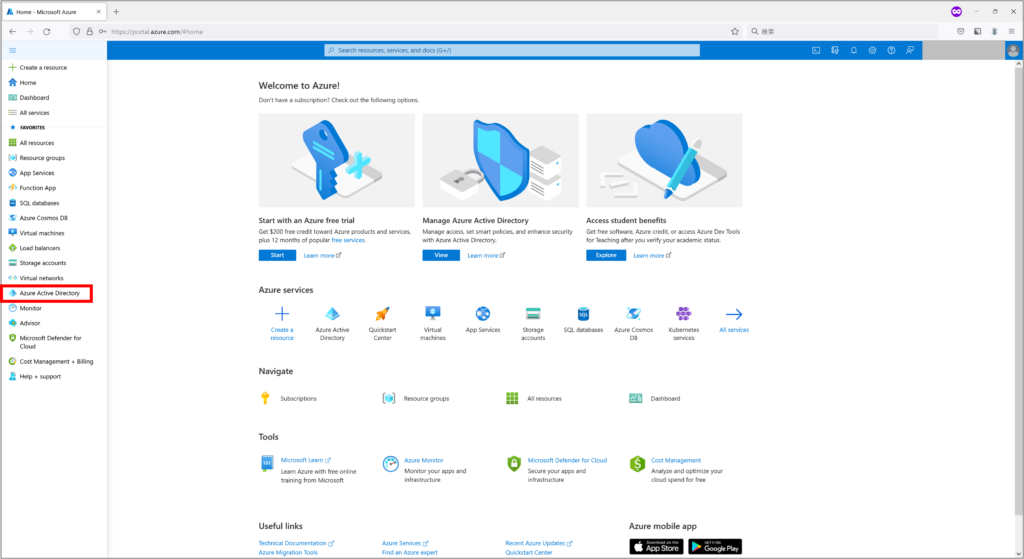
(2) Click on “Azure Active Directory”
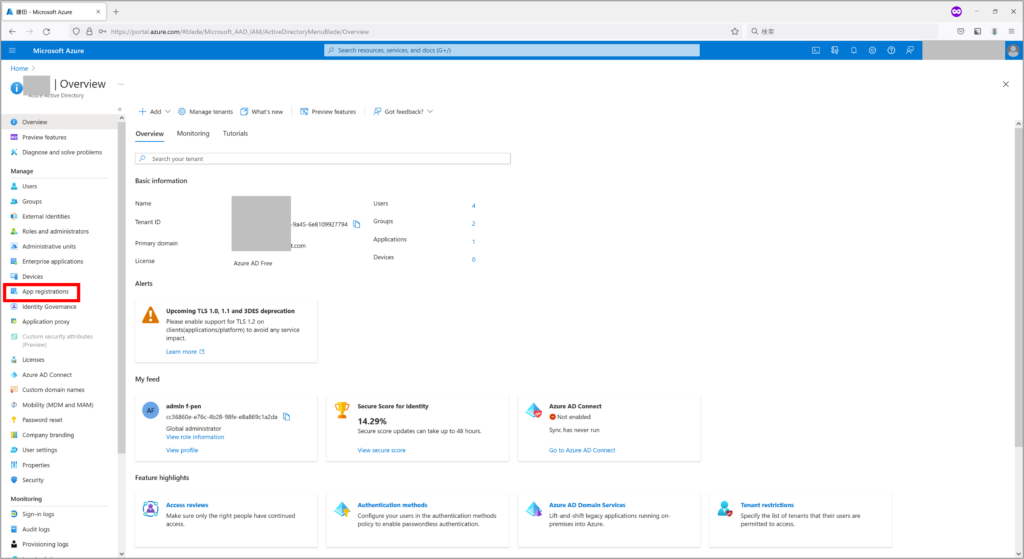
(3) Click on “App Register”
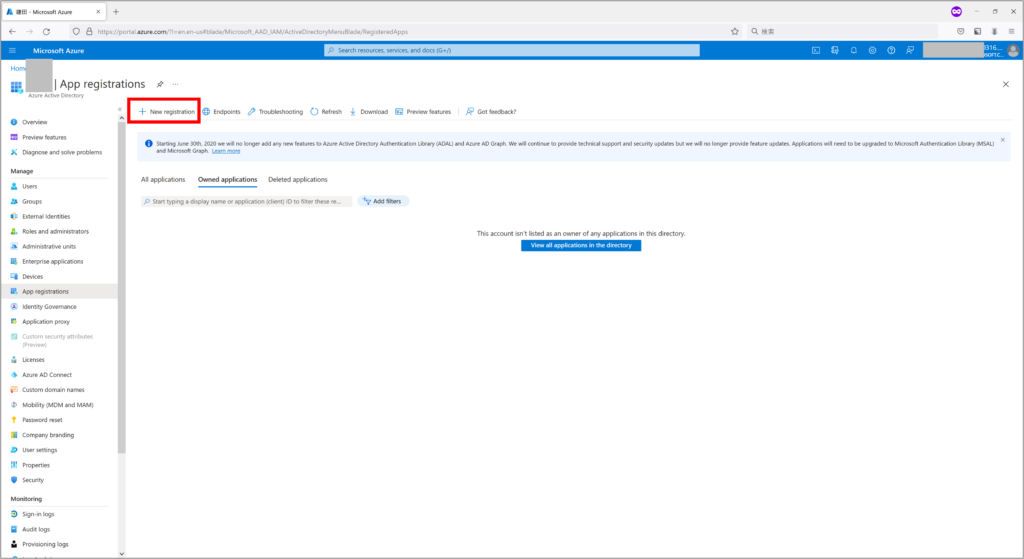
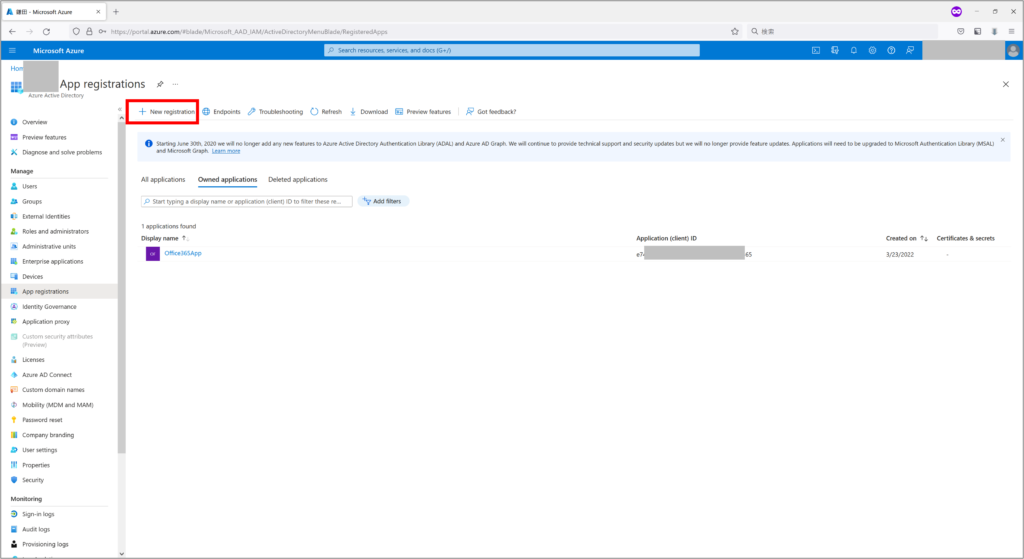
(4) Click on “New Registration”
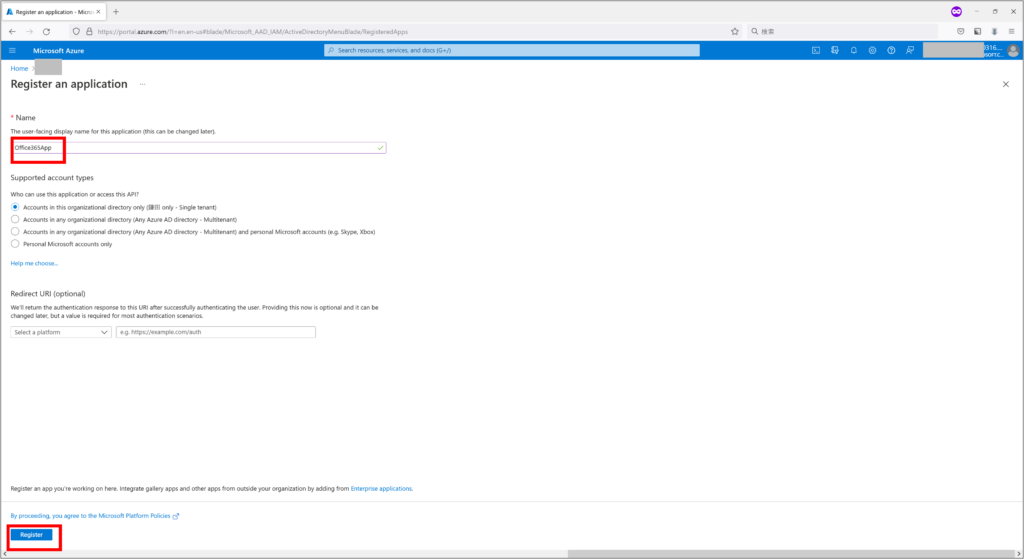
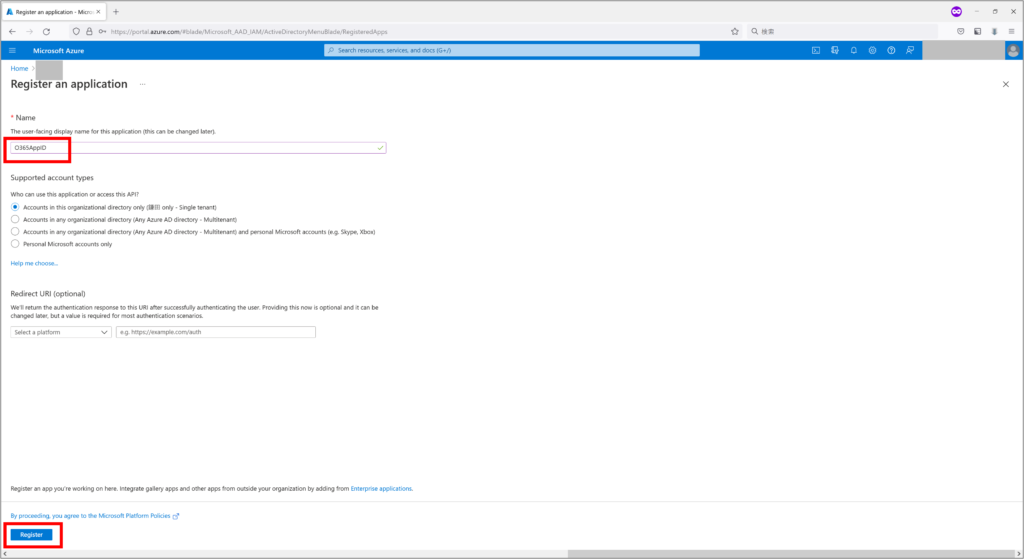
(5) Enter any name in the Name field (e.g. Office365App) and click “Register”.
* Depending on your environment, select or enter “Support Account Types” or “Redirect URL”.
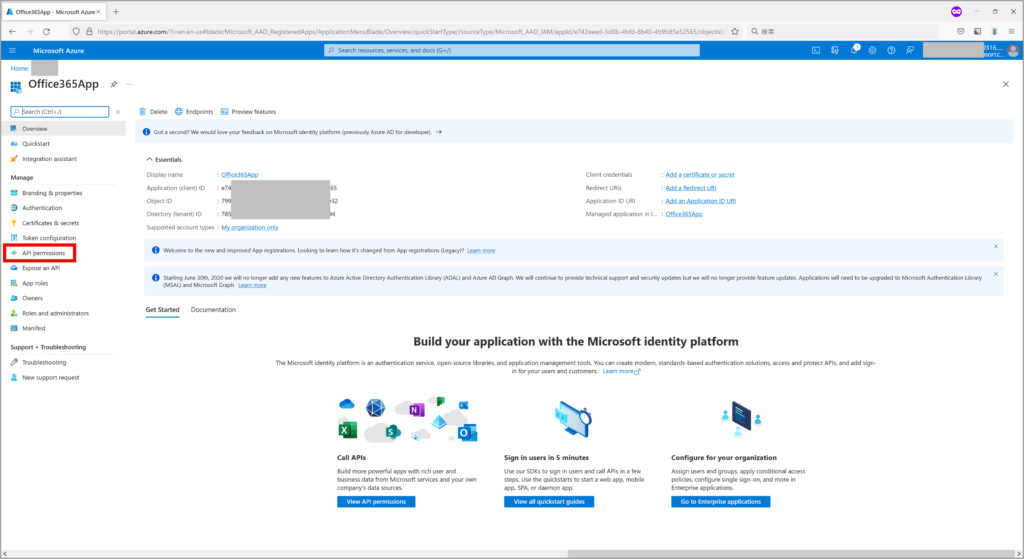
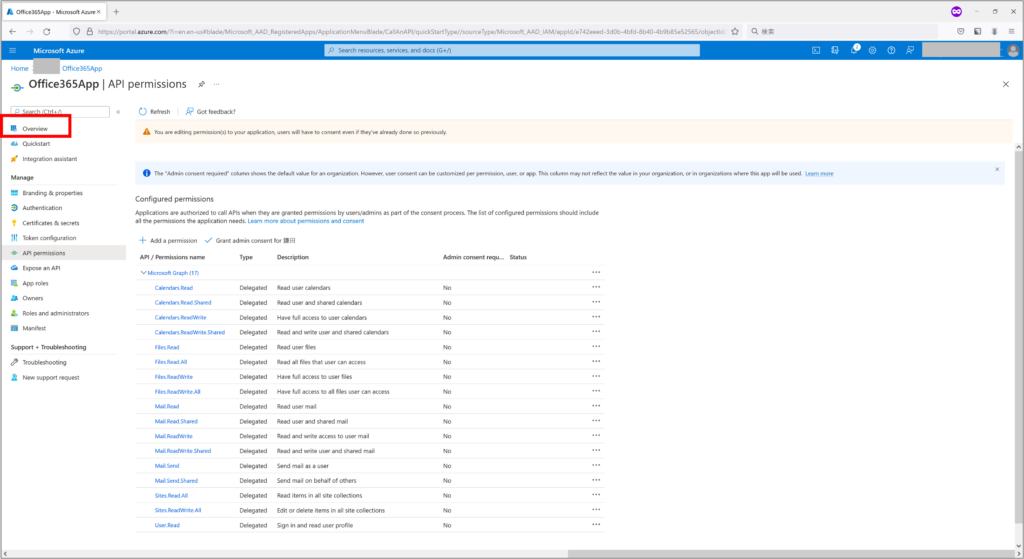
Procedure for adding API permissions
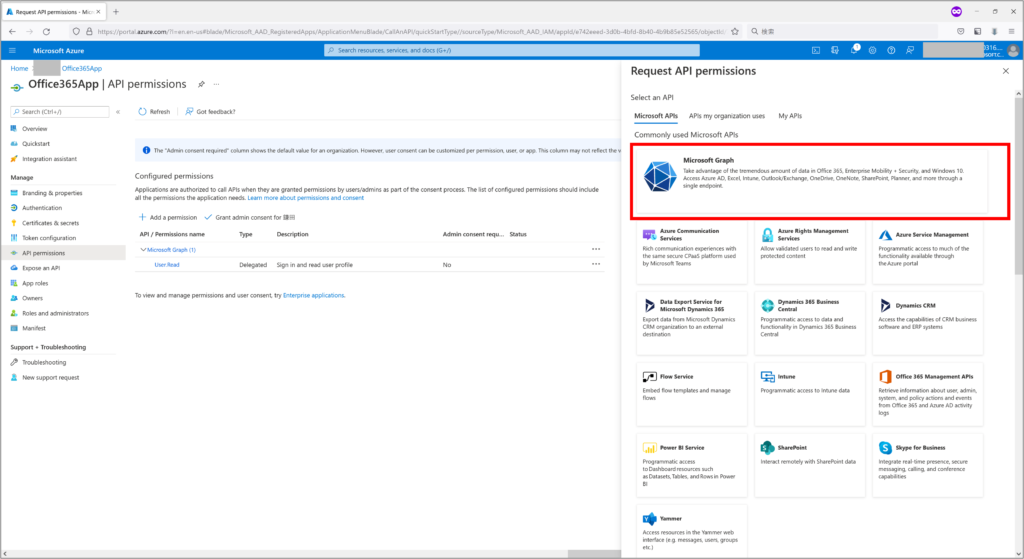
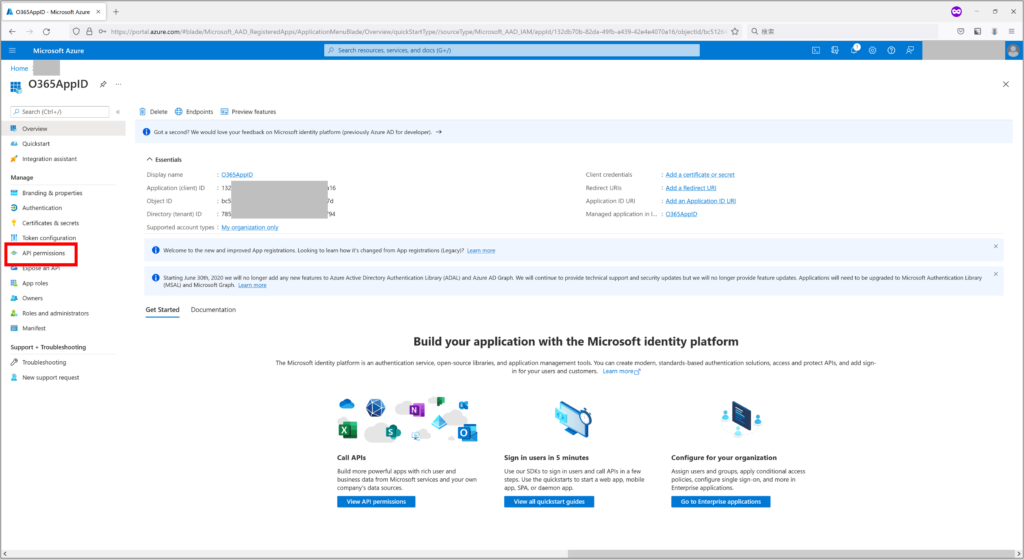
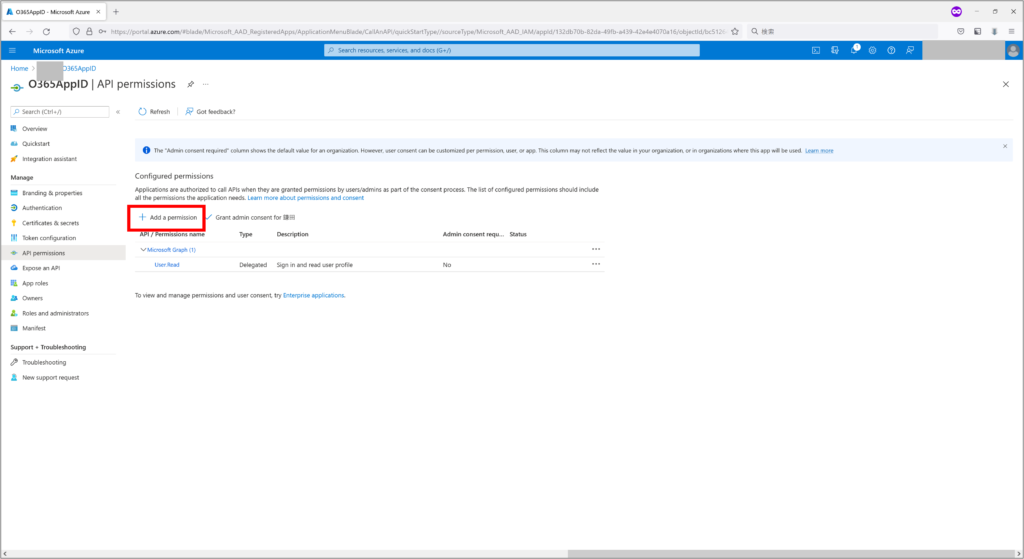
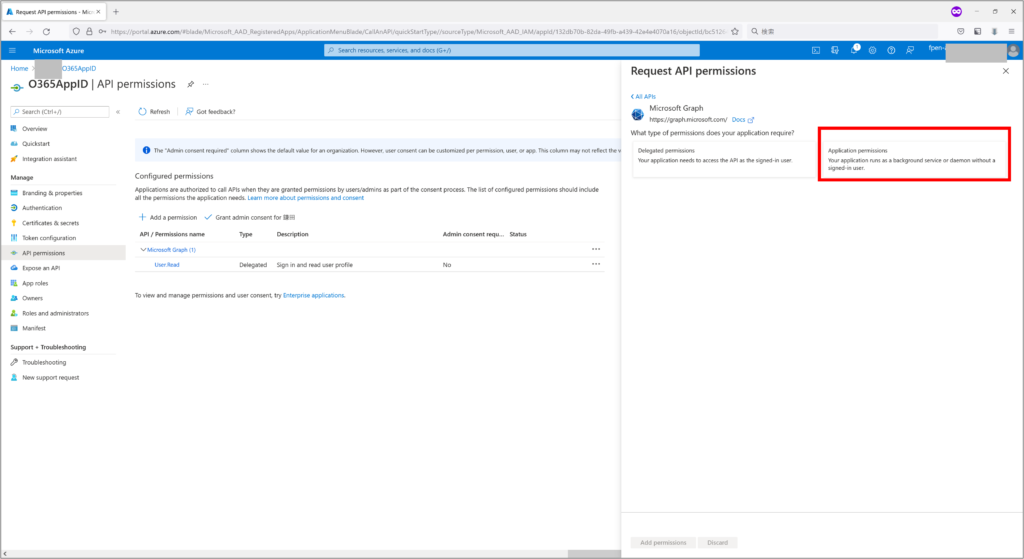
(1) Click on “API permission”
(2)Click on “Add a permissions”

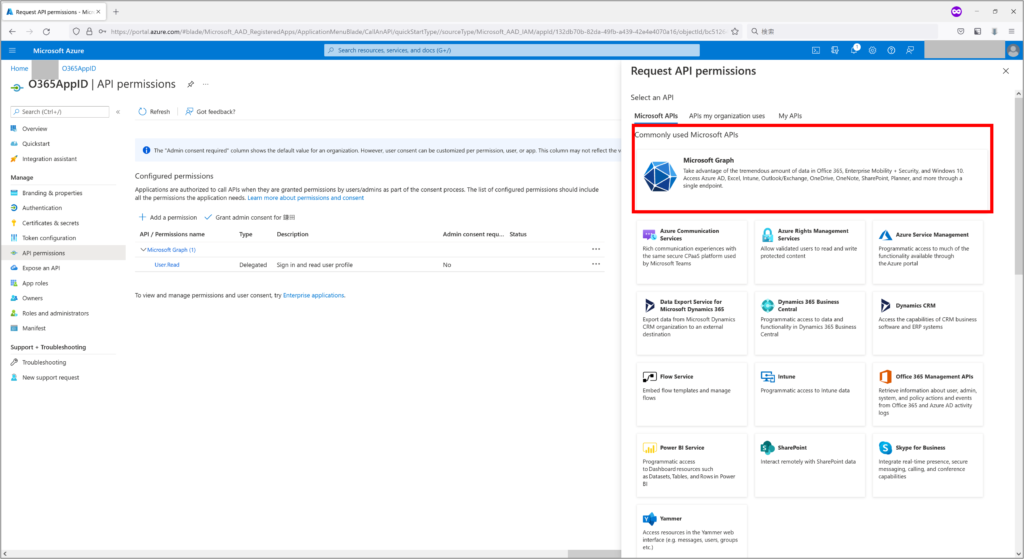
(3) Click on “Microsoft Grah”
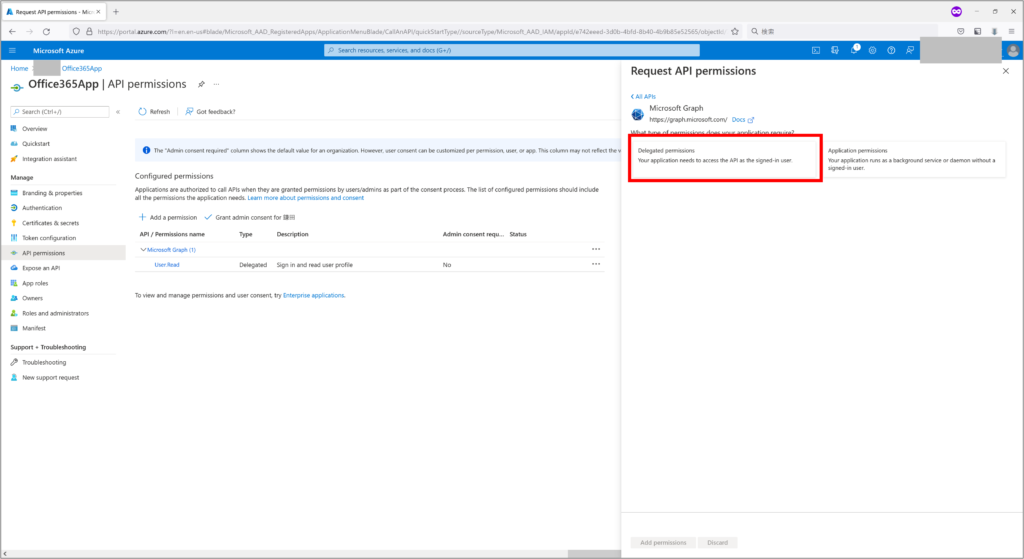
(4) Click on “Delegated Permissions”
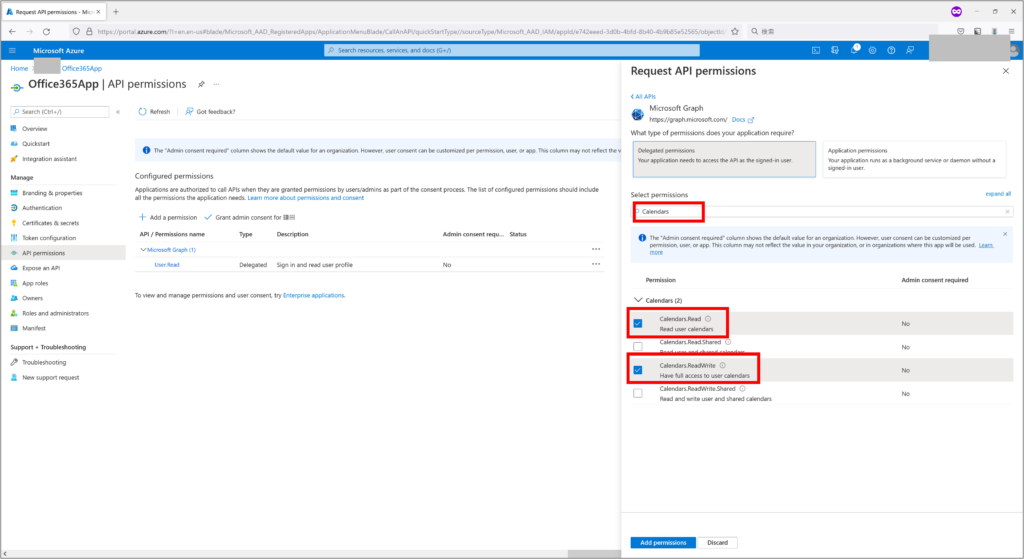
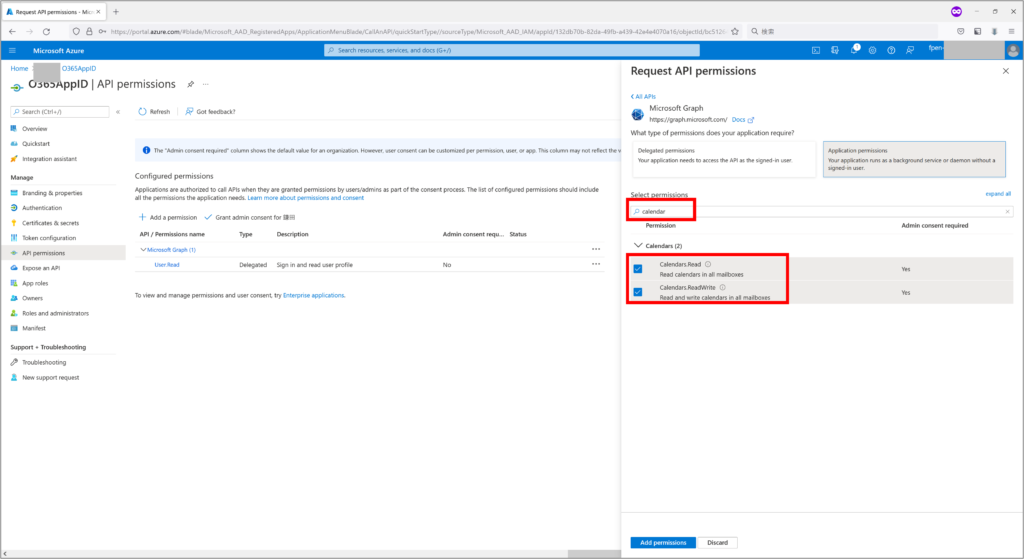
(5) Enter “Calender” and select “Calendars.Read”, “Calendars.ReadWrite”.
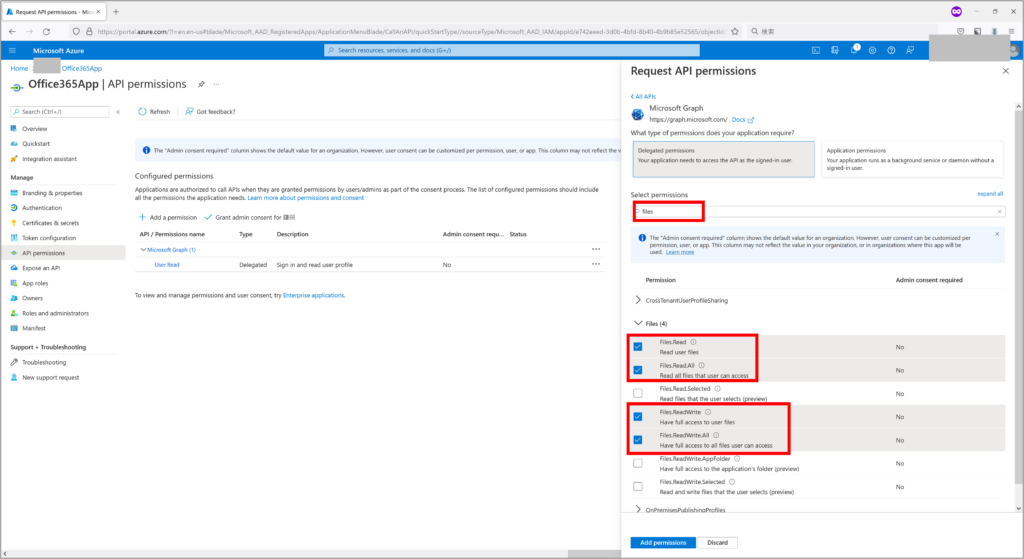
(6) Enter “Files” and select “Files.Read”, “Files.Read.All”, “Files.ReadWrite”, or “Files.ReadWrite.All”.
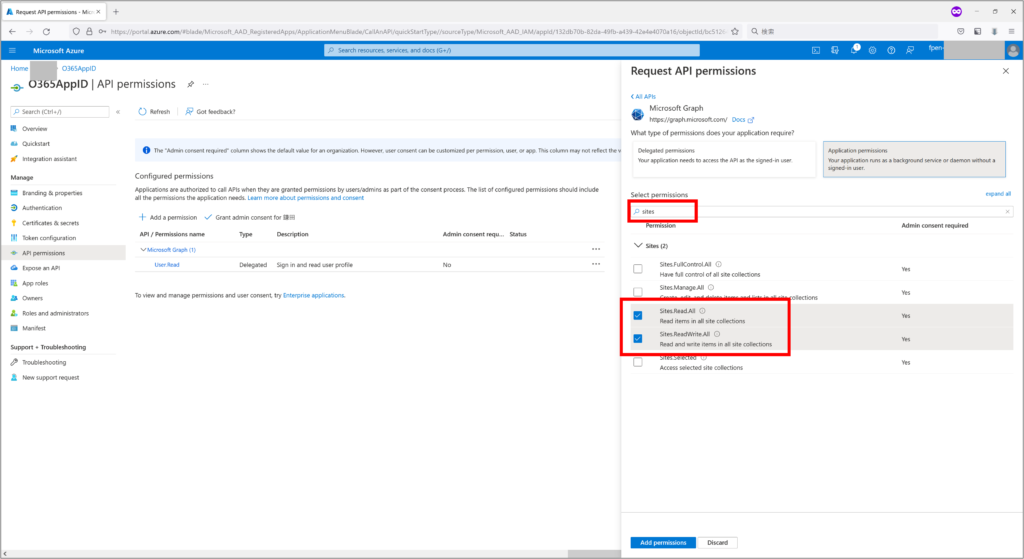
(7) Enter “Sites” and select “Sites.Read.All”, “Sites.ReadWrite.All”
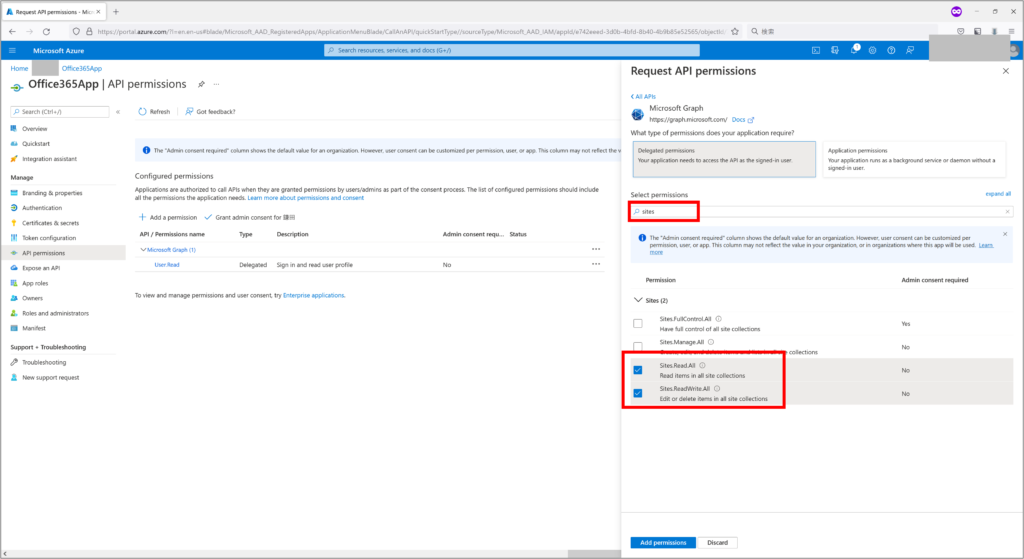
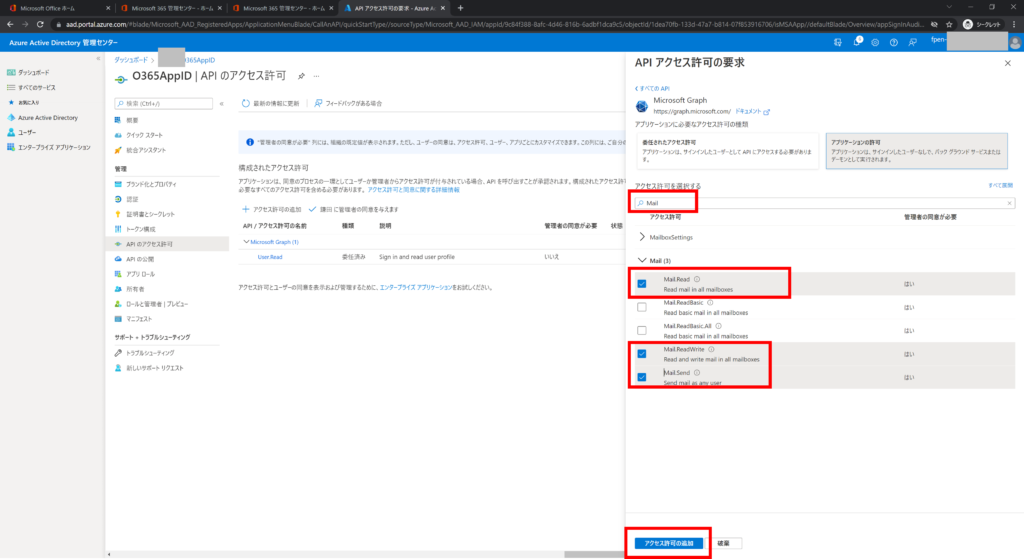
(8) Enter “Mail” and select “Mail.Read”, “Mail.ReadWrite”, or “Mail.Send”

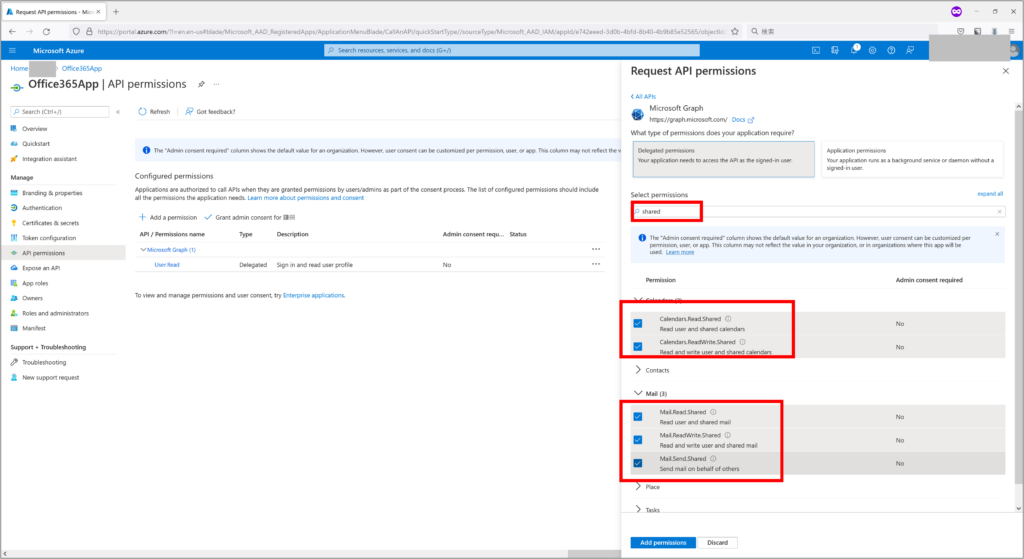
(9) Enter “Shared” and select “Mail.Read.Shared”,”Mail.ReadWrite.Shared”,”
Mail.Send.Shared”,”Calendars.Read.Shared”,”Calendars.ReadWrite.Shared”
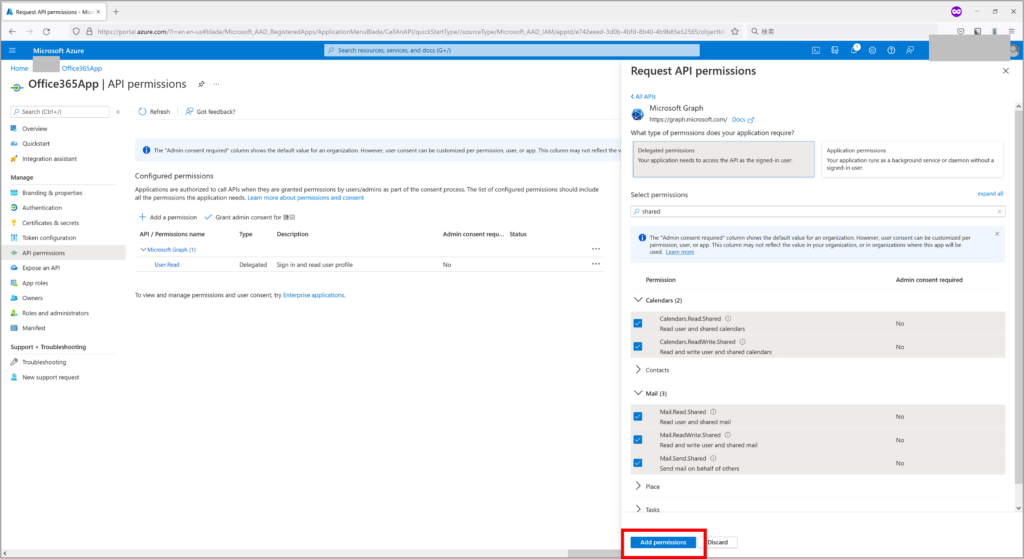
(10) Click “Add Permission”
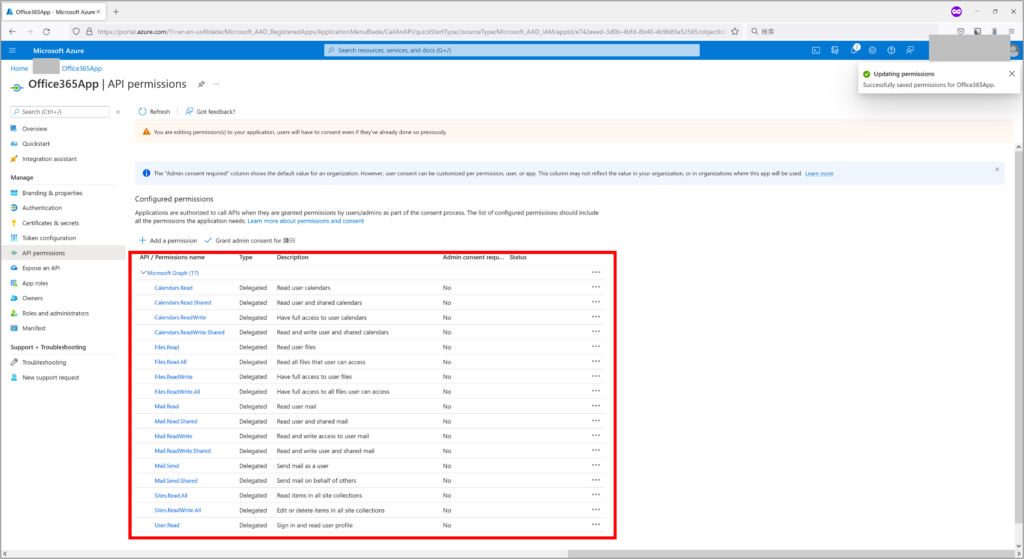
(11) Verify that the created permissions have been added
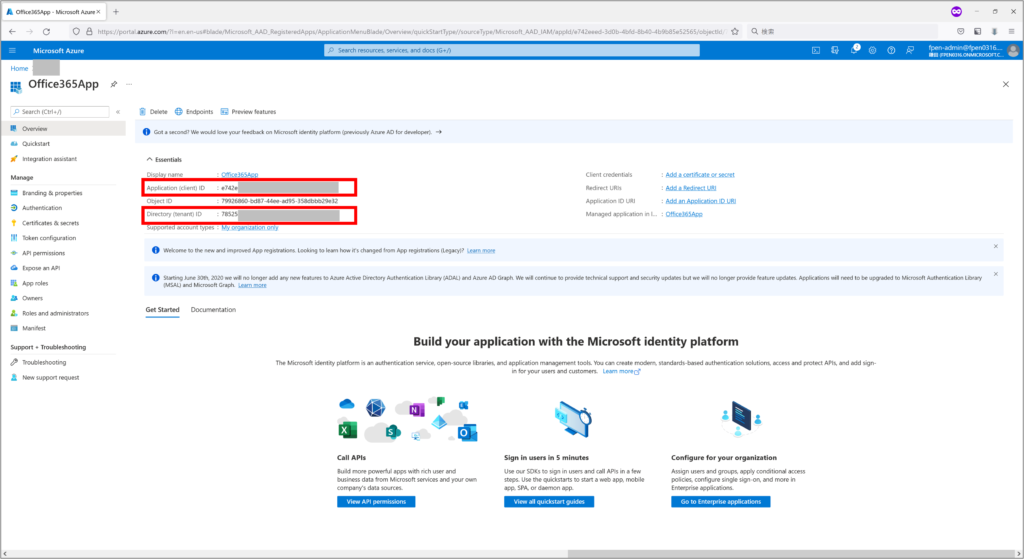
(12) Click “Overview”
(13) Copy the application (client) ID and directory (tenant) to Notepad or similar for use in the “Microsoft Office 365 Scope” configuration.
Build the project
Open a new or existing project in UiPathStudio and place a “Microsoft Office 365 scope” and an Office365 activity.
Project Creation and Activity Placement Procedures
(1) Install the Activity Package as described in the Installing the Office365 Activity Package chapter.
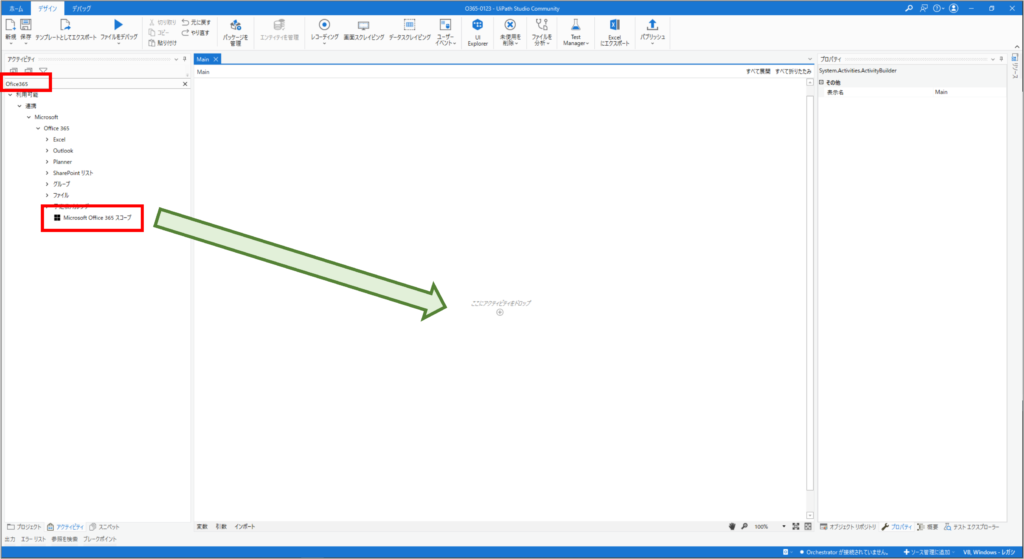
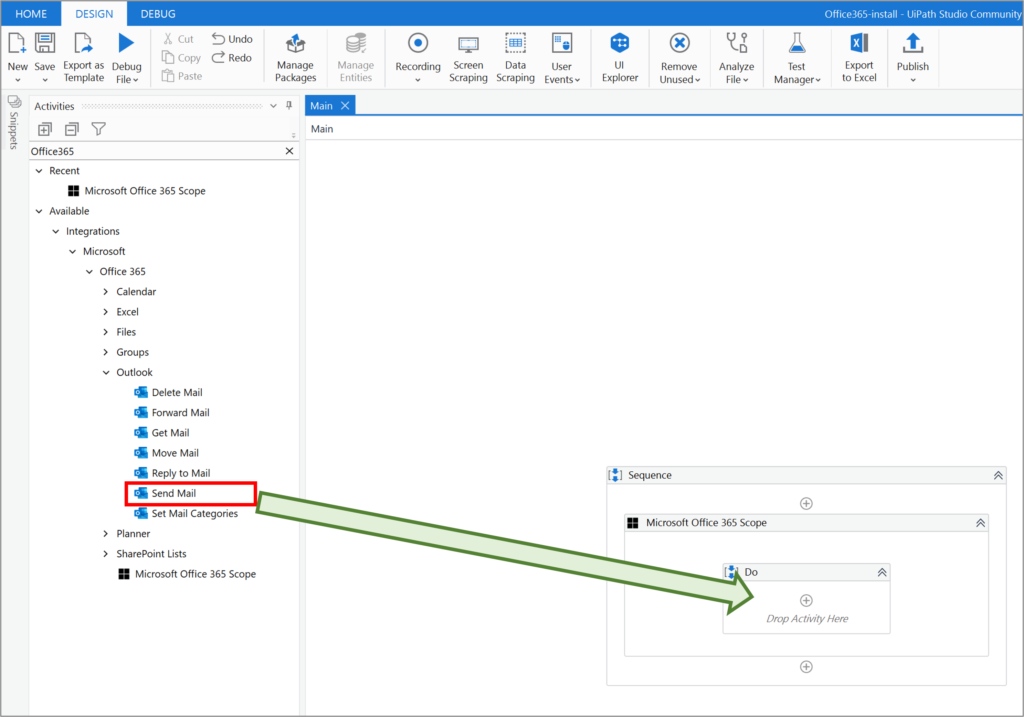
(2) Type “Ofice365” in the search window and drop “Microsoft Office 365 Scope”
(3) Set the “Microsoft Office 365 Scope” property to the values in the table below.
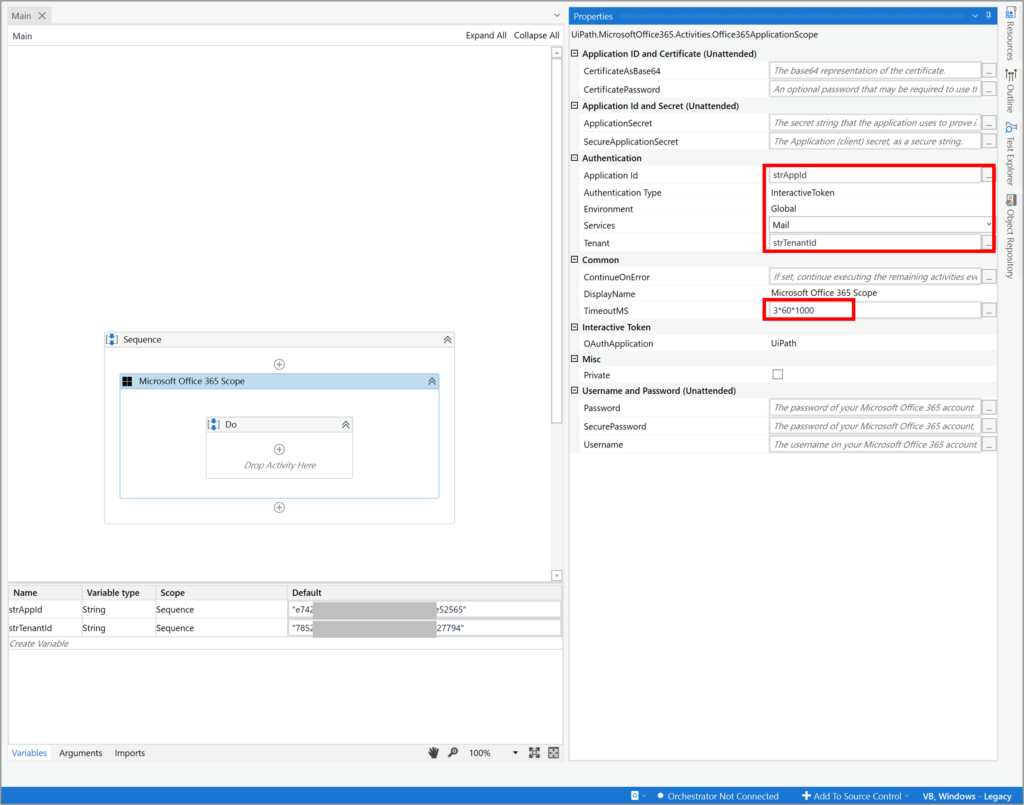
| Setting items | Set value | remarks | |
| Common | TimeoutMS | 3*60*1000 | A longer time than the default of 30 seconds is recommended, since the user must enter the authentication dialog the first time it is run. In this case, set 3 minutes (3*60*1000). If no entry is made, the default is 30 seconds. |
| Authentication | Application Id | strAppId | Set the application (client) ID for the AzureAD app. |
| Services | Select the service according to the activity to be used. In this case, select “Mail” to use e-mail. | ||
| Tenant | strTenantId | Set the directory (tenant) ID for the AzureAD app. | |
| Authentication Type | Interactive Token | Select Interactive Token to use an interactive token. | |
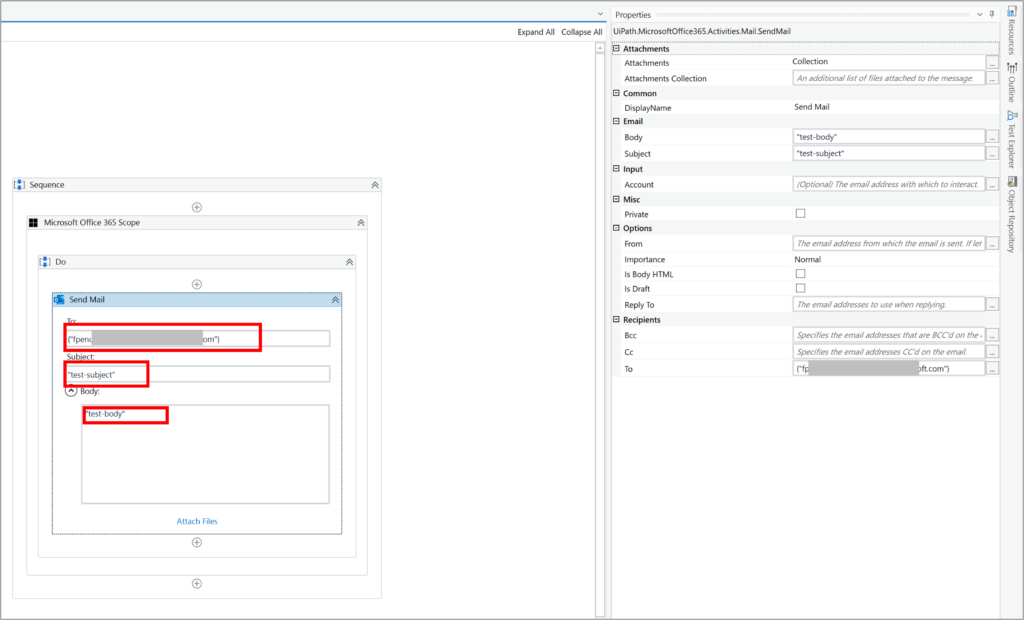
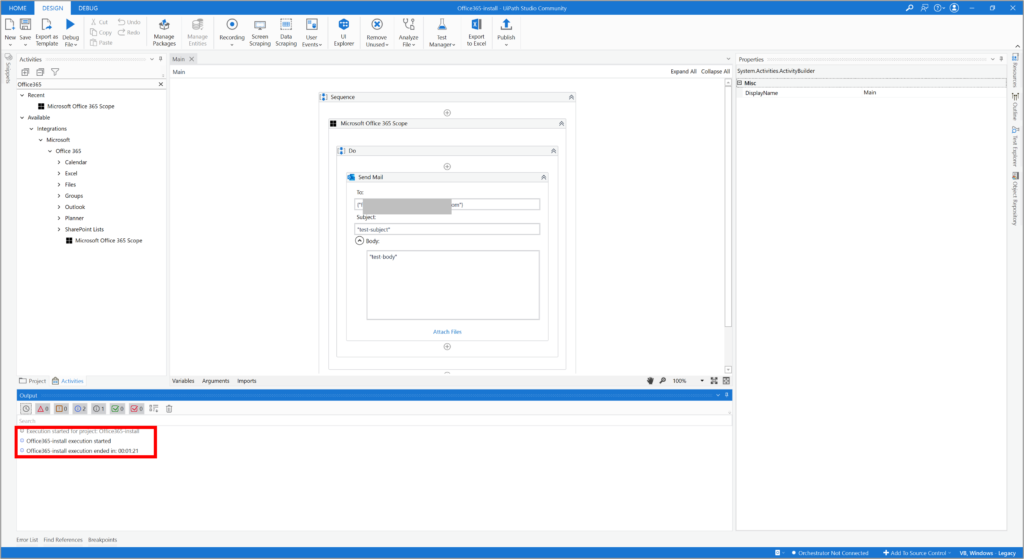
(4) Drop “Send mail” in the “Microsoft Office 365 Scope”.
(5) Set the email address in the destination as a String[] type, the subject as the subject of the email, and the message body as the body.
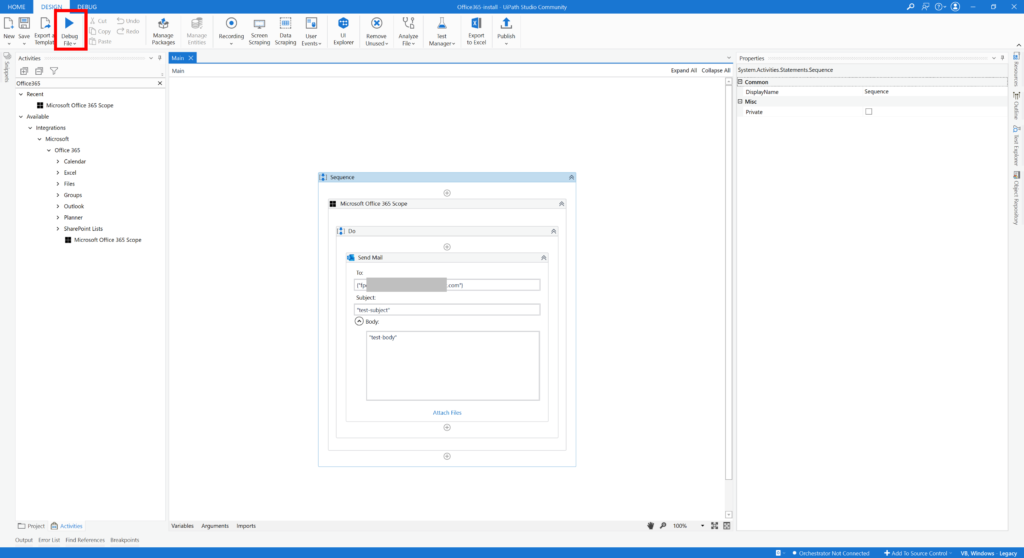
(6) Execute the process.
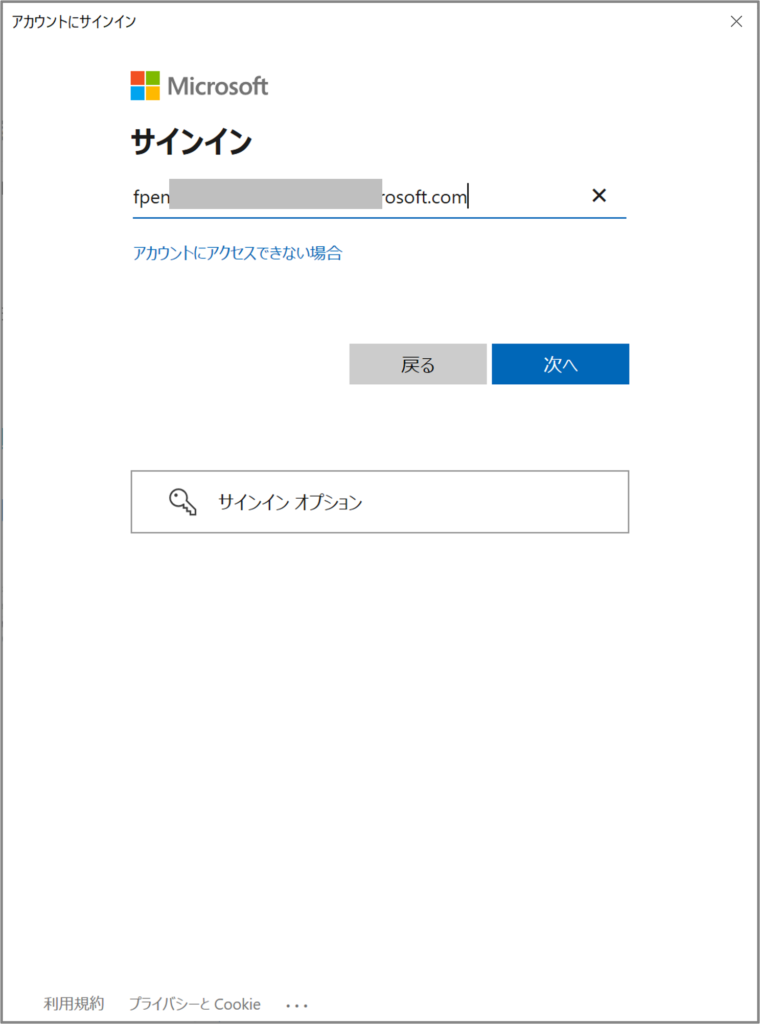
(7) The first time you do this, you will be asked to sign in, enter the user to whom you want to send the email, and click “Next”.
(8) Enter your password and click “Sign In”.

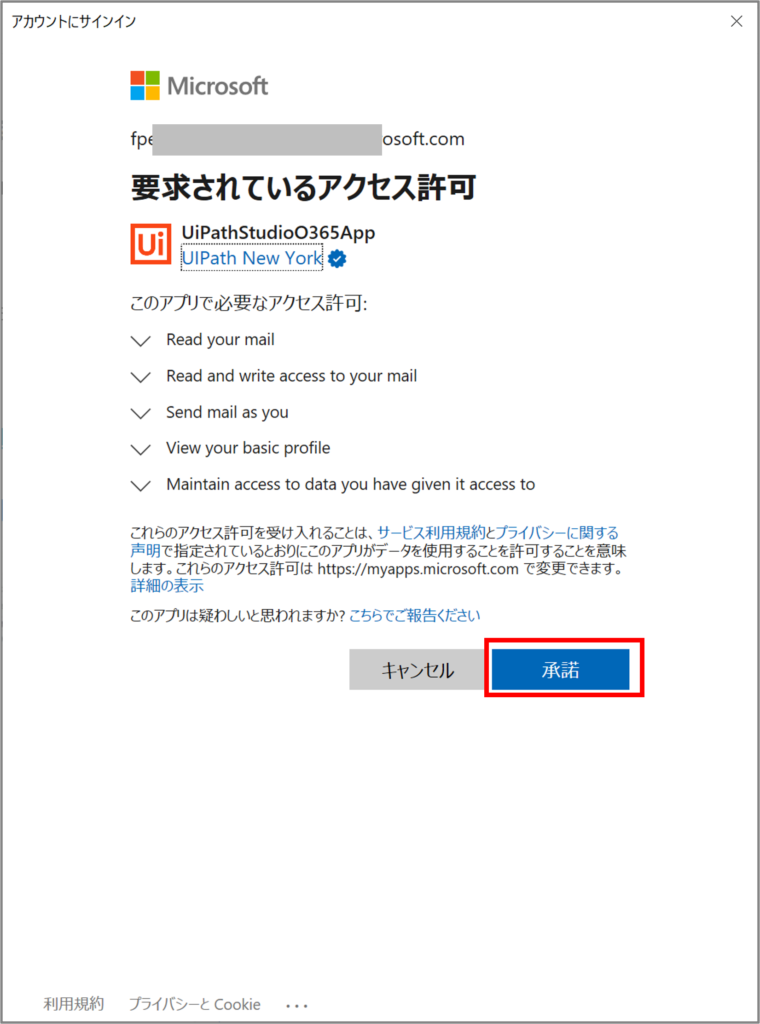
(9) Click Accept
(10)Look at the output panel to confirm that it has finished successfully.
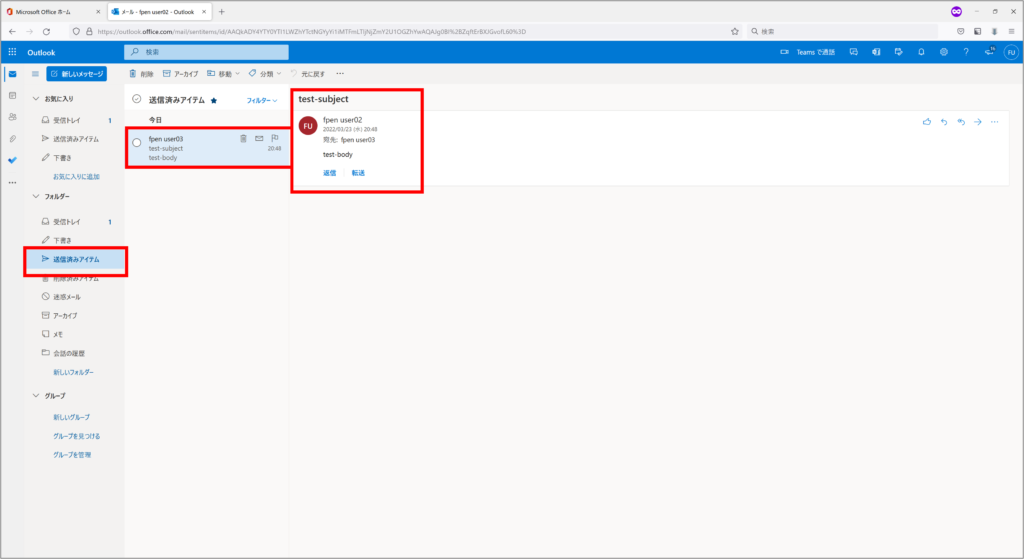
(11) Verify that the email you just sent is in your Sent Items in Outlook in Office365.
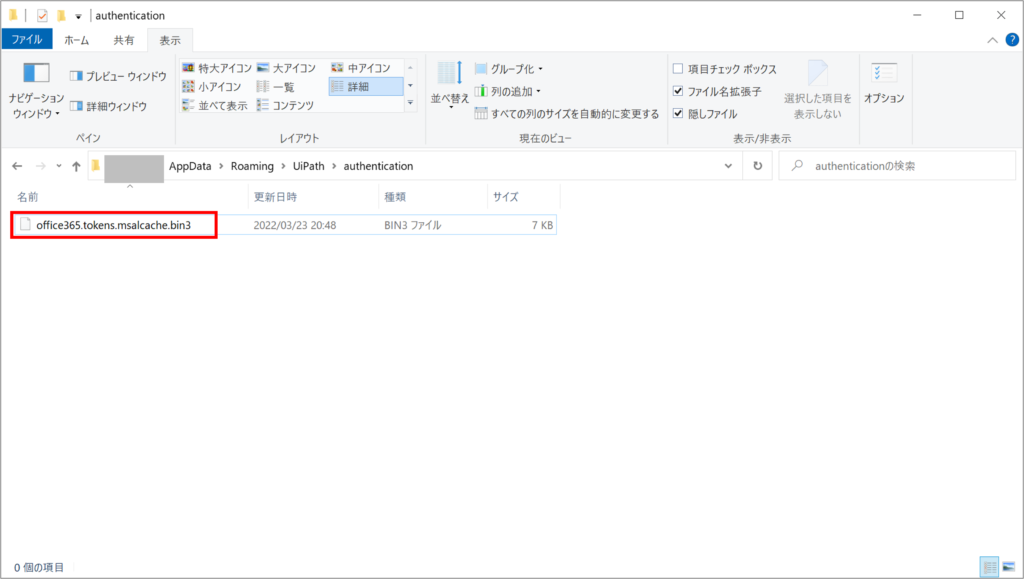
Authentication file
ApplicationIdAndSecret
Register the application in AzureAD as described in the UiPath documentation Registering Applications in Microsoft Office 365 Setup.
Application Registration Procedure
(1) Open the Azure Portal in a web browser and sign in.
(2) Click on “Azure Active Directory”
(3) Click on “App regisrations”
(4) Click on “New Registration”
(5) Enter any name in the Name field (e.g., O365AppID) and click Register.
* Depending on your environment, select or enter “Supported account Types” or “Redirect URL”.
Procedure for adding API permissions
(1) Click on “API permissions”
(2) Click “Add Permission”
(3) Click “Microsoft Grah”
(4) Click “Application permissions”
(5) Type “Calendars” in the search window and enter “Calendars.Read”,”Calendars.ReadWrite”
(6) Type “Files” in the search window and select “Files.Read”,”Files.ReadWrite”

(7) Type “Sites” in the search window and select “Sites.Read.All”,”Sites.ReadWrite.All”
(8) Type “Mail” in the search window, select “Mail.Read”, “Mail.Read”, “Mail.Send”, and click “Add Permissions”
(9) Click on “**Give your administrative consent to”
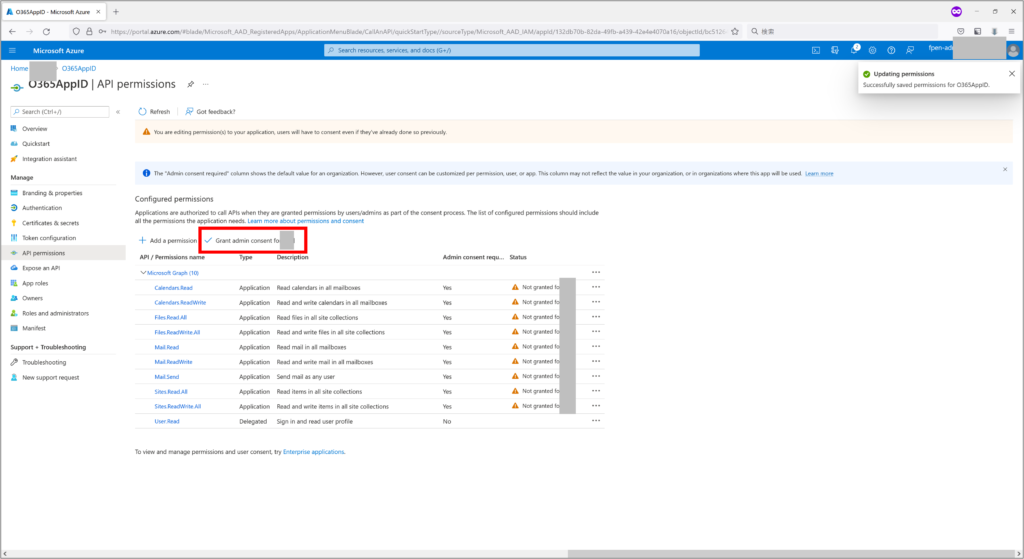
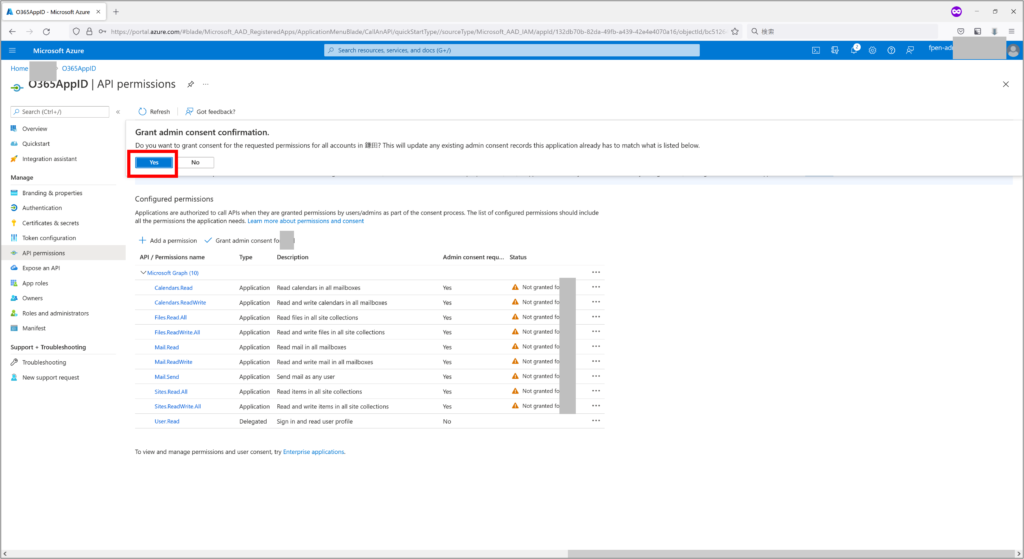
(10) Click “Yes”
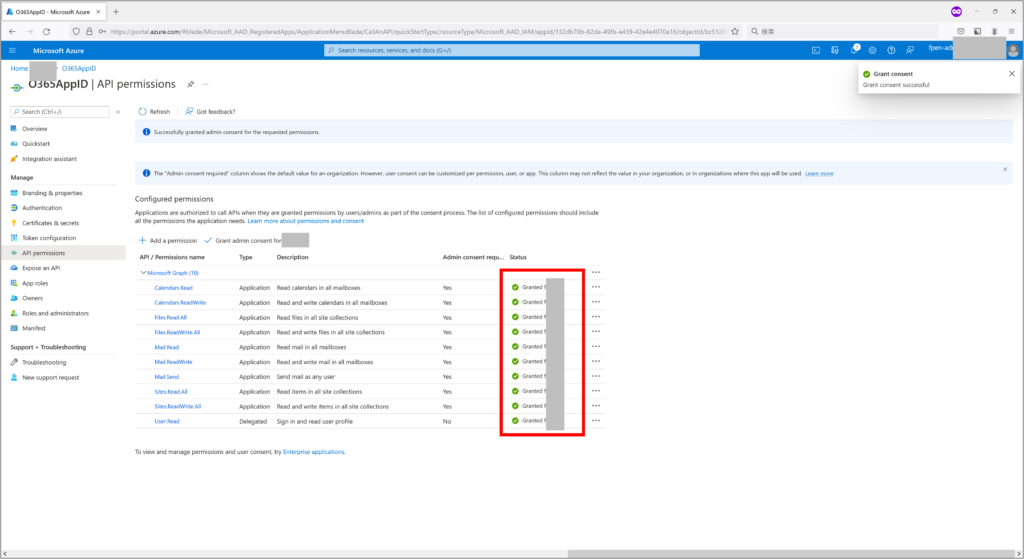
(11) Confirm that each API access right is changed to “granted to **”.
Procedure for setting up authentication, certificate and secret
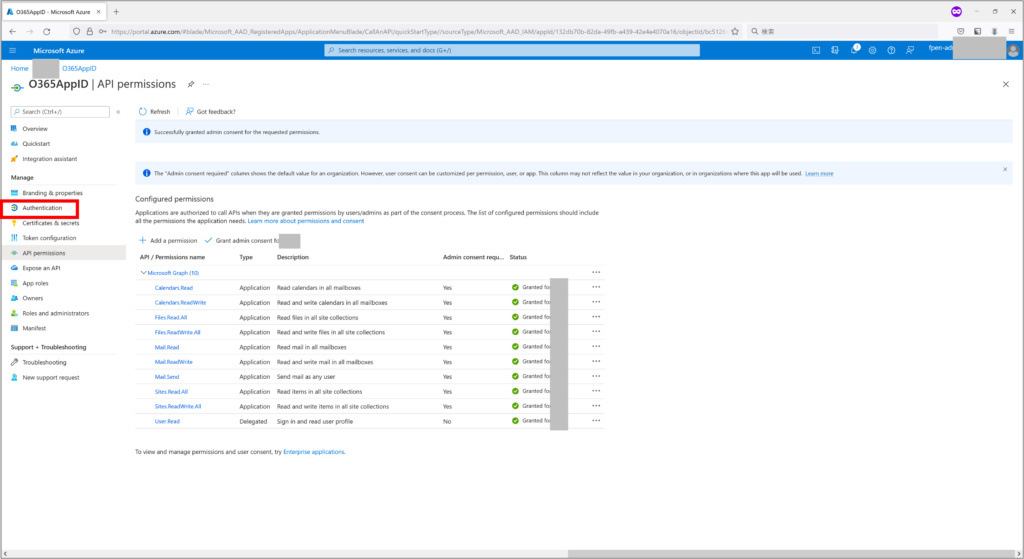
(1) Click “Authentication” on the app you created.
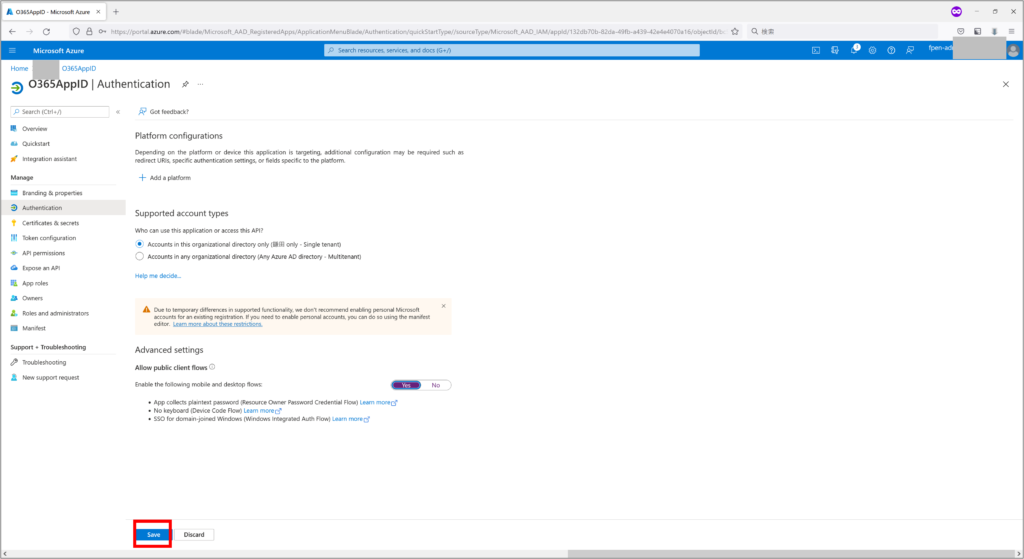
(2) Select “Yes” to “Allow public client flow”
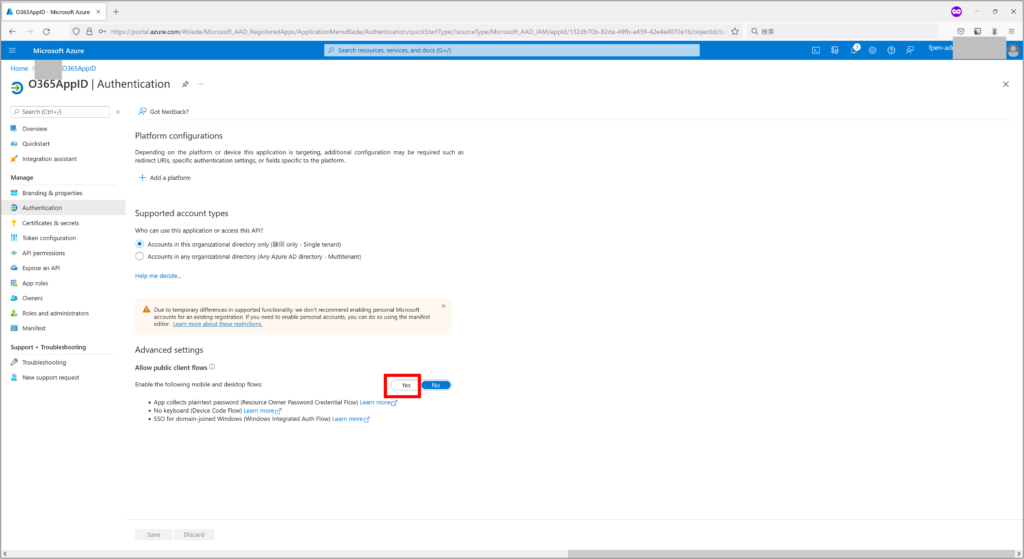
(3) Click “Save”
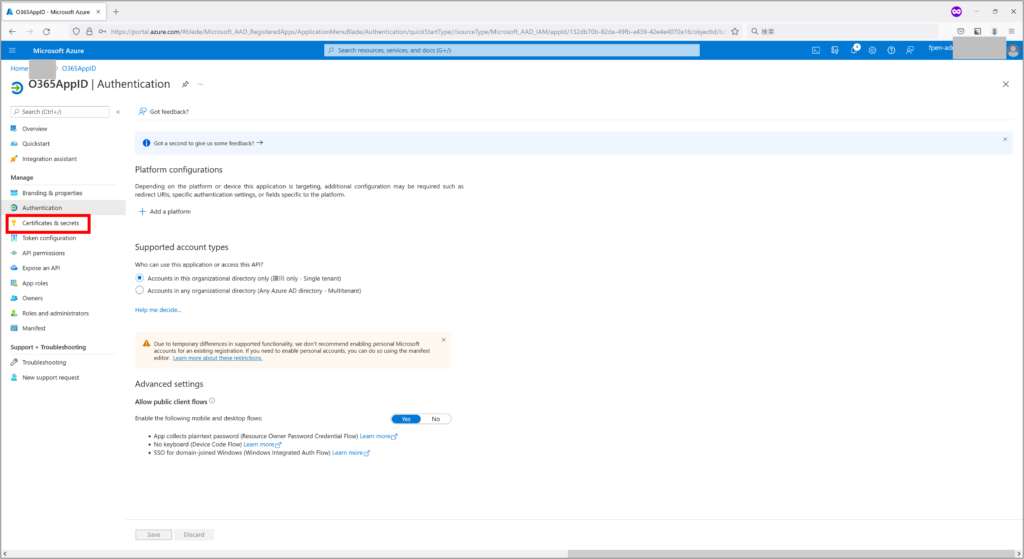
(4) Click “Certificates and secrets”
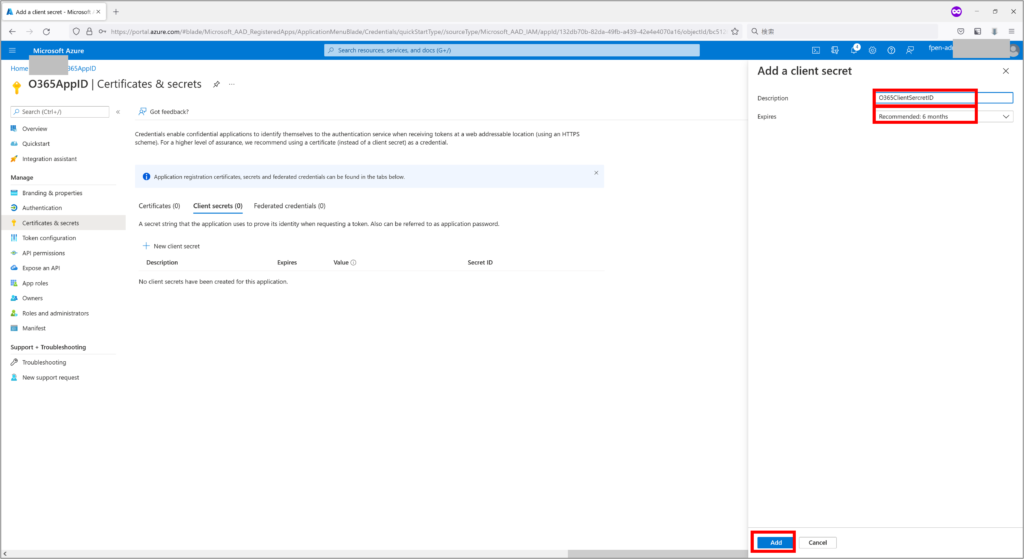
(5) Click on “New client secret”
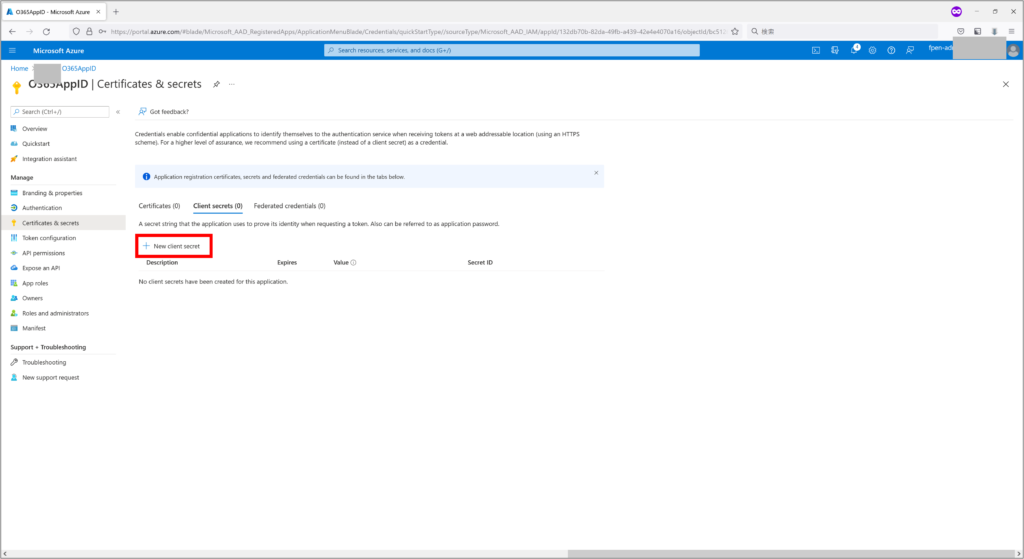
(6) Enter any client secret name (e.g. O365ClientSecretID) in the description, select the expiration date you wish to specify and click “Add”
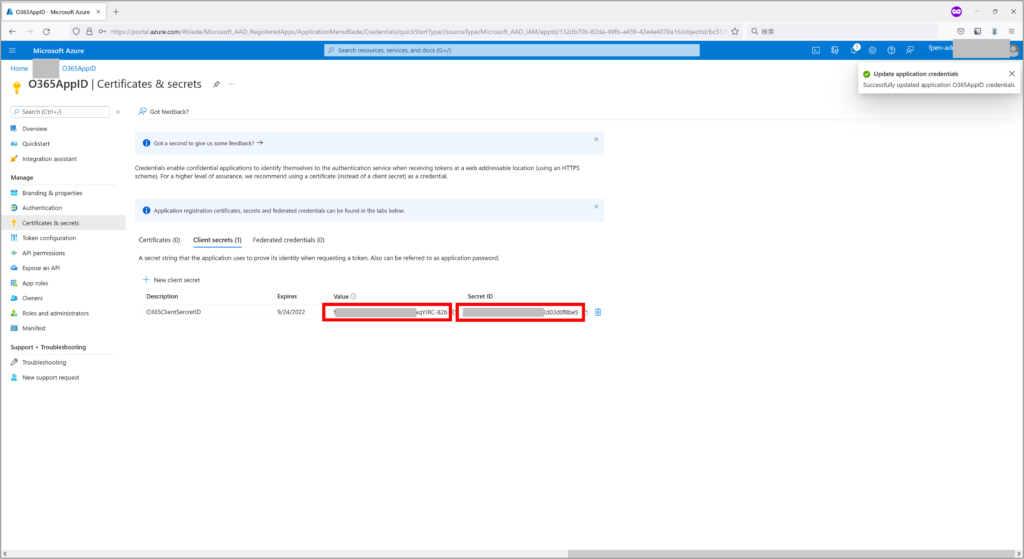
(7) Copy the values and secret IDs to a notepad or similar tool for later configuration in the “Microsoft Office 365 Scope” activity of the process to be developed.
Build the project
Open a new or existing project in UiPathStudio and install the activity package as described in the Installing the Office365 Activity Package chapter.
Next, deploy the “Microsoft Office 365 Scope” and the Office365 Activity.
sample process
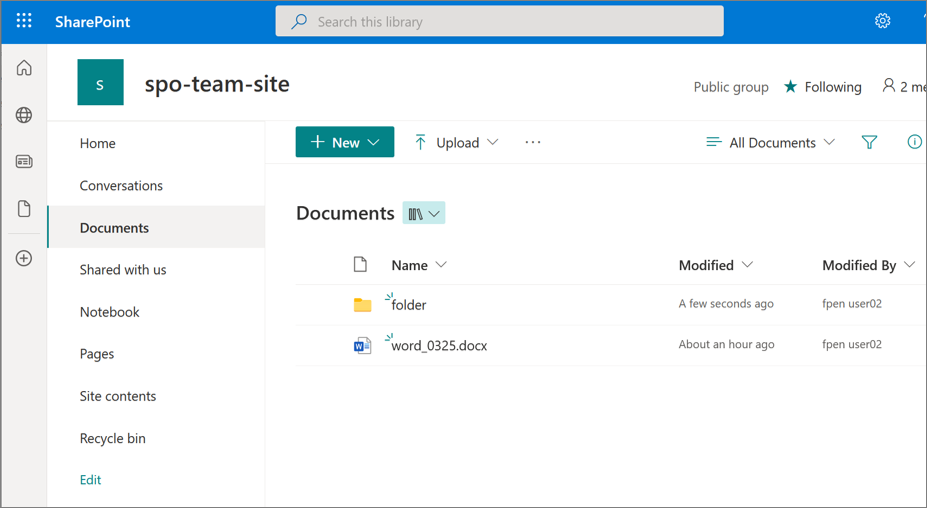
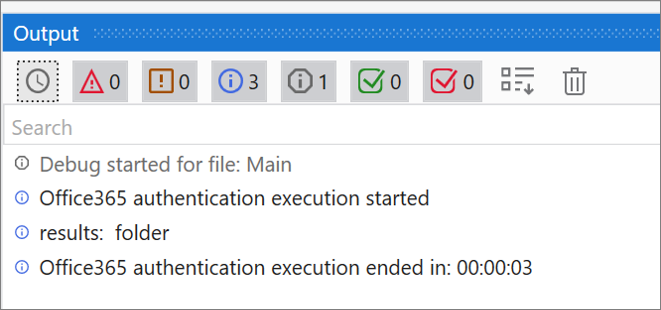
Search in the list of documents in SharePointOnline and display the first item name in the search results in the log message.
・SharePointOnline document sites to search
・process

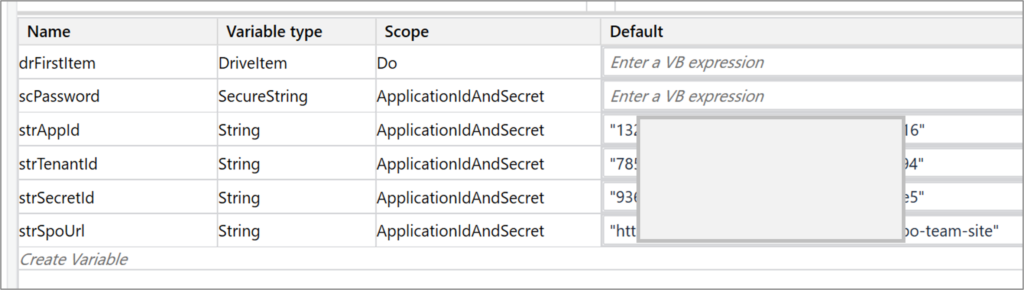
・変数の設定
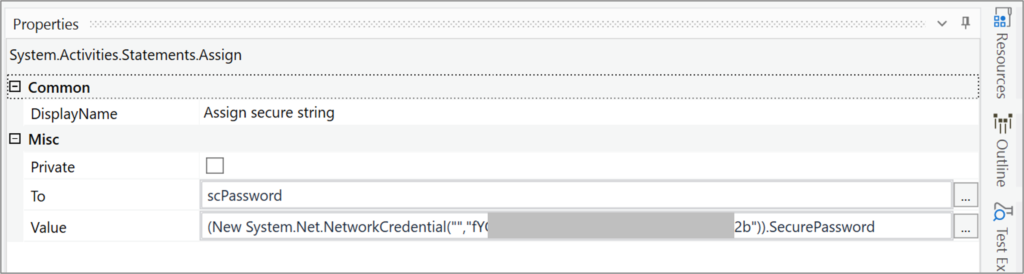
・Properties of “Assign secure string”
・Properties of “Microsoft Office 365 Scope”

| 設定項目 | 設定値 | 備考 | |
| Application Id and Secret (Unattended) | Application Secret | strSecretId | Set the Secret ID created in Client Secret. |
| Secure Application Secret | scPassword | Sets the secure string for the secret ID value created in the client secret. | |
| Authentication | Application Id | strAppId | Set the application (client) ID for the AzureAD app. |
| Services | Files | Select the service according to the activity to be used. In this case, select File to search folders. | |
| Tenant | strTenantId | Copy from the directory (tenant) ID of the application in AzureAD. | |
| Authentication Type | ApplicationAndSecret | Set the application and secret ID. | |
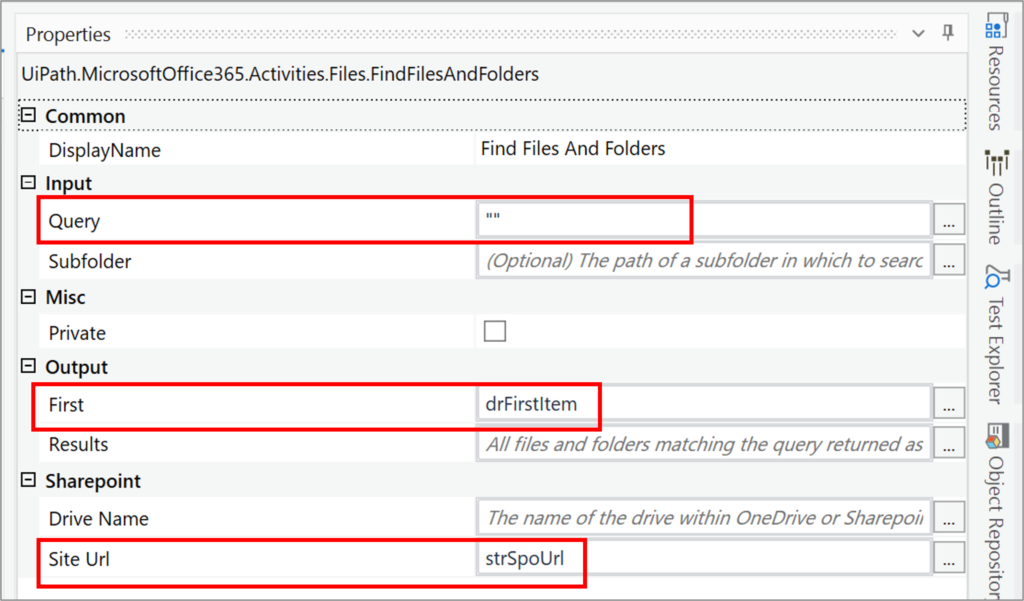
・property “Find Files And Folders”
| 設定項目 | 設定値 | 備考 | |
| Sharepoint | Site Url | strSpoUrl | URL of the site to be searched |
| Drive Name | List name to be searched | ||
| Input | Query | “folder” | search query |
| Output | First | drFirstItem | First retrieved DriveItem |
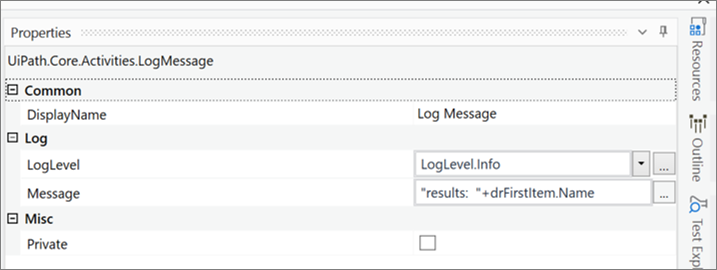
・Properties of “Log Message”
・Execution Result Log
・コピペ用
(New System.Net.NetworkCredential("","fYO7*****************.***********-82b")).SecurePassword
"results: "+drFirstItem.Name
Authentication Use OneDrive and SharePoint
Unlike “Microsoft Office 365 Scope“, “Use OneDrive & SharePoint” does not require AzureAD configuration.
By placing the “Integration>Microsoft>Office365>Files” activity within the “Use OneDrive and SharePoint” activity in UiPathStudio, you can manipulate files and folders in Office365.
Project Creation and Activity Placement Procedures
(1) Install the Activity Package as described in the Installing the Office365 Activity Package chapter.
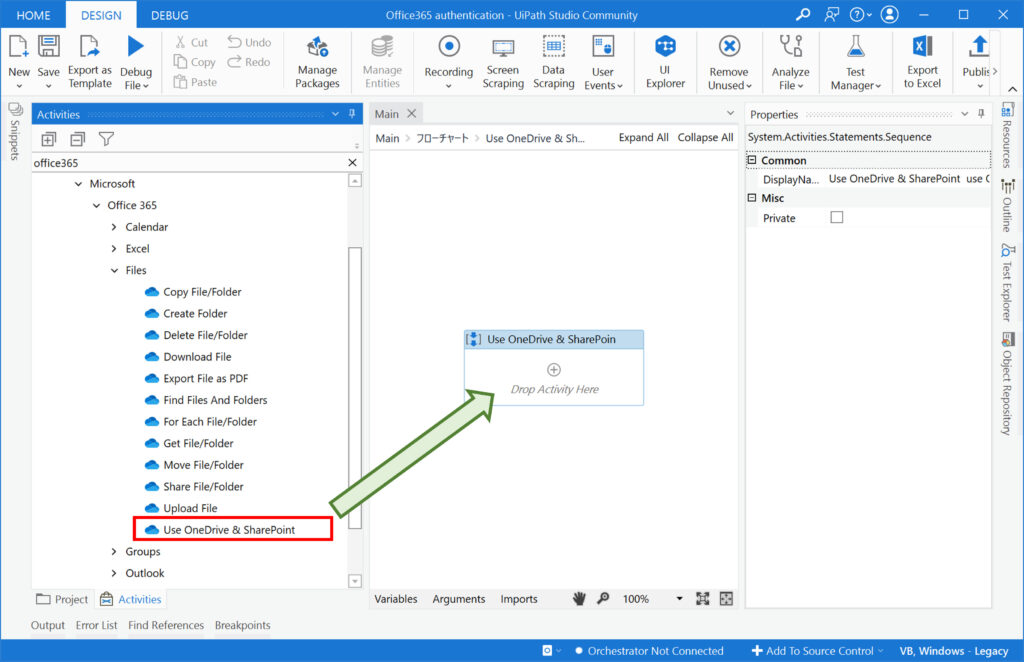
(2) Drop the “Use OneDrive and SharePoint” activity.
(3) Click “Add new account” under Accounts.

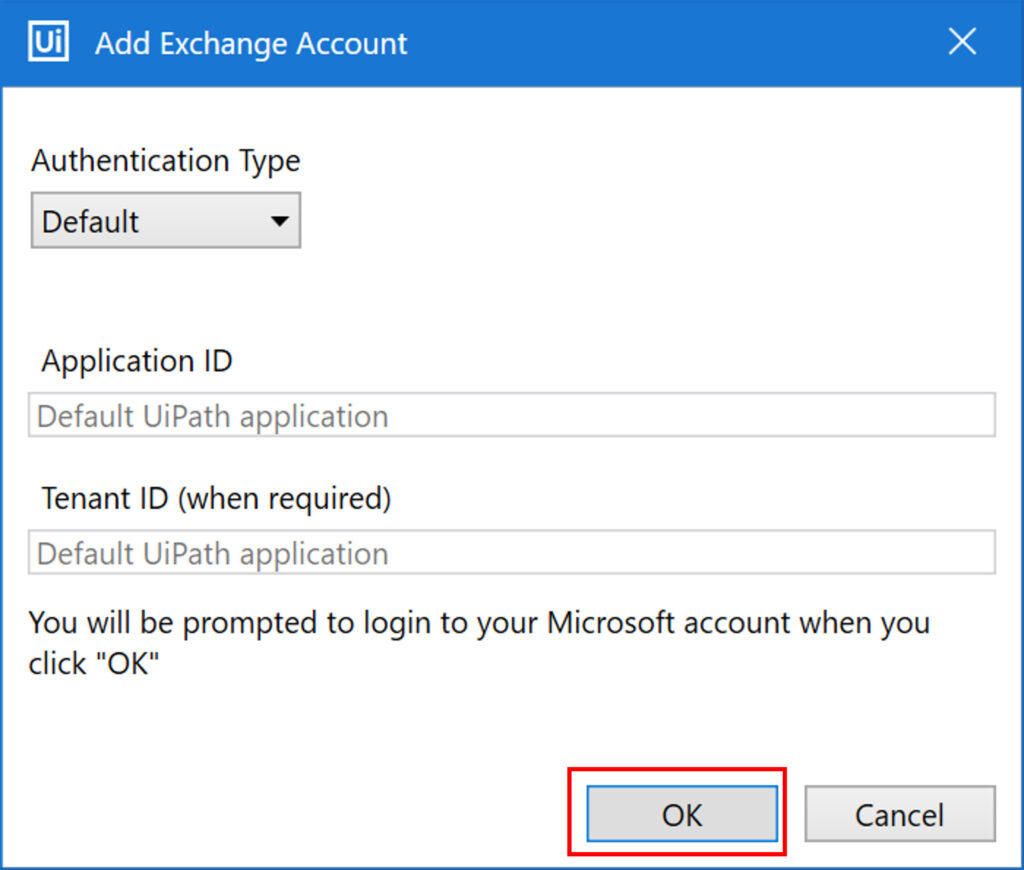
(4) Click “OK”
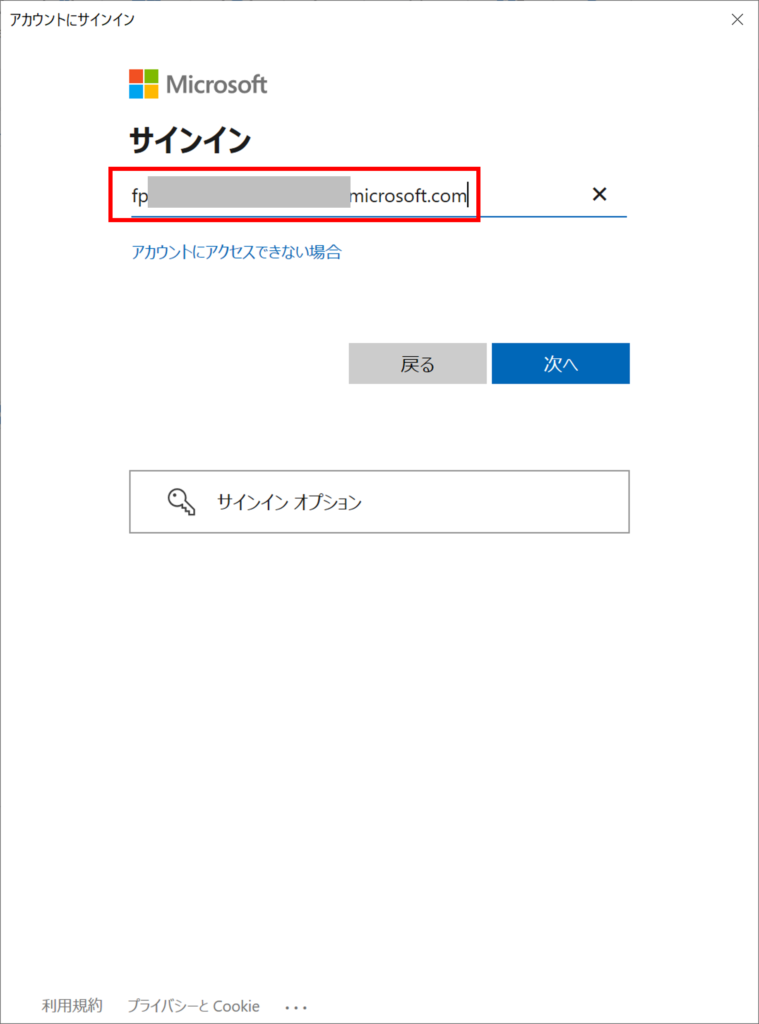
(5) Enter the user to log in to Office365 and click [Next].
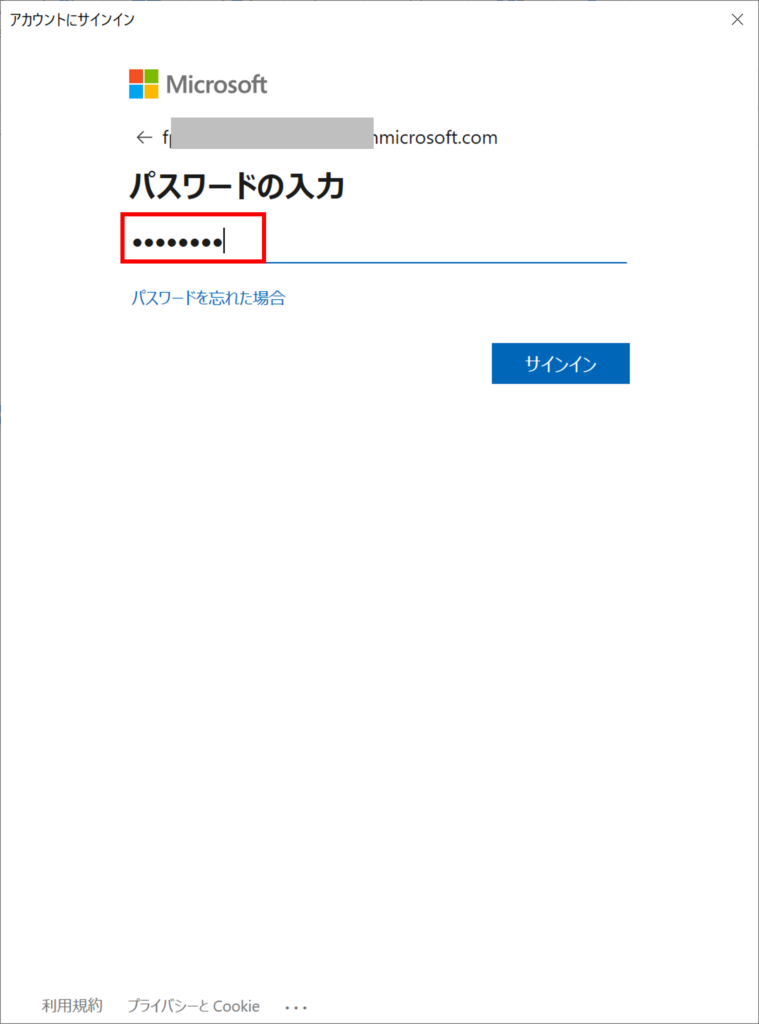
(6) Enter your password and click “Sign In”
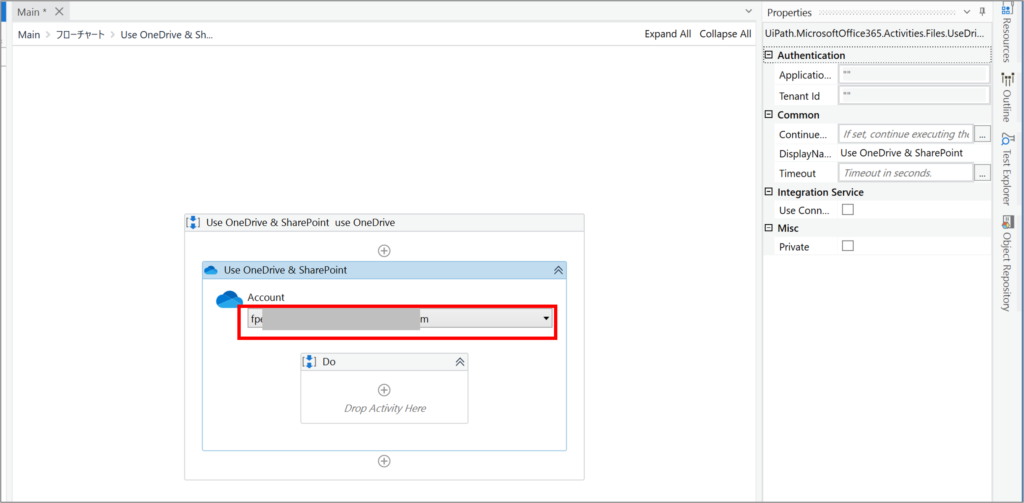
(7) Verify that the user entered appears in the account
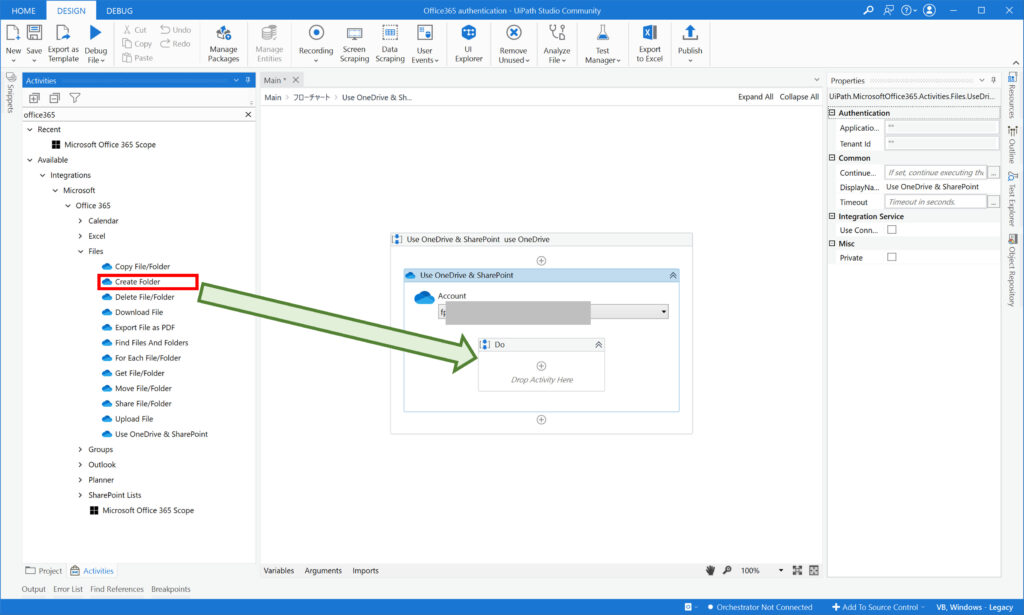
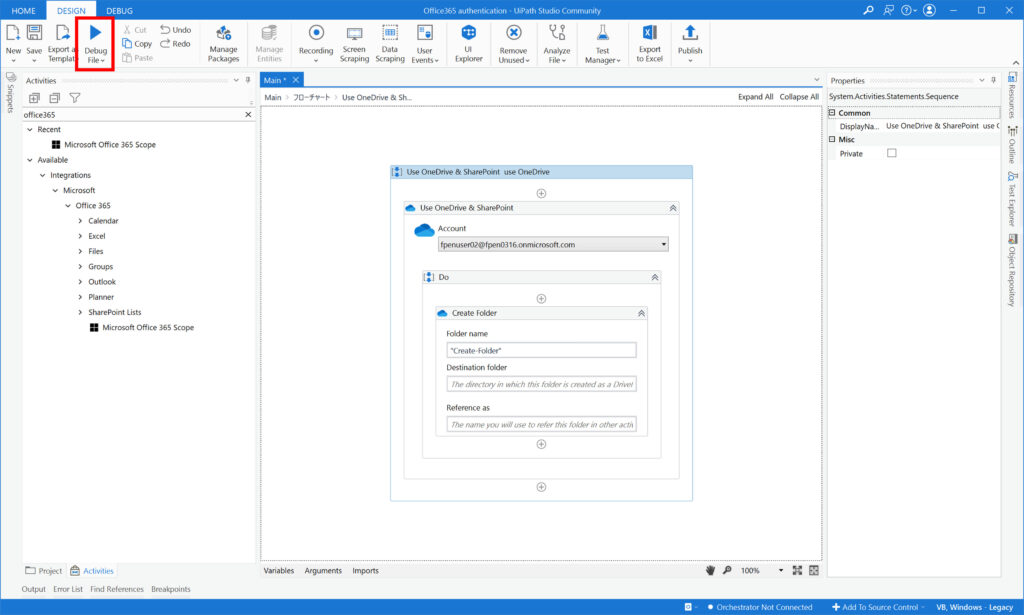
(8) Drop “Create Folder” into Run
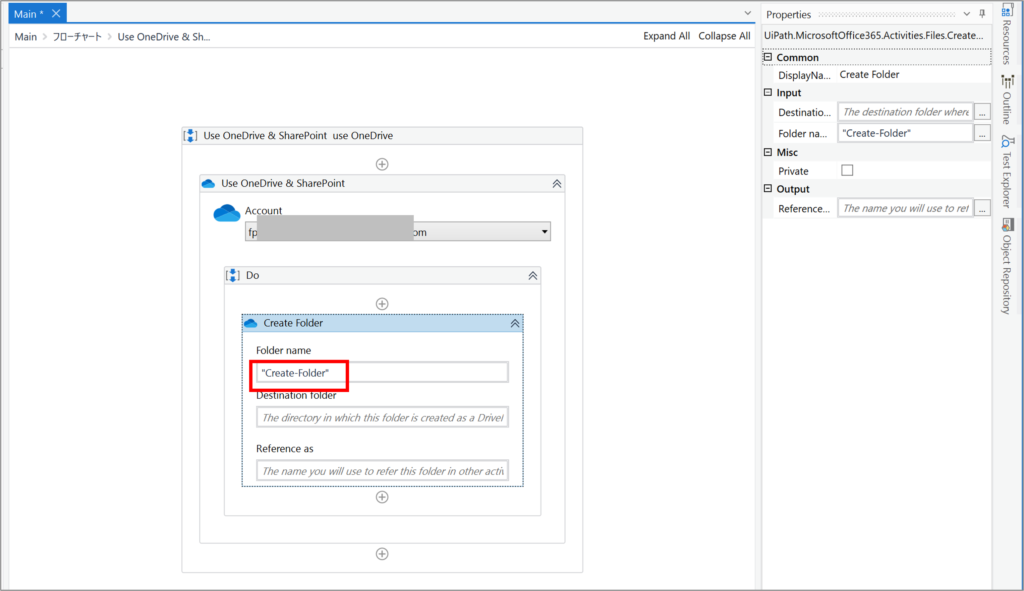
(9) Enter the name of the folder to be created in Folder name.
(10) Click “Debug Files”
(11) Confirm that the process has been successfully completed in “Output”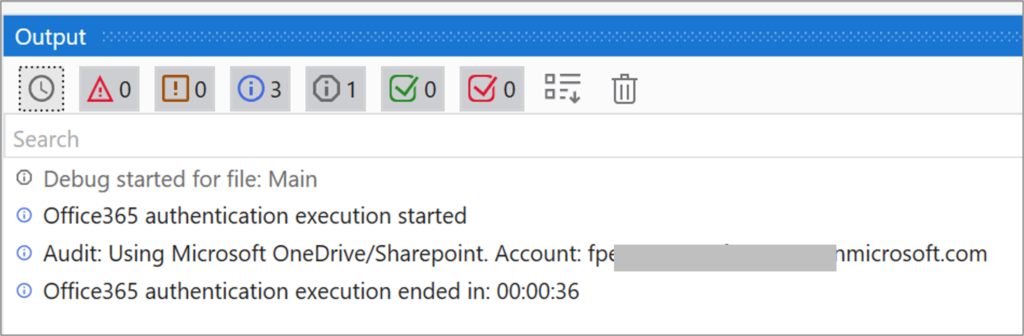
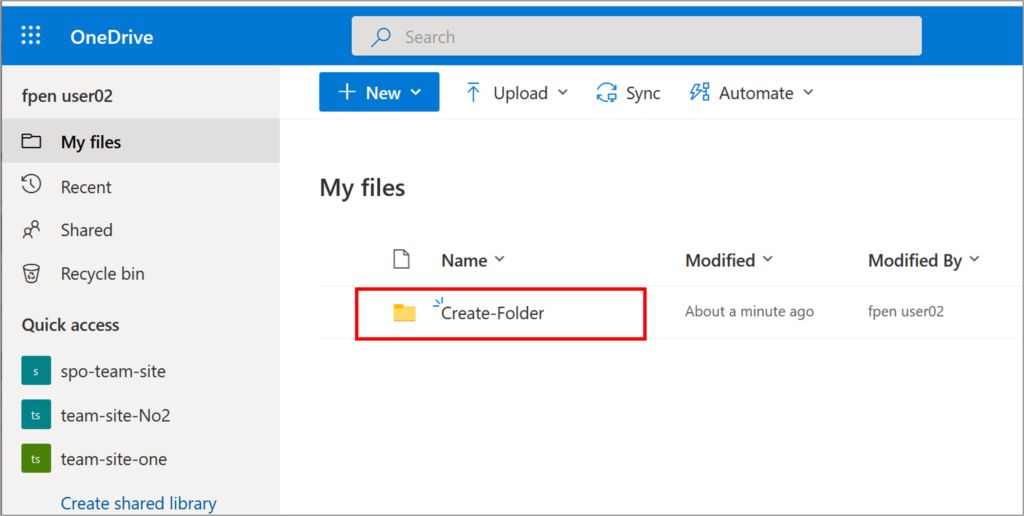
(12) Confirm that the folder is created directly under OneDrive for the user logged into Office365.
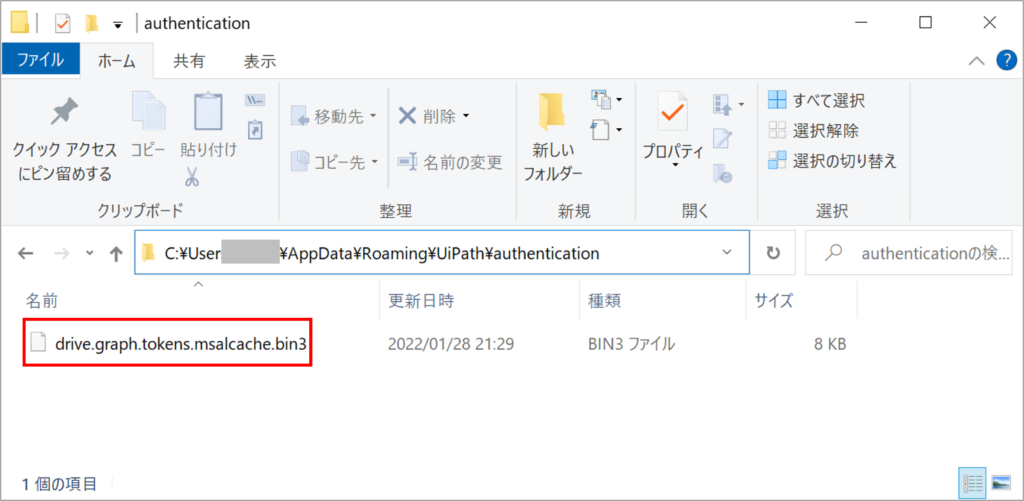
authentication file
summary
- MicrosoftOffice365 Activity is used to automate Office365 web-based operations
- When “Microsoft Office 365 Scope” is used for authentication, all activities under Integration>Microsoft>Office365 can be used.
- When “Use OneDrive and SharePoint” is used for authentication, only the activities under Integration>Microsoft>Office365>Files can be used, and only files on Office365 can be manipulated.
\Save during the sale period!/
Take a look at the UiPath course on the online learning service Udemy
*Free video available
Related Articles Learn the Creation Techniques f UiPath robotics creation with Udemy’s online courses that take it up a notch
same category UiPath
Japanese IT engineer with a wide range of experience in system development, cloud building, and service planning. In this blog, I will share my know-how on UiPath and certification. profile detail / twitter:@fpen17